Hi all,
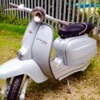
I am having a number of panels repainted on my series 3 special and I purchased a new badge set to finish it off. Had a call of the painter stating that there was nothing to secure the badges on the led shield in place. Holes are all pre drilled ready and the badges have pegs on the back to go into the holes but nothing in the kit to secure and stop them falling off.
Could anyone tell me what the proper way to secure the badges is please?
Thanks in advance for the help
Halflife
LCGB Forums
The ability to post messages is restricted to LCGB members. Any questions contact us at lcgbadmin@googlemail.com
Series 3 Li150 special badge kit
10 posts
• Page 1 of 1
Re: Series 3 Li150 special badge kit
The correct way is tap the ends over like an old fashioned rivet but I'm not sure that the badges you can get these days are of the right material to do this without them snapping.
If you don't fancy that epoxy resin works quite well.
If you don't fancy that epoxy resin works quite well.
-

Digger - Posts: 992
- Joined: Sat May 31, 2014 4:41 am
- Location: Stroud, Gloucestershire
Re: Series 3 Li150 special badge kit
As digger says,but the original badges had hollow pins and once in place a special tool was used to splay out the ends of the pins.
Last edited by HxPaul on Fri Jan 15, 2016 12:13 pm, edited 2 times in total.
-

HxPaul - Posts: 1583
- Joined: Fri May 30, 2014 9:18 am
- Location: Halifax
Re: Series 3 Li150 special badge kit
see this from the resto blog -
http://lambrettarestorations.blogspot.c ... ndles.html
http://lambrettarestorations.blogspot.c ... ndles.html
-

Covboy - Posts: 745
- Joined: Thu Nov 20, 2014 9:26 pm
- Location: Coventry
Re: Series 3 Li150 special badge kit
I use epoxy resin with a dab of paint mixed in the same colour as the panel your putting the badge on
- Jazzy b
- Posts: 528
- Joined: Fri May 30, 2014 7:12 pm
Re: Series 3 Li150 special badge kit
I use epoxy resin with a dab of paint mixed in the same colour as the panel your putting the badge on
- Jazzy b
- Posts: 528
- Joined: Fri May 30, 2014 7:12 pm
Re: Series 3 Li150 special badge kit
Additionally, I centre punch the to top the pin and use a small ball hammer to gently peen over - this makes a neat job and prevents the pin from splaying / splitting
-

Covboy - Posts: 745
- Joined: Thu Nov 20, 2014 9:26 pm
- Location: Coventry
Re: Series 3 Li150 special badge kit
Trim the lenth of the pin once through the panel to around 2.5mm and the ballpien hammer. I used a club hammer with some tape on the face to use on the front side so you get a nice ping as you tap. Tapping the pin is the way to do it shaping it to a dome don't just bash away. A dab of paint once done hides the back side.
-

MK Monty - Posts: 340
- Joined: Sun Jun 01, 2014 10:32 pm
- Location: Stockport
Re: Series 3 Li150 special badge kit
Thanks all, I will splay out the pins as suggested. Clever idea about paint to cookout the apoxy though.
Sorry about the double post by the way, the forum won't let me delete.
Sorry about the double post by the way, the forum won't let me delete.
- Halflife
- Posts: 14
- Joined: Tue Nov 24, 2015 7:42 pm
Re: Series 3 Li150 special badge kit
Halflife wrote:Thanks all, I will splay out the pins as suggested. Clever idea about paint to cookout the apoxy though.
Sorry about the double post by the way, the forum won't let me delete.
- Jazzy b
- Posts: 528
- Joined: Fri May 30, 2014 7:12 pm
10 posts
• Page 1 of 1
Who is online
Users browsing this forum: No registered users and 130 guests