About grinding the headset clamp, perhaps it is too small a gain to measure but I feel whilst it's all apart I might as well try to gain even the smallest incremental benefit. Certainly that top bend causes a lot of resistance in the cable. On my last build I had an engine and a headset on the bench, and I connected a cable in a straight line between them (as I'm typing this I'm thinking god that's sad) and the clutch was incredibly light. Then I arranged them so that I replicated that first bend and it was amazing how it changed the feel for the worse. One thing I do which I didn't mention is bend the wire cable guide to suit the best run of the cable - I've seen headsets where the cable is forced through to go through the wire regardless of that not being the best route. Lambretta headsets are crowded places, I'll be fiddling around with that before the headset top goes on.
Re the legshields, on reflection I'm not sure what I'll do. In the past I've fitted them and not scratched the headset, but in the past I've also fitted them and I have scratched the headset. I'd love to know what the build order was at the factory - does anyone know for sure? Stuart Owen told me he would put the legshields on the frame, then the headset, then cable up. I've tried this and it wasn't easy to get everything right if I was fitting the cable ties, in fact it was so fiddly I took the leggies off and started again. On this occasion I'm omitting cable ties so perhaps I should have tried that method again. To be decided.
LCGB Forums
The ability to post messages is restricted to LCGB members. Any questions contact us at lcgbadmin@googlemail.com
S3 TV175 build up
91 posts
• Page 3 of 5 • 1, 2, 3, 4, 5
Re: S3 TV175 build up
![]() by alex_hughes » Fri Dec 08, 2023 6:42 pm
by alex_hughes » Fri Dec 08, 2023 6:42 pm
- alex_hughes
- Posts: 93
- Joined: Mon Apr 24, 2017 8:42 am
Re: S3 TV175 build up
![]() by alex_hughes » Sun Dec 10, 2023 9:30 pm
by alex_hughes » Sun Dec 10, 2023 9:30 pm
The second time I've typed this... accidently deleted the post... can you tell a story twice with the same conviction? we will see.
So I'm looking at the electrics, and I'm doing it now because once I built a bike and it had a faulty loom - power went in but power didn't come out. I could do this check with a multimeter but I also want to check switches and bulbs and I don't know the full history of this loom. I think I took it off a running bike, not sure. So best checked.
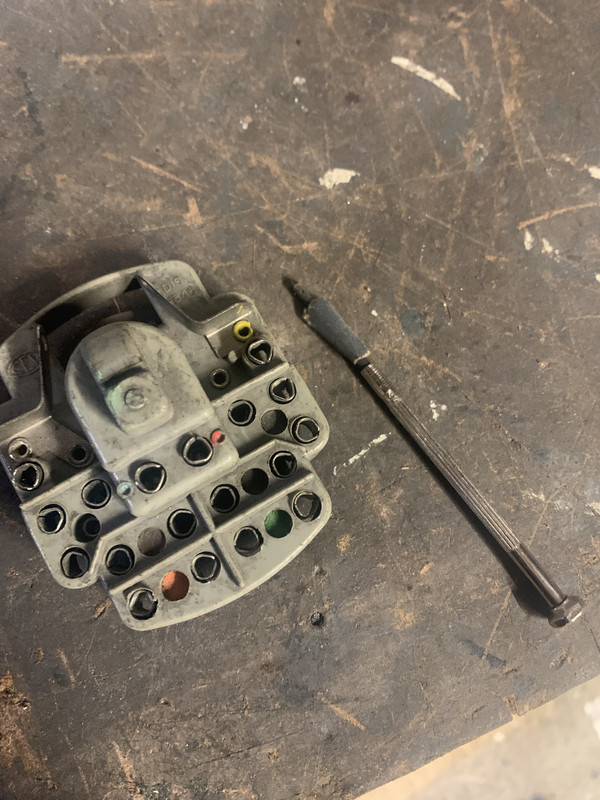
This is the bulb holder I plan to use, it's been in my parts box for at least two decades so a little bit of emery paper used to clean inside the terminals.
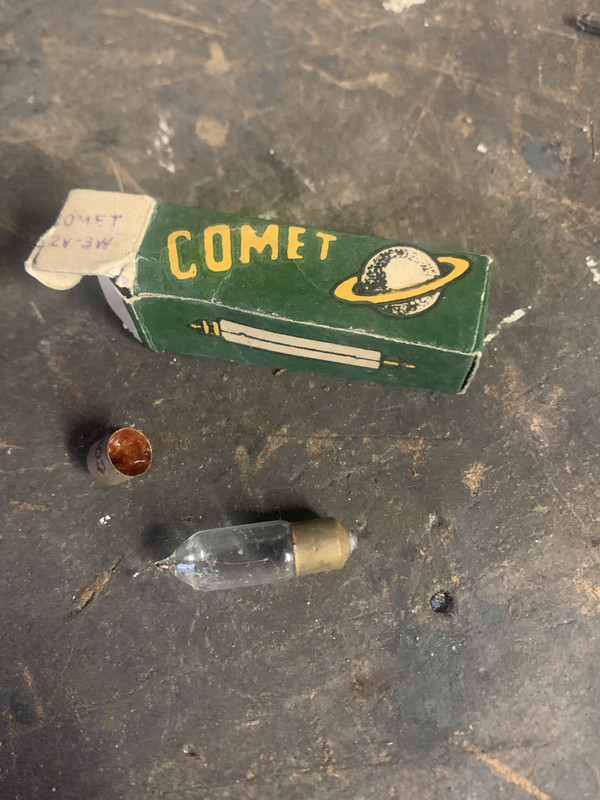
Fresh bulbs. I was going to say how cute this box is, but the bulb fell apart in my hands, it is full of corrosion... an Indian product from a scooter specialist. A more prosaically parcelled bulb from Halfords saves the day. Halfords 1 Scooter Industry nil.
I earth the wires here. So much easier to get at if you need to, compared to removing the the headset clamp bolt. The pink wire will need extending in due course.
Straightforward enough, all wires plugged into the right colours on the headlamp block.
To put power into the loom I am using the 12v supply mode on this battery charger. Better than trying to work on the bike whilst the garage is filling up with two stroke fumes!
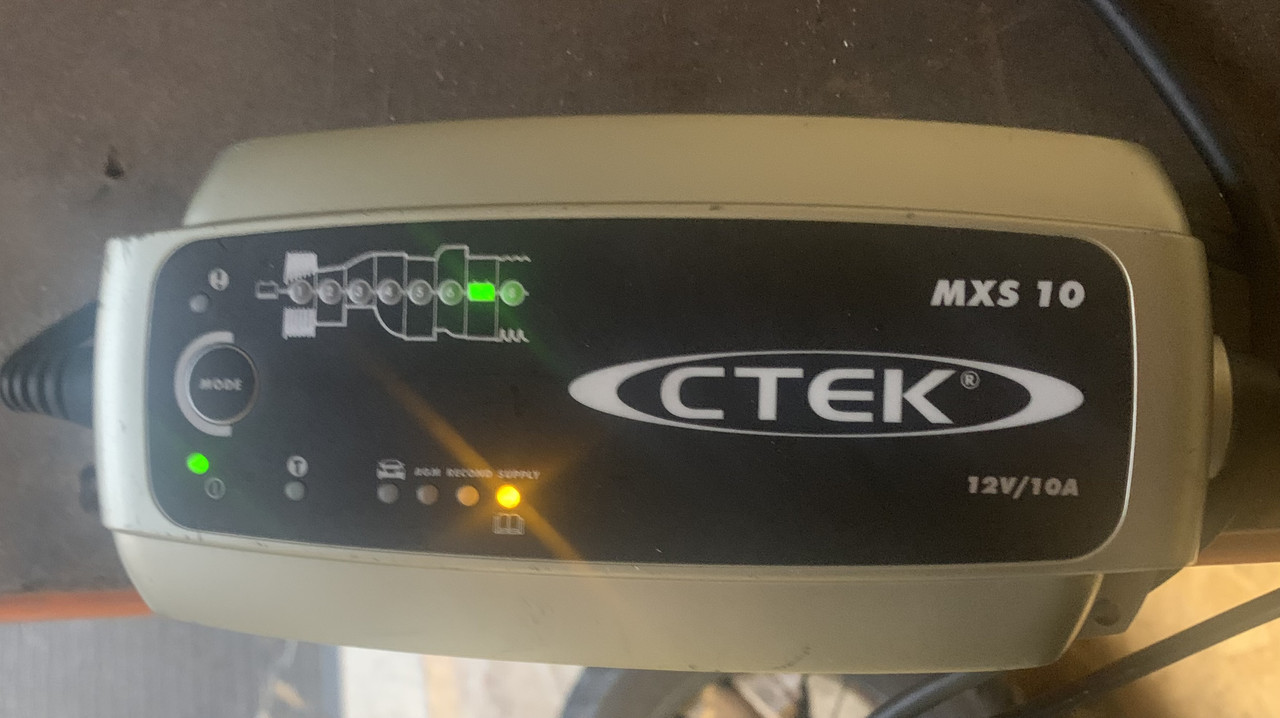
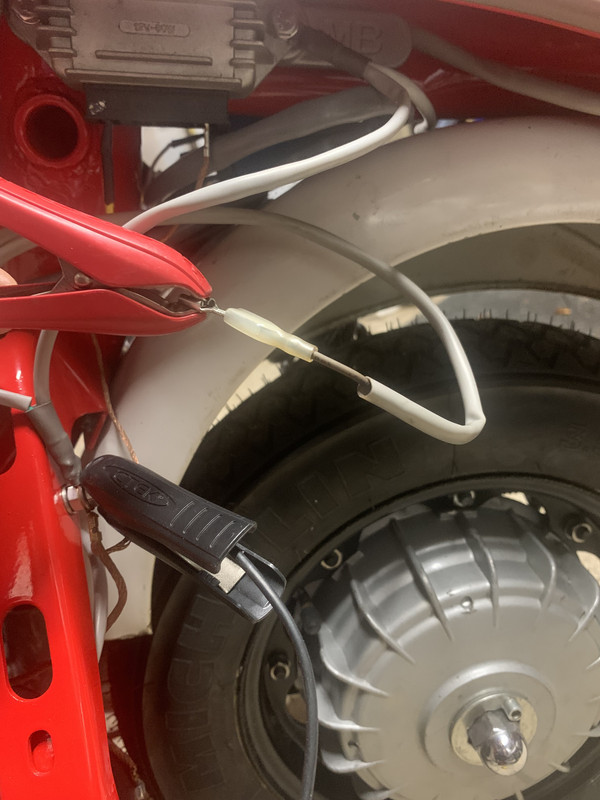
I'm using an AC system, so leaving the wire from the stator plate and the earth on the regulator, I pull the other wire off and connect it to the positive feed on the battery charger. This is the wire which sends power up to the headset - brown in this case but sometimes yellow. The negative feed on the battery charger goes to the frame earth. Be careful if you do this to make sure the positive does not come into contact with anything.
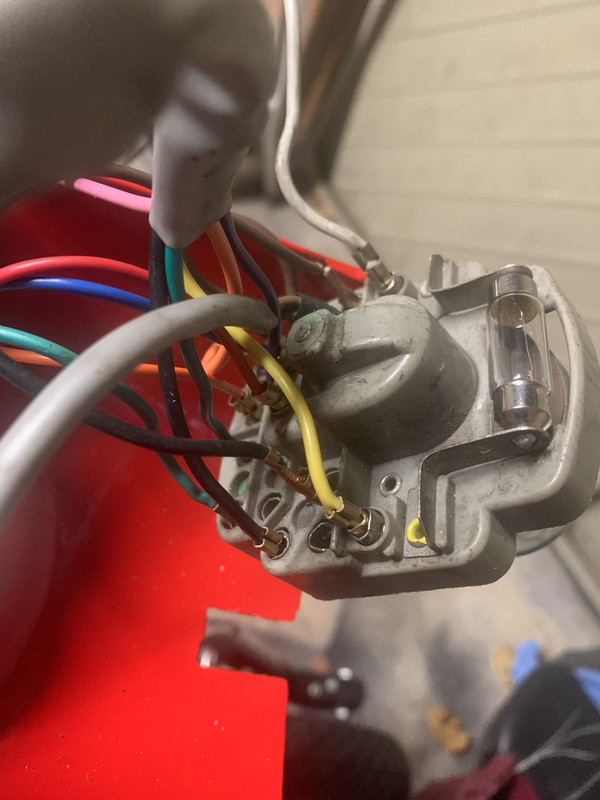
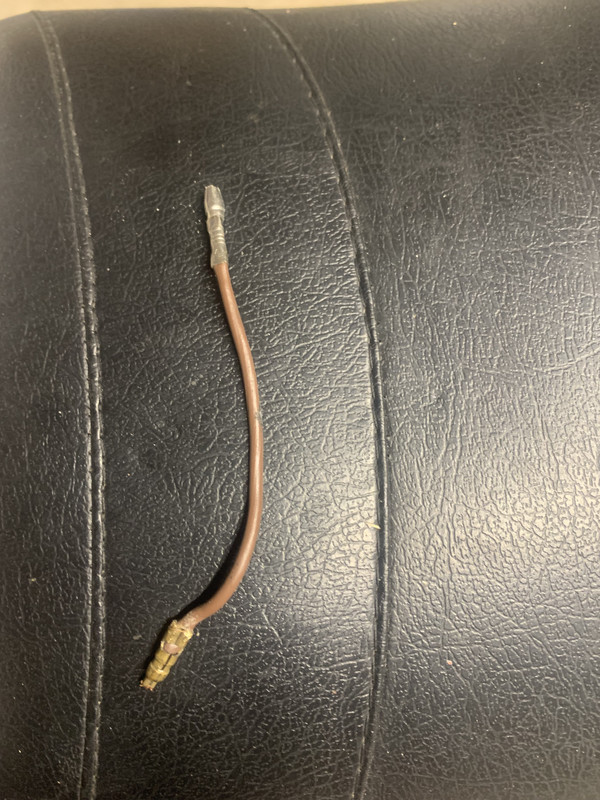
So ignition on and brake light works. Side lights on and nothing. Headlights on and its good for high beam, low beam and tail lights. Some looms need an extra bit of wire. Mr B calls it a piggy back. It takes power from the supply up and sends it to the switch for side lights. I've always called this a 'jumper' , I've got a couple of old looms which I've kept for parts, so this is what I've made.
Connected and it's all working.
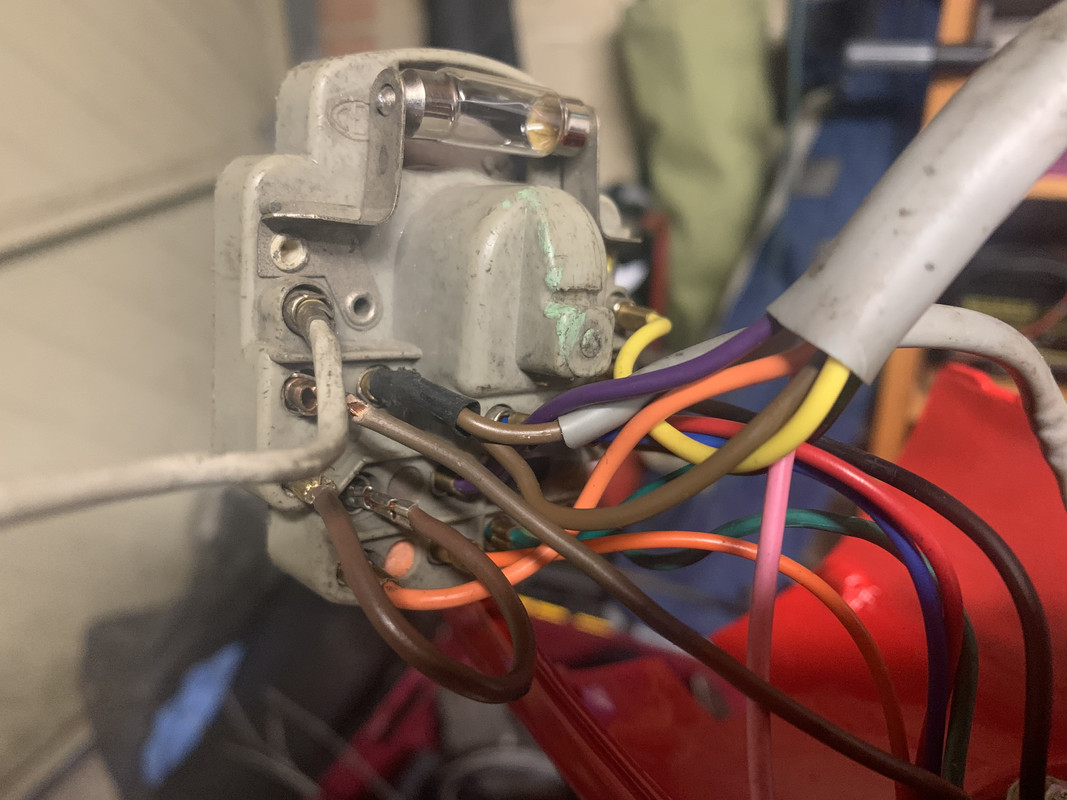
You might be able to see the jumper which links to the lilac wire on the switch via the connector. Sometimes this lilac wire is blue. I've moved the browns into the next group up because its a triple, and the jumper and the lilac are joined in the double marked for brown. Anyway it's all good to go. I've noticed that one of the brown wires needs its terminal making good, it is not a good connection. I suspect a previous owner has pulled it out of it's home by tugging on the wire - not to be recommended, ideally use long nosed pliers and grip the brass. The only thing missing is the speedo bulb, I've got one somewhere but I can't put my hands on it, it can wait.
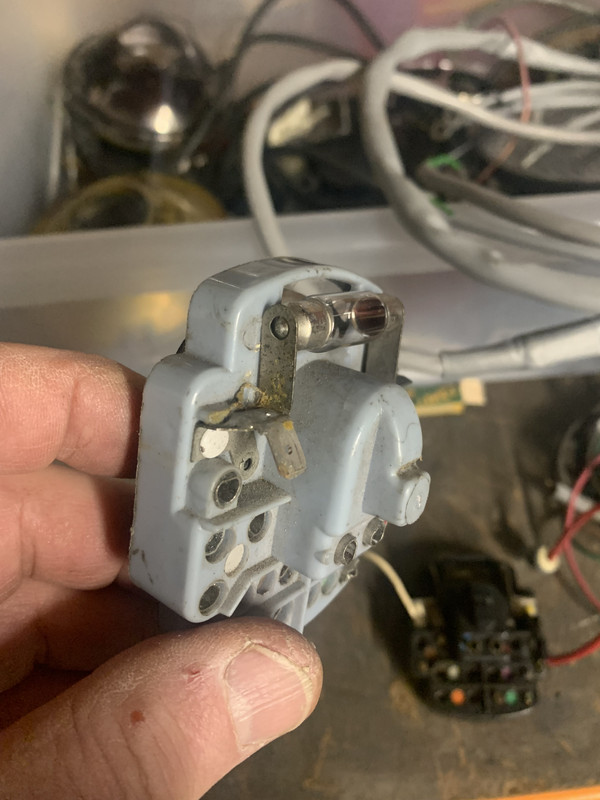
One last picture, sorting through the lamp holder units I had the choice of this one, you can see it has an extra terminal soldered onto the earth position. I don't think I've ever seen another so I'm guessing a diligent previous owner adding another earth wire... can't help but approve of the thought and the way it has been carried out.
So I'm looking at the electrics, and I'm doing it now because once I built a bike and it had a faulty loom - power went in but power didn't come out. I could do this check with a multimeter but I also want to check switches and bulbs and I don't know the full history of this loom. I think I took it off a running bike, not sure. So best checked.
This is the bulb holder I plan to use, it's been in my parts box for at least two decades so a little bit of emery paper used to clean inside the terminals.
Fresh bulbs. I was going to say how cute this box is, but the bulb fell apart in my hands, it is full of corrosion... an Indian product from a scooter specialist. A more prosaically parcelled bulb from Halfords saves the day. Halfords 1 Scooter Industry nil.
I earth the wires here. So much easier to get at if you need to, compared to removing the the headset clamp bolt. The pink wire will need extending in due course.
Straightforward enough, all wires plugged into the right colours on the headlamp block.
To put power into the loom I am using the 12v supply mode on this battery charger. Better than trying to work on the bike whilst the garage is filling up with two stroke fumes!
I'm using an AC system, so leaving the wire from the stator plate and the earth on the regulator, I pull the other wire off and connect it to the positive feed on the battery charger. This is the wire which sends power up to the headset - brown in this case but sometimes yellow. The negative feed on the battery charger goes to the frame earth. Be careful if you do this to make sure the positive does not come into contact with anything.
So ignition on and brake light works. Side lights on and nothing. Headlights on and its good for high beam, low beam and tail lights. Some looms need an extra bit of wire. Mr B calls it a piggy back. It takes power from the supply up and sends it to the switch for side lights. I've always called this a 'jumper' , I've got a couple of old looms which I've kept for parts, so this is what I've made.
Connected and it's all working.
You might be able to see the jumper which links to the lilac wire on the switch via the connector. Sometimes this lilac wire is blue. I've moved the browns into the next group up because its a triple, and the jumper and the lilac are joined in the double marked for brown. Anyway it's all good to go. I've noticed that one of the brown wires needs its terminal making good, it is not a good connection. I suspect a previous owner has pulled it out of it's home by tugging on the wire - not to be recommended, ideally use long nosed pliers and grip the brass. The only thing missing is the speedo bulb, I've got one somewhere but I can't put my hands on it, it can wait.
One last picture, sorting through the lamp holder units I had the choice of this one, you can see it has an extra terminal soldered onto the earth position. I don't think I've ever seen another so I'm guessing a diligent previous owner adding another earth wire... can't help but approve of the thought and the way it has been carried out.
- alex_hughes
- Posts: 93
- Joined: Mon Apr 24, 2017 8:42 am
Re: S3 TV175 build up
![]() by alex_hughes » Sun Dec 10, 2023 10:16 pm
by alex_hughes » Sun Dec 10, 2023 10:16 pm
Ps. I know the connections into the lamp holder are not fully home, I’ll push them right in on final installation
- alex_hughes
- Posts: 93
- Joined: Mon Apr 24, 2017 8:42 am
Re: S3 TV175 build up
![]() by dickie » Mon Dec 11, 2023 9:46 am
by dickie » Mon Dec 11, 2023 9:46 am
Love the detail. I guess many of us are just as sad!
Regarding the clutch cable routing, I completely agree about removing any restrictions at all. On my s3, I have no cable ties etc on my clutch cable throughout it's installation and it's probably the best lambretta clutch I've ever used. On no motorbike I've ever owned are there are points where the clutch cable is tied down, thereby allowing it to find its own position when pulled or relaxed.
By the way, a tiny dab of grease on all electrical connections will pay dividends in the future.
- dickie
- Posts: 1758
- Joined: Thu Oct 02, 2014 12:32 pm
- Location: Tyne and Wear
Re: S3 TV175 build up
![]() by alex_hughes » Wed Dec 13, 2023 10:49 pm
by alex_hughes » Wed Dec 13, 2023 10:49 pm
https://www.instagram.com/reel/CoP8988j ... tive_share
I'm going to start with a tale of disappointment.
This is a link to Dean Stradlings dry build of this scooter.
The frame was so straight that Dean asked if he could use it to add extra features to his jig. I sourced very sound panel work and Dean built it to his very high standard.
Before it was to be painted it went to have the old paint removed. Unfortunately the blasting was so severe that when it came back none of the panels were a good fit. In fact, the distortion was so bad that one of the side panels wouldn't go onto the frame. Back to Dean, and he recovered it as all well as he could, but both he and the painter said it would need to be finished with filler.
My view of filler is that I don't mind a fine skim to blank out the pitting of old corrosion and the like, but I don't want to use it to make rippled panels look straight.
On the plus side, the frame was fine.
So, plan B.
Last edited by alex_hughes on Thu Dec 14, 2023 12:40 am, edited 2 times in total.
- alex_hughes
- Posts: 93
- Joined: Mon Apr 24, 2017 8:42 am
Re: S3 TV175 build up
![]() by alex_hughes » Thu Dec 14, 2023 12:36 am
by alex_hughes » Thu Dec 14, 2023 12:36 am
Plan B
Right back at the start of this thread I mentioned that I have enough spares to build several scooters- from a lifetime of hoarding I will admit. And a lot of this process is to use up the spares by building usable bikes. So in reserve I do have some panelwork.
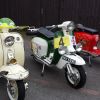
If you went to Amsterdam a few years ago you might have noticed this TV200 outside the cannabis museum, a scooter called Sensi Seeds...
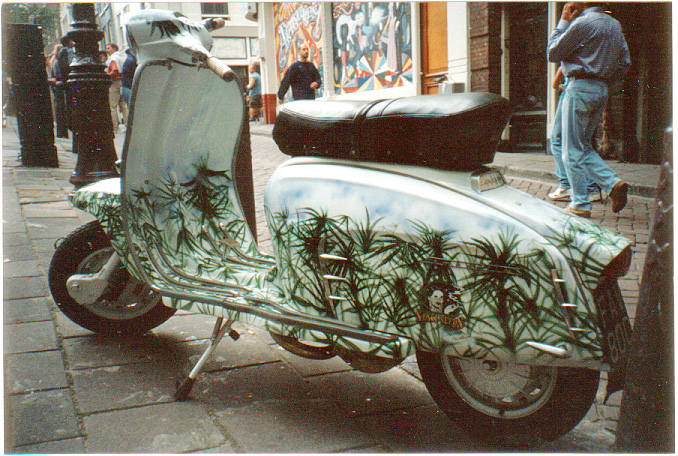
It went to Rimini for one of their 'Belair' builds and that involved being fitted with genuine New Old Stock Innocenti panels. Well those original Sensi Seeds panels changed hands a few times and some of them ended up with me. I had toyed with the idea of recreating Sensi Seeds but it was impossible to match the artwork. And it really was artwork - a shame to paint over it really. But I did, and I used them on this scooter, which was on the road as recently as the Arundel rally this year...
well that scooter is also being reworked, but I do still have the panels, so for now they will go onto the TV175. They may stay on there, I may rework the sidepanels, I don't know for sure - but pragmatically I want the scooter on the road as soon as possible and this is a quick fix to the blasted blasting probelm.
So here they are on the bench and I'm wiping off the dust of the Arundel rally. That was a good rally. Even with the Friday night rain. I bloody love LCGB rallies. Especially the Derby 150.
Having been on a rally bike for a while they are not pristine but I won't have to worry about getting that 'first scratch' on immaculate paintwork.
First things first - I TOOK THE HEADSET OFF!
Once it was mentioned that leggie installation could scratch the headset I couldn't get it out of my mind. I have previously installed them safely but with you lot watching there was every chance that I would mess up. Decision made on that basis.
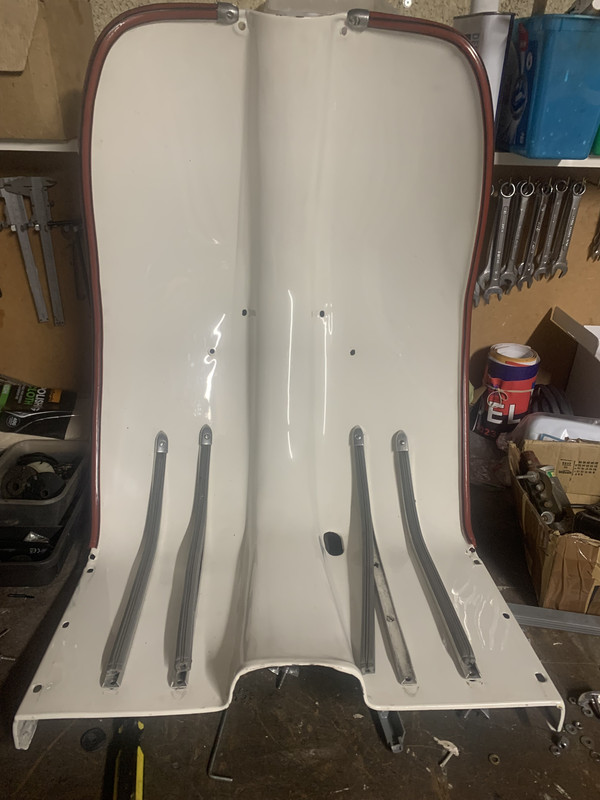
I've put the rubbers in place, held there with a dab of grease. But they can still get knocked out of the way no matter how careful you are. The factory glued them into place but I think you need to be able to move them around to align the holes.
Getting the legshield top bracket around the steering tube can be tight, so before painting I file the bracket back as far as the nuts to make the gap as wide as possible.
So putting it on, base more or less into position, then ease the bracket around the steering tube. Those credit cards again...
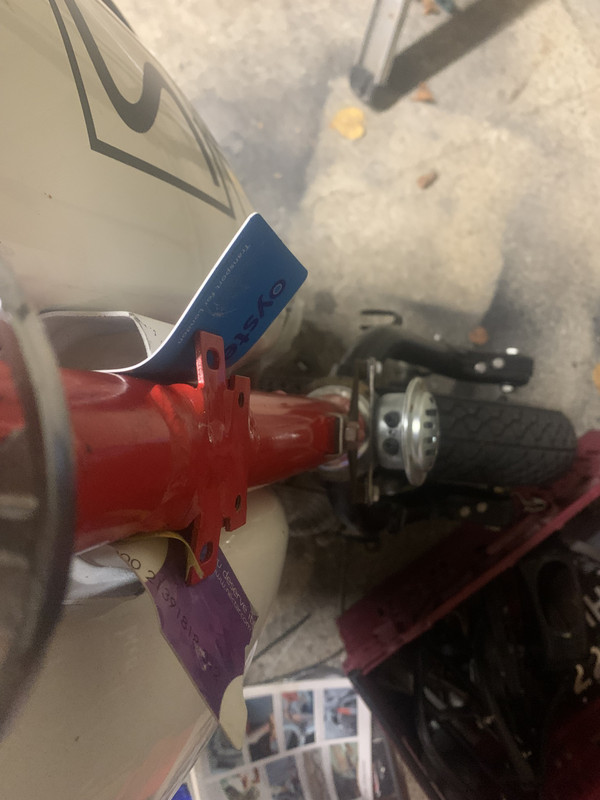
and hold the top of the leggies loosely in place with the two bolts through the top bracket.
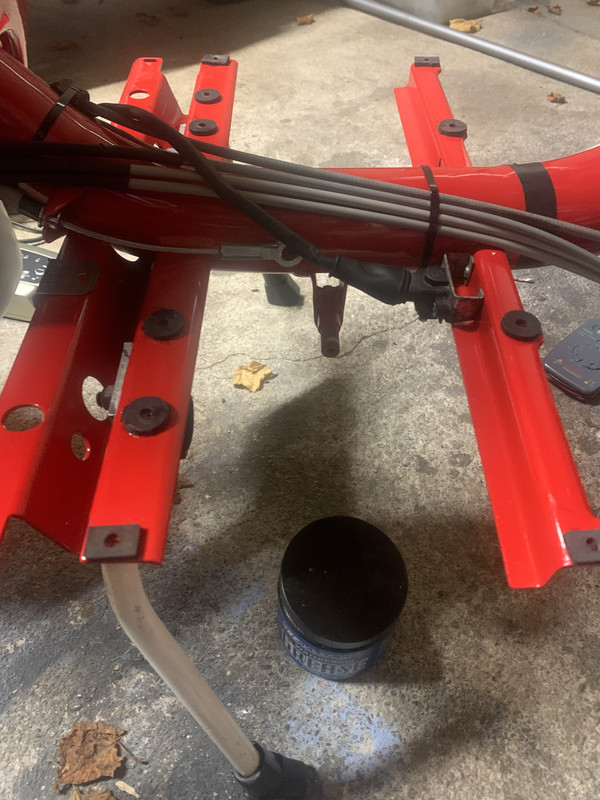
What I prefer to do is get all the nuts and bolts loosely fitted, but of course some of the rubbers will be dislodged. To get them all into place ready for the screws I use a scribe, the credit card (again!) and half a dozen tie wraps which are looped with a long tail, you can see them in the photo below. I push a rubber into place using the credit card underneath and centralise it from above using the scribe. Then, using a looped tie wrap, I keep the rubber in place by dropping the end of the tie wrap through the hole. The loop stops it dropping through and it will hold the rubber where it is meant to be until you have got them all in place. Once they are all in place you can remove one tie wrap at a time and drop the screw through the hole and put the nut/washer on to it.
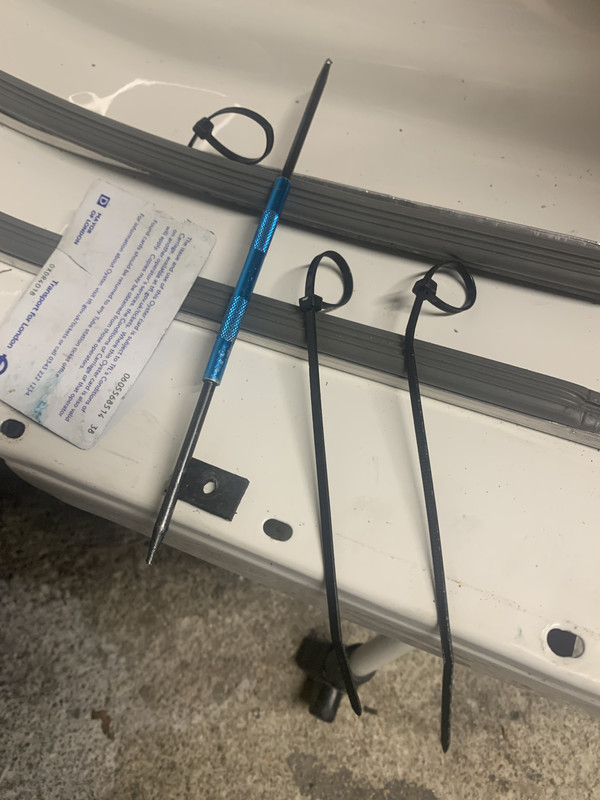
The idea is similar to the way aircraft are built, the ali panels are held in place by clips called clicos which locate through the hole until ready for the rivet. Years ago I built a Lotus 7 type car and the clicos were really useful to get the ali panels on - this was the source of the idea.
One tip from Dean is not to put the legshields hard up against the chrome ring because he believes it will inevitably cause paint damage as the panels flex. He suggests a good gap to leave is the thickness of a credit card! That's it for the credit cards, we won't see them again on this build!
So everything tightened up and rear runners put in place to check the gap, I'm happy with that so a tidy up and that's it for today.
Next I need to finish cabling up and install the carb, then move up to the front brake and speed cable area.
Right back at the start of this thread I mentioned that I have enough spares to build several scooters- from a lifetime of hoarding I will admit. And a lot of this process is to use up the spares by building usable bikes. So in reserve I do have some panelwork.
If you went to Amsterdam a few years ago you might have noticed this TV200 outside the cannabis museum, a scooter called Sensi Seeds...
It went to Rimini for one of their 'Belair' builds and that involved being fitted with genuine New Old Stock Innocenti panels. Well those original Sensi Seeds panels changed hands a few times and some of them ended up with me. I had toyed with the idea of recreating Sensi Seeds but it was impossible to match the artwork. And it really was artwork - a shame to paint over it really. But I did, and I used them on this scooter, which was on the road as recently as the Arundel rally this year...
well that scooter is also being reworked, but I do still have the panels, so for now they will go onto the TV175. They may stay on there, I may rework the sidepanels, I don't know for sure - but pragmatically I want the scooter on the road as soon as possible and this is a quick fix to the blasted blasting probelm.
So here they are on the bench and I'm wiping off the dust of the Arundel rally. That was a good rally. Even with the Friday night rain. I bloody love LCGB rallies. Especially the Derby 150.
Having been on a rally bike for a while they are not pristine but I won't have to worry about getting that 'first scratch' on immaculate paintwork.
First things first - I TOOK THE HEADSET OFF!
Once it was mentioned that leggie installation could scratch the headset I couldn't get it out of my mind. I have previously installed them safely but with you lot watching there was every chance that I would mess up. Decision made on that basis.
I've put the rubbers in place, held there with a dab of grease. But they can still get knocked out of the way no matter how careful you are. The factory glued them into place but I think you need to be able to move them around to align the holes.
Getting the legshield top bracket around the steering tube can be tight, so before painting I file the bracket back as far as the nuts to make the gap as wide as possible.
So putting it on, base more or less into position, then ease the bracket around the steering tube. Those credit cards again...
and hold the top of the leggies loosely in place with the two bolts through the top bracket.
What I prefer to do is get all the nuts and bolts loosely fitted, but of course some of the rubbers will be dislodged. To get them all into place ready for the screws I use a scribe, the credit card (again!) and half a dozen tie wraps which are looped with a long tail, you can see them in the photo below. I push a rubber into place using the credit card underneath and centralise it from above using the scribe. Then, using a looped tie wrap, I keep the rubber in place by dropping the end of the tie wrap through the hole. The loop stops it dropping through and it will hold the rubber where it is meant to be until you have got them all in place. Once they are all in place you can remove one tie wrap at a time and drop the screw through the hole and put the nut/washer on to it.
The idea is similar to the way aircraft are built, the ali panels are held in place by clips called clicos which locate through the hole until ready for the rivet. Years ago I built a Lotus 7 type car and the clicos were really useful to get the ali panels on - this was the source of the idea.
One tip from Dean is not to put the legshields hard up against the chrome ring because he believes it will inevitably cause paint damage as the panels flex. He suggests a good gap to leave is the thickness of a credit card! That's it for the credit cards, we won't see them again on this build!
So everything tightened up and rear runners put in place to check the gap, I'm happy with that so a tidy up and that's it for today.
Next I need to finish cabling up and install the carb, then move up to the front brake and speed cable area.
- alex_hughes
- Posts: 93
- Joined: Mon Apr 24, 2017 8:42 am
-
Rich Oswald - Posts: 8816
- Joined: Fri May 30, 2014 3:30 pm
- Location: Wiseman From The East (East Of The Pennines That Is)
Re: S3 TV175 build up
![]() by ULC Soulagent » Thu Dec 14, 2023 12:55 pm
by ULC Soulagent » Thu Dec 14, 2023 12:55 pm
Attention to detail is second to none  keep up the great work
-

ULC Soulagent - Posts: 2137
- Joined: Sun Apr 03, 2016 3:26 pm
- Location: Milton Keynes
Re: S3 TV175 build up
![]() by alex_hughes » Tue Dec 19, 2023 6:31 pm
by alex_hughes » Tue Dec 19, 2023 6:31 pm
So I refitted all the stuff I took off when I removed the headset, looks the same now as it did before so no need for a photo.
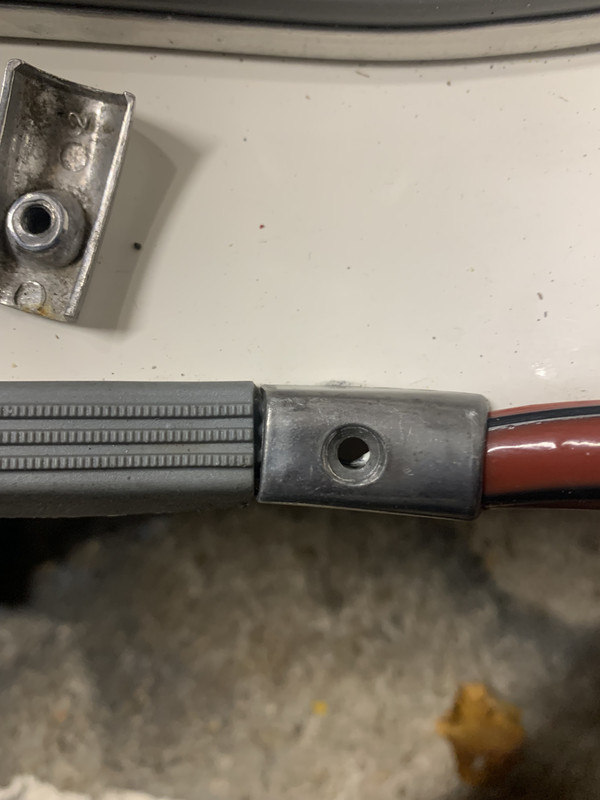
A little job just completed is to fit the legshield end caps.
To get a good fit you need a proper set. Original ones are handed left side and right side. The top left wont fit the bottom right, and vice versa. So you need four different components. I've seen repro ones which are not handed and as a consequence they don't fit well.
I think the best fit are original Spanish. Inside they are numbered, and a set is 87 - 88 - 89 - 95. Parts fair gold!
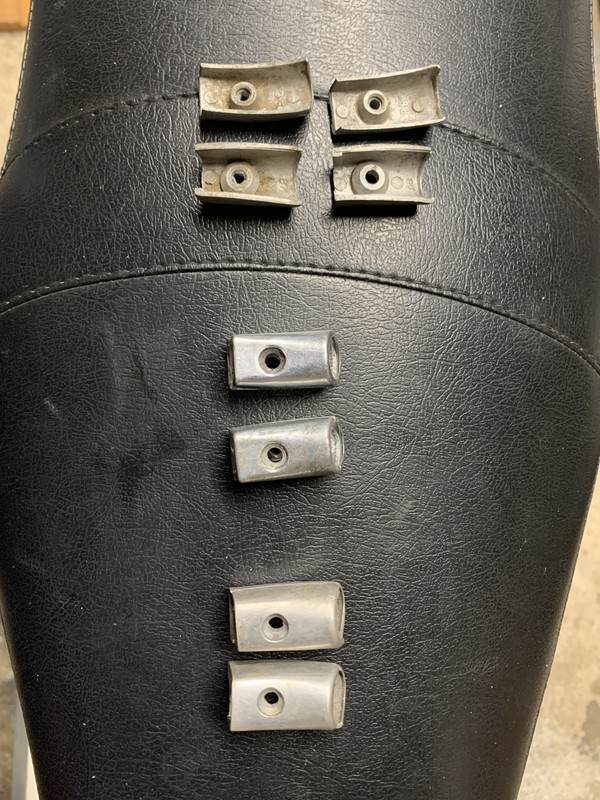
Italian are fine but sometimes I've had to shave the legshield rubber to get a good fit, although maybe that is to do with the rubber rather than the end caps. Of the repro, scootopia are probably the best I've seen, and they are also numbered inside 1 and 2. In the picture above they are the middle ones, but they don't fit quite as nicely as originals.
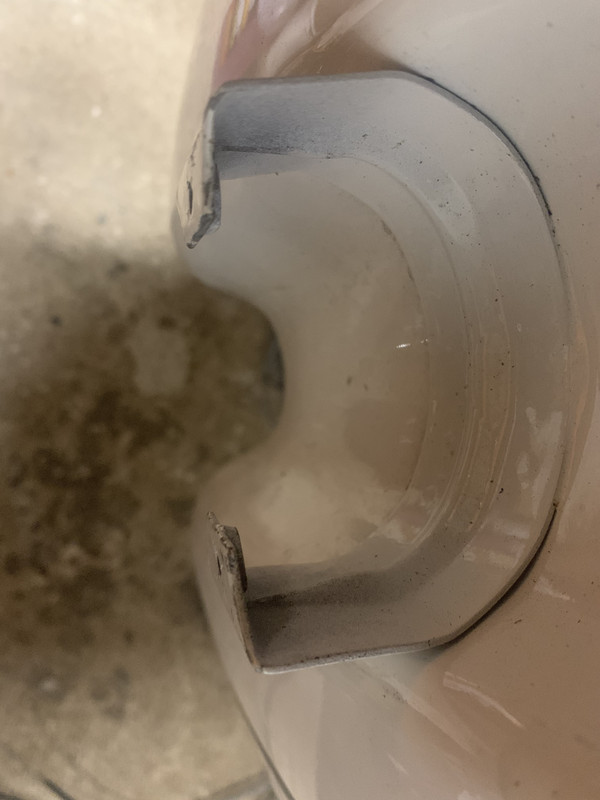
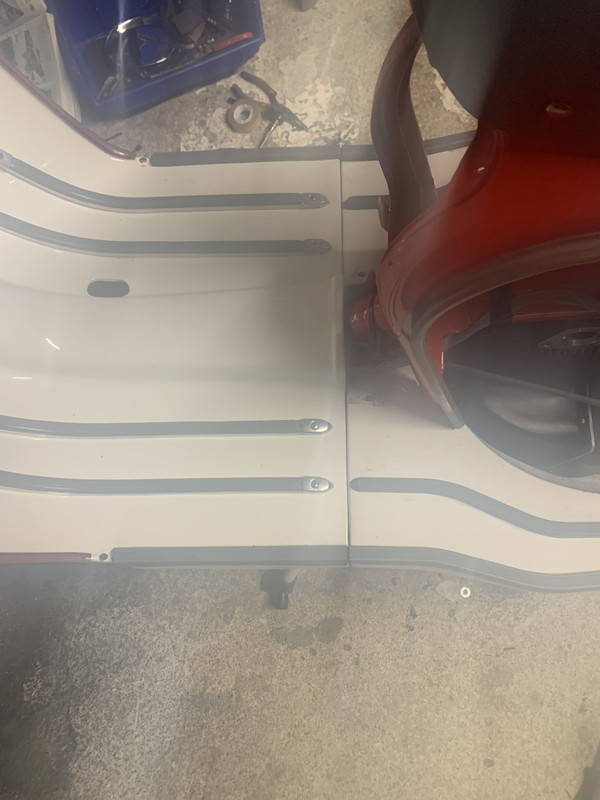
I've seen lots like this and I don't like it...
but this is the same one fitted on the other side, gap between end cap and the outer running strip is tight and parallel, top aligns perfectly with the bottom so I'm happy with that.
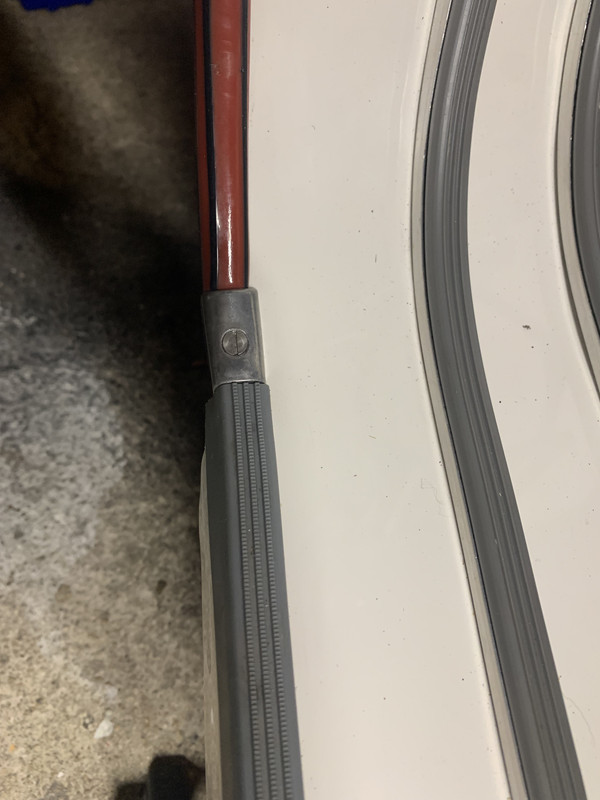
That's it, Tuesday is pie night with the club so I'm off out.
A little job just completed is to fit the legshield end caps.
To get a good fit you need a proper set. Original ones are handed left side and right side. The top left wont fit the bottom right, and vice versa. So you need four different components. I've seen repro ones which are not handed and as a consequence they don't fit well.
I think the best fit are original Spanish. Inside they are numbered, and a set is 87 - 88 - 89 - 95. Parts fair gold!
Italian are fine but sometimes I've had to shave the legshield rubber to get a good fit, although maybe that is to do with the rubber rather than the end caps. Of the repro, scootopia are probably the best I've seen, and they are also numbered inside 1 and 2. In the picture above they are the middle ones, but they don't fit quite as nicely as originals.
I've seen lots like this and I don't like it...
but this is the same one fitted on the other side, gap between end cap and the outer running strip is tight and parallel, top aligns perfectly with the bottom so I'm happy with that.
That's it, Tuesday is pie night with the club so I'm off out.
- alex_hughes
- Posts: 93
- Joined: Mon Apr 24, 2017 8:42 am
Re: S3 TV175 build up
![]() by alex_hughes » Fri Dec 22, 2023 12:51 am
by alex_hughes » Fri Dec 22, 2023 12:51 am
Busy time of year but I've managed to keep on with it. My good friend Andy (Nsaints on here) has booked us a dyno session with Al Terry so there is a deadline to work to.
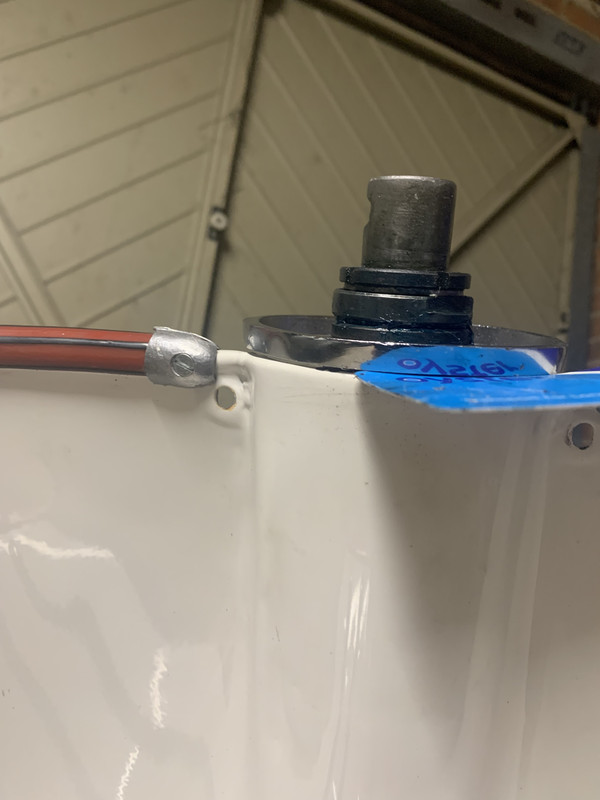
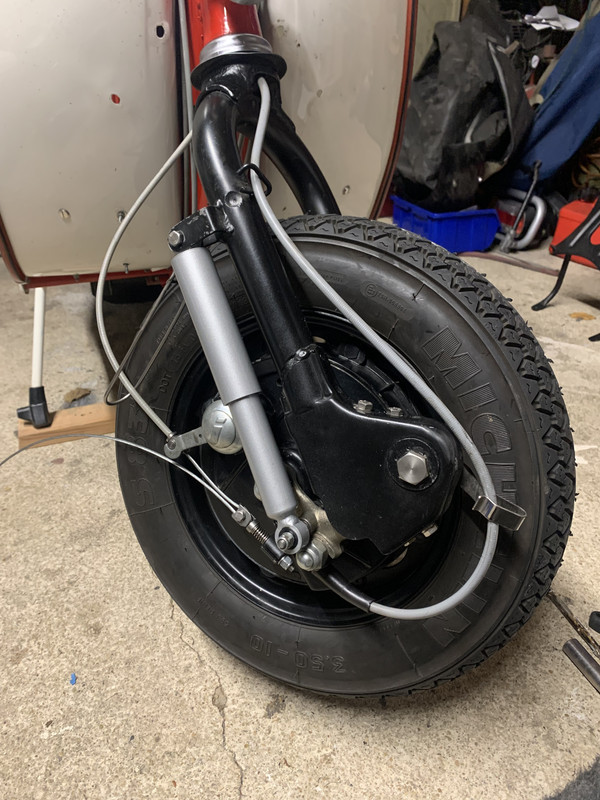
Cabled up the front brake, reverse pull using the new thicker cable from Camlam. Wasn't intending to use this full length cable on this project, as I was going reverse pull, but it was the smoothest of what I had. Had to shorten it of course. As normal, started by adjusting the static pad. To make this as easy as possible this is what I use, the deep socket has a couple of flats files on it to help grip.
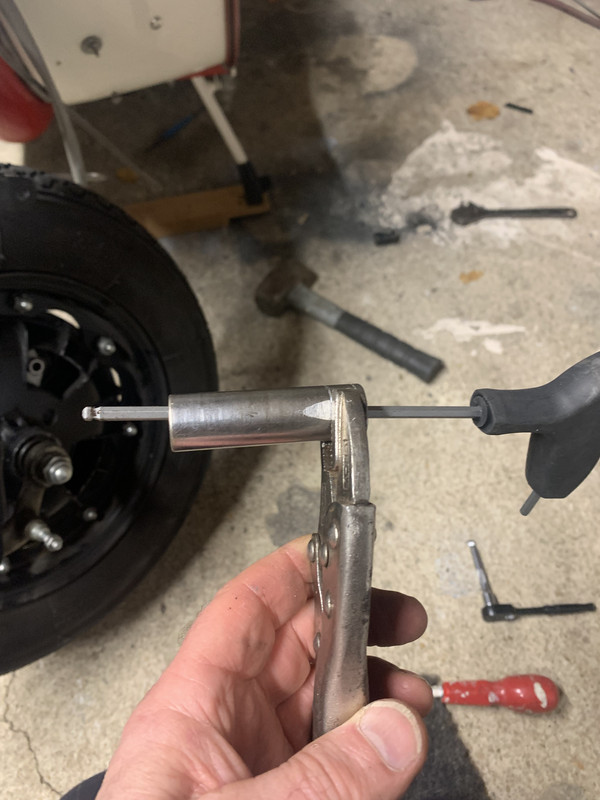
I follow the standard procedure except for one thing - most instructions say to back off the adjuster by half a turn. This is too much in most cases. Typically I back it off a quarter turn or so, enough for the wheel to rotate with the brake retarding it. A worthwhile tip from Adam Winstone.
Fitted new shock absorbers and speedo cable too, need to shorten the inner and tidy up the loose end.
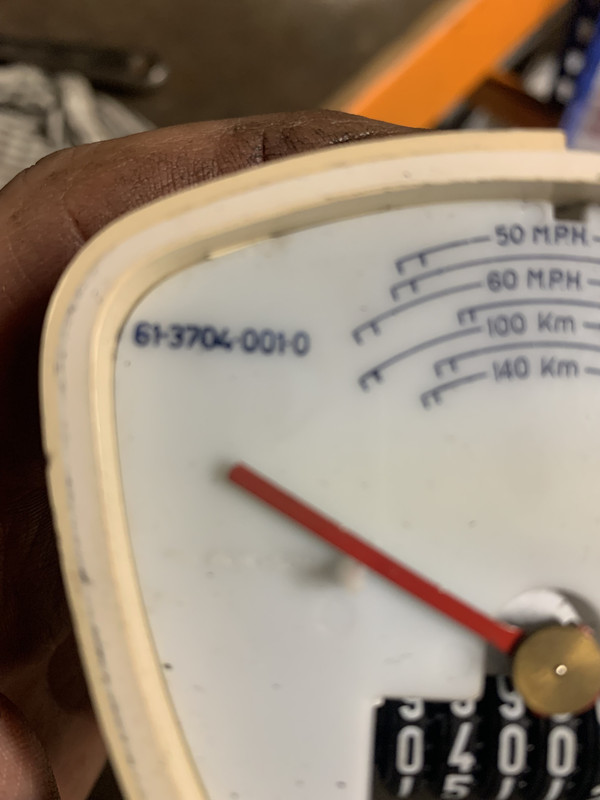
Speedo choice... decided to use this one. The frame lived most of it's life in Finland so it seems appropriate to use km. I thought it was right for a TV175 - the 120km dial is - but checking with The Original Lambretta Speedometer page on Facebook (yes really there is such a page, and yes really I'm on it) the Veglia serial number doesn't match up with TV175. Somebody also suggested this was from a Lambretta three wheeler... though I'm not sure I'd want to drive a Lambretta three wheeler at 120km per hour! So maybe this is a repro... but then someone else commented that the repros don't have Veglia serial numbers on them. Lambrettas are a puzzle sometimes. On the plus side it works and it matches the cable I have to hand.

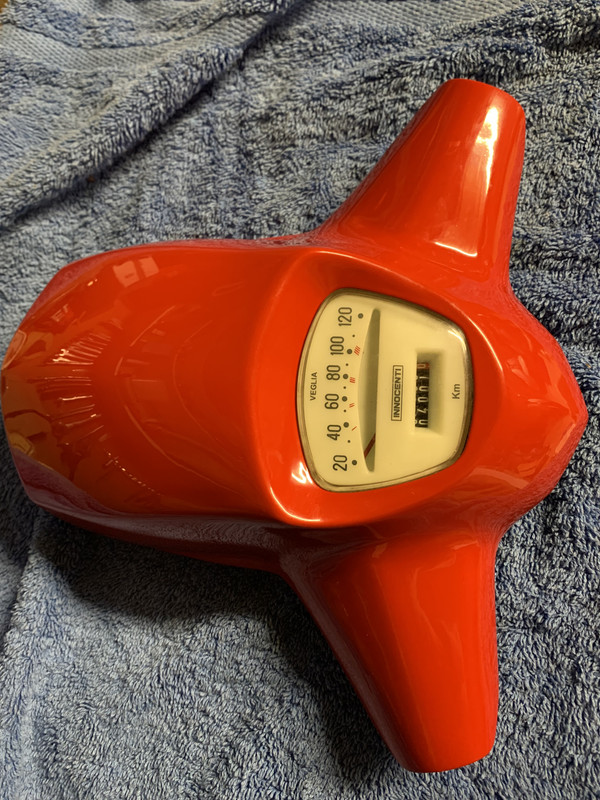
Fitting the speedo into the headset - using original screws again. Also using headset gaskets. My S1 still has the original gaskets on the headset, it's nice and I've just got to like using them - even though I'm not really sure they are needed. Old school, they are not self adhesive, got to be careful not to get adhesive anywhere else.

You can see I'm working on a clean towel, there is a layer of foam under there too. The things you can find in your partners yoga kit... Turn it over... nice, I'm happy with that...
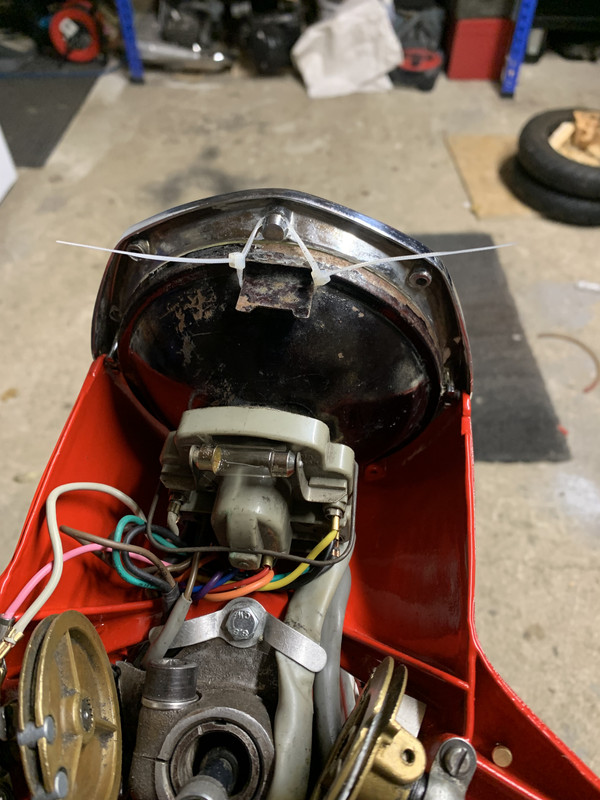
Meanwhile, back on the bike, making sure the wiring curls round nicely to the connector. And actually it didn't so I removed some of the cable outer from the wires which come from the ignition switch.

I can't find a wire clip for the top of the headlight to rim. cable tie will do for now, its a temporary solution.
And that's it for now.
Cabled up the front brake, reverse pull using the new thicker cable from Camlam. Wasn't intending to use this full length cable on this project, as I was going reverse pull, but it was the smoothest of what I had. Had to shorten it of course. As normal, started by adjusting the static pad. To make this as easy as possible this is what I use, the deep socket has a couple of flats files on it to help grip.
I follow the standard procedure except for one thing - most instructions say to back off the adjuster by half a turn. This is too much in most cases. Typically I back it off a quarter turn or so, enough for the wheel to rotate with the brake retarding it. A worthwhile tip from Adam Winstone.
Fitted new shock absorbers and speedo cable too, need to shorten the inner and tidy up the loose end.
Speedo choice... decided to use this one. The frame lived most of it's life in Finland so it seems appropriate to use km. I thought it was right for a TV175 - the 120km dial is - but checking with The Original Lambretta Speedometer page on Facebook (yes really there is such a page, and yes really I'm on it) the Veglia serial number doesn't match up with TV175. Somebody also suggested this was from a Lambretta three wheeler... though I'm not sure I'd want to drive a Lambretta three wheeler at 120km per hour! So maybe this is a repro... but then someone else commented that the repros don't have Veglia serial numbers on them. Lambrettas are a puzzle sometimes. On the plus side it works and it matches the cable I have to hand.
Fitting the speedo into the headset - using original screws again. Also using headset gaskets. My S1 still has the original gaskets on the headset, it's nice and I've just got to like using them - even though I'm not really sure they are needed. Old school, they are not self adhesive, got to be careful not to get adhesive anywhere else.
You can see I'm working on a clean towel, there is a layer of foam under there too. The things you can find in your partners yoga kit... Turn it over... nice, I'm happy with that...
Meanwhile, back on the bike, making sure the wiring curls round nicely to the connector. And actually it didn't so I removed some of the cable outer from the wires which come from the ignition switch.
I can't find a wire clip for the top of the headlight to rim. cable tie will do for now, its a temporary solution.
And that's it for now.
- alex_hughes
- Posts: 93
- Joined: Mon Apr 24, 2017 8:42 am
Re: S3 TV175 build up
![]() by Adam_Winstone » Sat Dec 23, 2023 8:03 pm
by Adam_Winstone » Sat Dec 23, 2023 8:03 pm
Nice Alex.
I told you that I'd read it, eventually.
I told you that I'd read it, eventually.
- Adam_Winstone
- Posts: 1078
- Joined: Tue Jun 03, 2014 1:52 pm
Re: S3 TV175 build up
![]() by alex_hughes » Sun Dec 24, 2023 11:52 pm
by alex_hughes » Sun Dec 24, 2023 11:52 pm
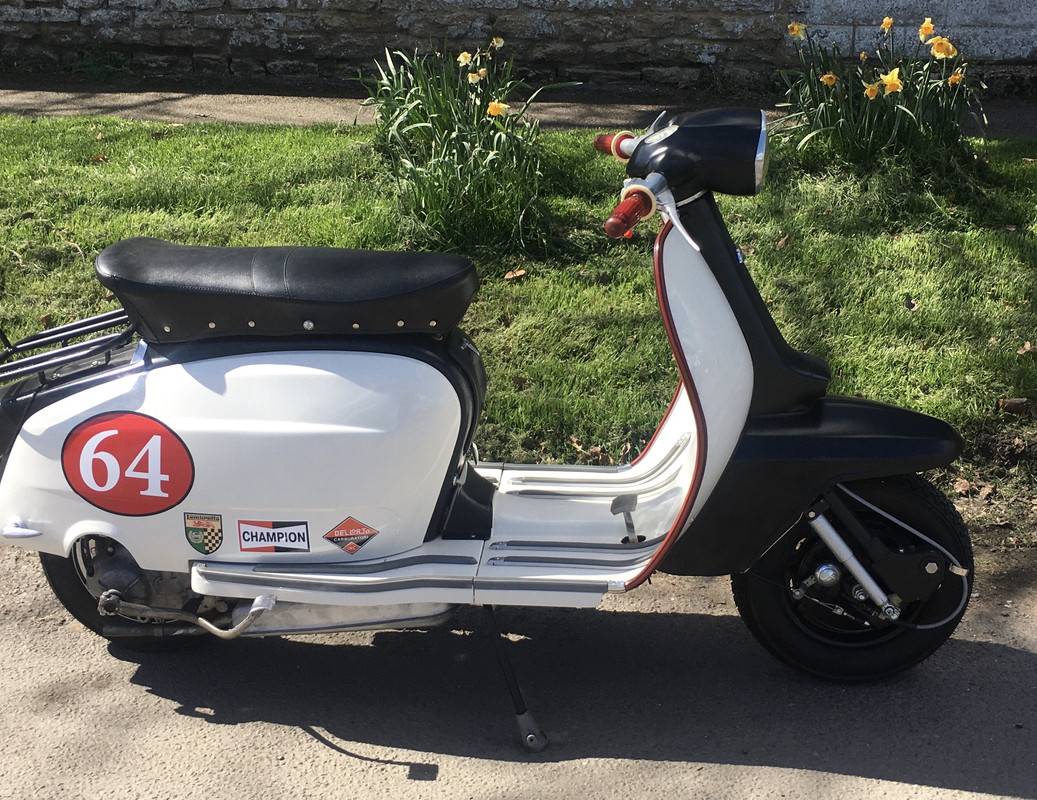
There is something very satisfying about getting the headset finished and screwed down. It feels like a big step forward.
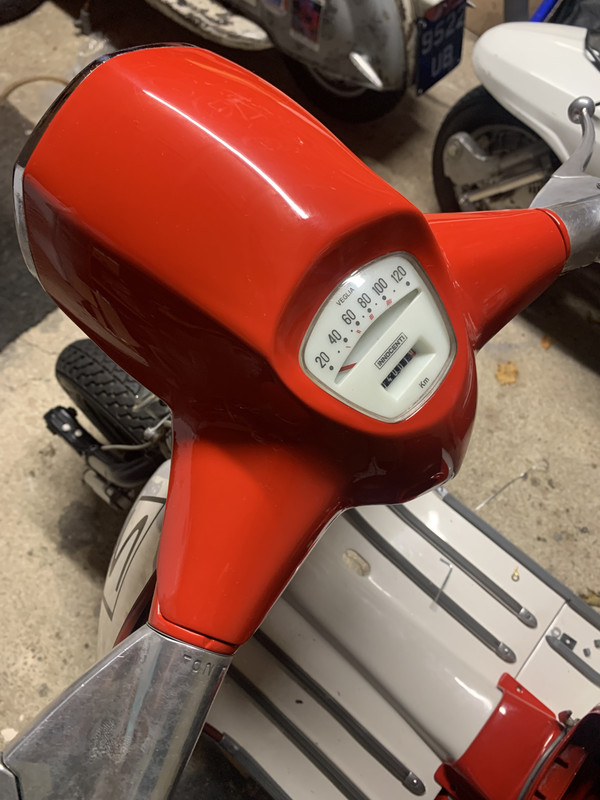
So now I can start thinking about the remaining panel work, and it starts to feel like it's nearly road ready.
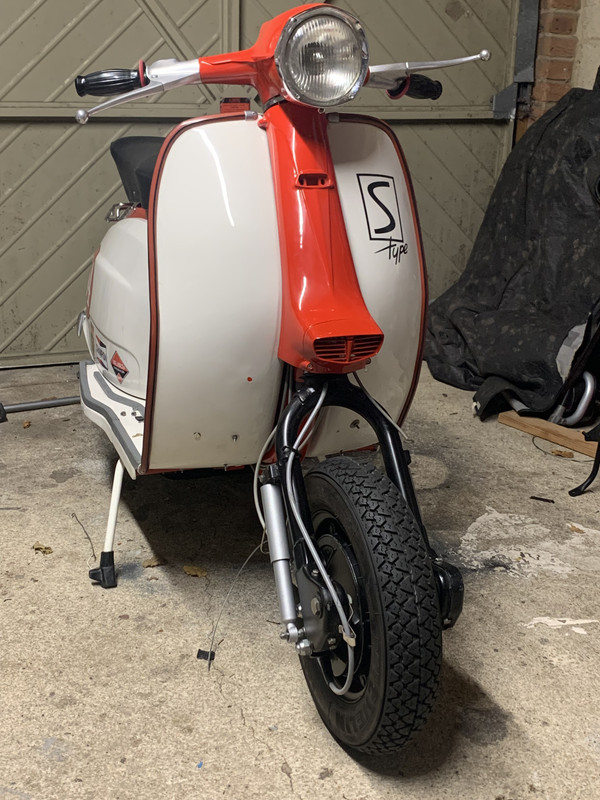
I'm not sure that the candy stripe red is a good match... if it looks like that much of a mis match in the daylight I will maybe use grey. I have some original used innocenti stuff which I might use if it cleans up ok.
That is it for tonight, wishing you all a happy holiday, whatever your beliefs (typing this on Christmas Eve)
So now I can start thinking about the remaining panel work, and it starts to feel like it's nearly road ready.
I'm not sure that the candy stripe red is a good match... if it looks like that much of a mis match in the daylight I will maybe use grey. I have some original used innocenti stuff which I might use if it cleans up ok.
That is it for tonight, wishing you all a happy holiday, whatever your beliefs (typing this on Christmas Eve)
- alex_hughes
- Posts: 93
- Joined: Mon Apr 24, 2017 8:42 am
Re: S3 TV175 build up
![]() by alex_hughes » Tue Dec 26, 2023 7:18 pm
by alex_hughes » Tue Dec 26, 2023 7:18 pm
I hadn’t checked the speedo bulb, and it’s good to make sure everything works when the headset gets bolted down, so the battery charger was reconnected to test it all
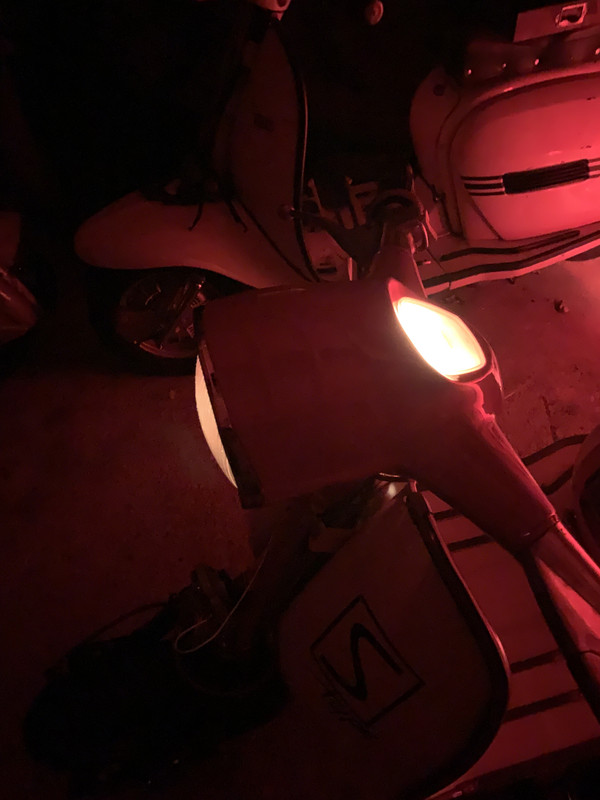
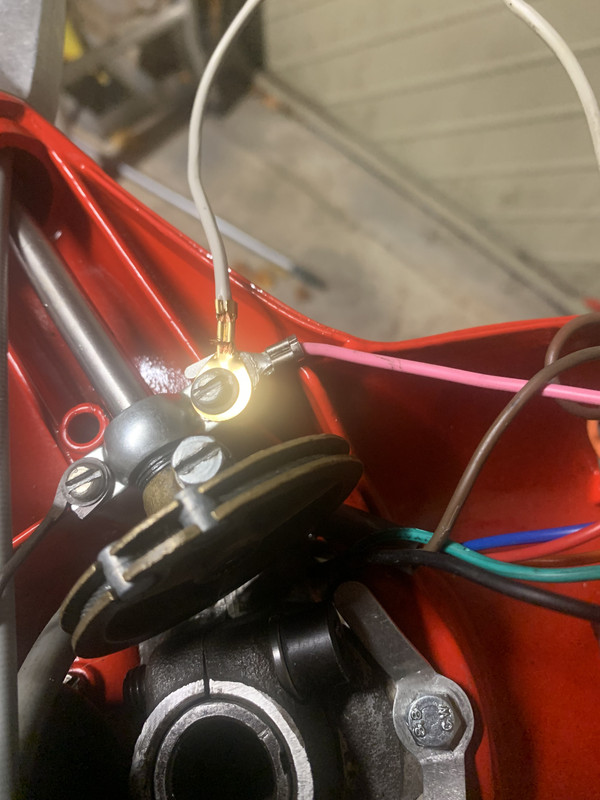
One other thing not checked was the horn. Now I may be wrong but I don’t think an AC horn will work with a DC supply, so a bulb was substituted. Obviously this doesn’t check the horn but it does check the switch and the wiring.
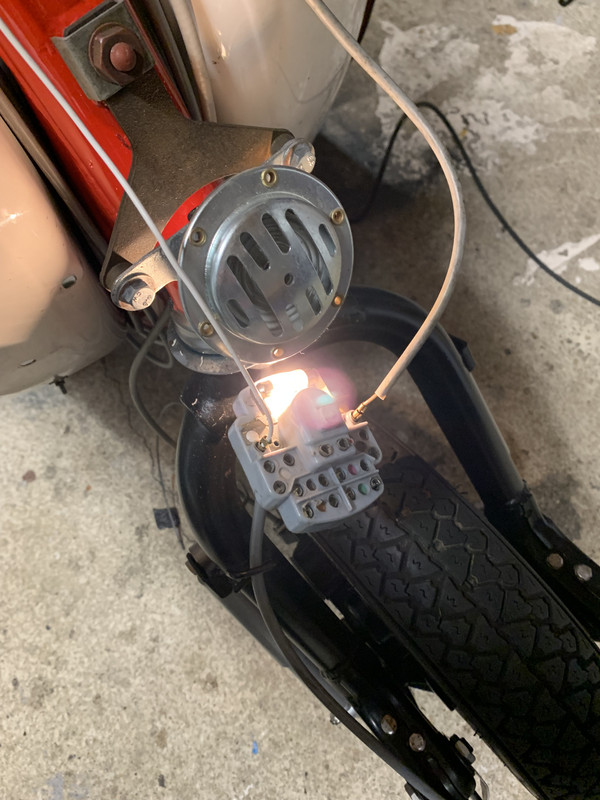
The brown wire is a constant live so I always take care with this, and make sure that it’s properly located into the horn.
One other thing not checked was the horn. Now I may be wrong but I don’t think an AC horn will work with a DC supply, so a bulb was substituted. Obviously this doesn’t check the horn but it does check the switch and the wiring.
The brown wire is a constant live so I always take care with this, and make sure that it’s properly located into the horn.
- alex_hughes
- Posts: 93
- Joined: Mon Apr 24, 2017 8:42 am
Re: S3 TV175 build up
![]() by Rich Oswald » Wed Dec 27, 2023 4:08 pm
by Rich Oswald » Wed Dec 27, 2023 4:08 pm
"I'm not sure that the candy stripe red is a good match... if it looks like that much of a mis match in the daylight I will maybe use grey. I have some original used Innocenti stuff which I might use if it cleans up ok."
Alex, I agree with this, the colour doesn't look quite right. I think grey would look better, just my opinion though, yours is the one which matters.
Rich'
Alex, I agree with this, the colour doesn't look quite right. I think grey would look better, just my opinion though, yours is the one which matters.
Rich'
-
Rich Oswald - Posts: 8816
- Joined: Fri May 30, 2014 3:30 pm
- Location: Wiseman From The East (East Of The Pennines That Is)
Re: S3 TV175 build up
![]() by Fast n Furious » Wed Dec 27, 2023 8:18 pm
by Fast n Furious » Wed Dec 27, 2023 8:18 pm
It might just be the photo but that speedo ilumination looks very bright?
If you find it to be too distacting when riding, you can swap the bulb out for a 24V one to bring the level down.
Nice Job Alex.
If you find it to be too distacting when riding, you can swap the bulb out for a 24V one to bring the level down.
Nice Job Alex.
-

Fast n Furious - Posts: 1512
- Joined: Sat Nov 19, 2016 3:56 am
- Location: York
Re: S3 TV175 build up
![]() by alex_hughes » Wed Dec 27, 2023 10:06 pm
by alex_hughes » Wed Dec 27, 2023 10:06 pm
Definitely going grey on the legshield beading. The horncasting gasket etc will be grey so it’s a match. When those legshields were on previous scoot the horncasting beading etc was black, as was the horncasting and the mudguard so it sort of blended in, and as a contrast the candy stripe looked fine.
In fact, the red paint wasn’t quite what I expected, it’s a bit brighter/lighter but I decided to go with it. The candy stripe will almost certainly find another home somewhere down the line.
The speedo bulb… it’s the photo! But that’s a good tip, thank you!
In fact, the red paint wasn’t quite what I expected, it’s a bit brighter/lighter but I decided to go with it. The candy stripe will almost certainly find another home somewhere down the line.
The speedo bulb… it’s the photo! But that’s a good tip, thank you!
- alex_hughes
- Posts: 93
- Joined: Mon Apr 24, 2017 8:42 am
Re: S3 TV175 build up
![]() by alex_hughes » Thu Dec 28, 2023 10:13 pm
by alex_hughes » Thu Dec 28, 2023 10:13 pm
A bit of time spent on carriers today. For a long time I'd be happy with an inner tube and small pump as preparation for a flat tyre, but struggling to change an inner tube mid rally convinced me of the need for carrying a spare wheel. My preference is the sort which hooks over the top of the legshields so that the weight is carried there, rather than the type which relies on the horncasting fixing for the top two mounts (though arguably these look a lot nicer)
The carrier I have fits perfectly on the legshields I'm not using. Typically, it is not a good fit onto the substitute leggies. So to make them fit I've had to extend the slots in the lower legs. Happily there was enough material to do this... a simple bit of fettling but one which will need to be be followed up by some paint repair. Easy enough as I paint all this sort of component in satin black, a forgiving finish.
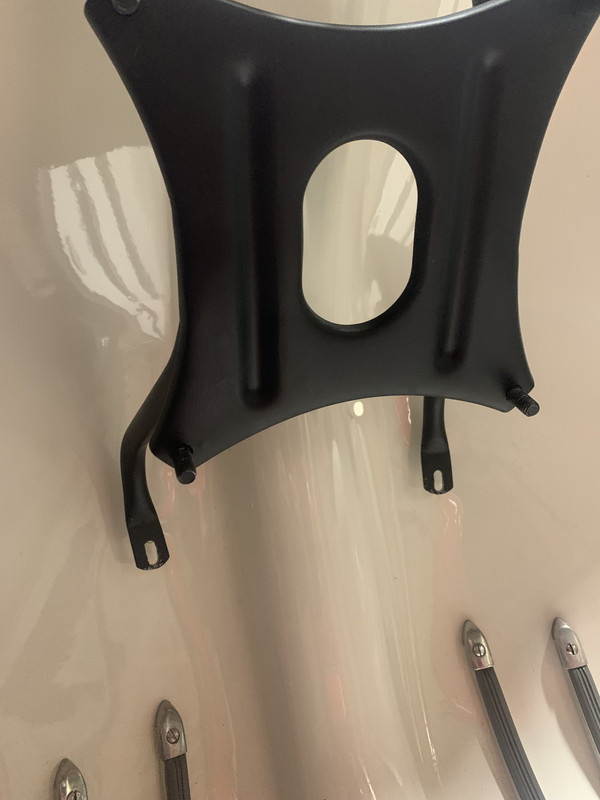
The carrier came with a sort of rubber sleeve to fit around the tops - they are not an good fit. I've discarded them and instead glued a couple of pieces of rubber inside the top curve where they will be barely noticeable, rubber was salvaged from an old inner tube.

On a different scooter I have an oil carrier which mounts onto the horncasting screws. Where there is any additional weight on the horncasting threads my preference is to discard the original screws and instead use 5 x 25mm grub screws. By using these I know that the whole thread length is being used in the horncasting to support the additional weight. These are also good if the first few turns of the thread in your old horncasting have gone missing over the years, as is the case here.

I've had to change the inlet manifold. I was using an MB one on the RT195 kit (25mm carb through the airbox) and even with Armadillo rubber it didn't line up. By a long way. Turns out I should have used the BGM manifold. It's fitted but I want to make sure there's no air leak on the manifold or the flange. Lambretta paranoia innit? The exhaust has yet to be fitted, so it should be a straightforward job in the morning.
The carrier I have fits perfectly on the legshields I'm not using. Typically, it is not a good fit onto the substitute leggies. So to make them fit I've had to extend the slots in the lower legs. Happily there was enough material to do this... a simple bit of fettling but one which will need to be be followed up by some paint repair. Easy enough as I paint all this sort of component in satin black, a forgiving finish.
The carrier came with a sort of rubber sleeve to fit around the tops - they are not an good fit. I've discarded them and instead glued a couple of pieces of rubber inside the top curve where they will be barely noticeable, rubber was salvaged from an old inner tube.
On a different scooter I have an oil carrier which mounts onto the horncasting screws. Where there is any additional weight on the horncasting threads my preference is to discard the original screws and instead use 5 x 25mm grub screws. By using these I know that the whole thread length is being used in the horncasting to support the additional weight. These are also good if the first few turns of the thread in your old horncasting have gone missing over the years, as is the case here.
I've had to change the inlet manifold. I was using an MB one on the RT195 kit (25mm carb through the airbox) and even with Armadillo rubber it didn't line up. By a long way. Turns out I should have used the BGM manifold. It's fitted but I want to make sure there's no air leak on the manifold or the flange. Lambretta paranoia innit? The exhaust has yet to be fitted, so it should be a straightforward job in the morning.
- alex_hughes
- Posts: 93
- Joined: Mon Apr 24, 2017 8:42 am
Re: S3 TV175 build up
![]() by Solid Air » Thu Dec 28, 2023 10:57 pm
by Solid Air » Thu Dec 28, 2023 10:57 pm
Loving the look of this one Alex! The white, red and black work really well together 
-

Solid Air - Posts: 984
- Joined: Sun Jun 01, 2014 10:58 pm
- Location: Cambridge
Re: S3 TV175 build up
![]() by gaz_powell » Sat Dec 30, 2023 3:53 pm
by gaz_powell » Sat Dec 30, 2023 3:53 pm
Enjoyed viewing this.
It spurred me on for a day in the garage to finish my dry built off... As its a SIL resto circa 1980s ive spent considerable time making sure body work gaps are uneven, panels dont fit perfectly and black plastic trims are a poor fit.....
I shall also be using two shades of the colour so its not a perfect match.
Its all in the detail...
- gaz_powell
- Posts: 3094
- Joined: Sat May 31, 2014 7:56 pm
- Location: Hartlepool
Re: S3 TV175 build up
![]() by gizmo » Sat Dec 30, 2023 4:23 pm
by gizmo » Sat Dec 30, 2023 4:23 pm
Sure is. How are your panels fitting at the back Gaz where they start to turn to head downwards.gaz_powell wrote:Enjoyed viewing this.
It spurred me on for a day in the garage to finish my dry built off... As its a SIL resto circa 1980s ive spent considerable time making sure body work gaps are uneven, panels dont fit perfectly and black plastic trims are a poor fit.....
I shall also be using two shades of the colour so its not a perfect match.
Its all in the detail...
Last few sets of Sil panels I have got seem to be slightly too long on the corner. Could mould have stretched over time. Sorry Alex for butting in. Definitely grey with the grey floor runners too. Looks good
- gizmo
- Posts: 634
- Joined: Sat May 31, 2014 6:43 pm
91 posts
• Page 3 of 5 • 1, 2, 3, 4, 5
Who is online
Users browsing this forum: No registered users and 48 guests