LCGB Forums
The ability to post messages is restricted to LCGB members. Any questions contact us at lcgbadmin@googlemail.com
S3 TV175 build up
Re: S3 TV175 build up
![]() by alex_hughes » Tue Nov 28, 2023 12:03 am
by alex_hughes » Tue Nov 28, 2023 12:03 am
- alex_hughes
- Posts: 93
- Joined: Mon Apr 24, 2017 8:42 am
Re: S3 TV175 build up
![]() by alex_hughes » Thu Nov 30, 2023 8:41 pm
by alex_hughes » Thu Nov 30, 2023 8:41 pm
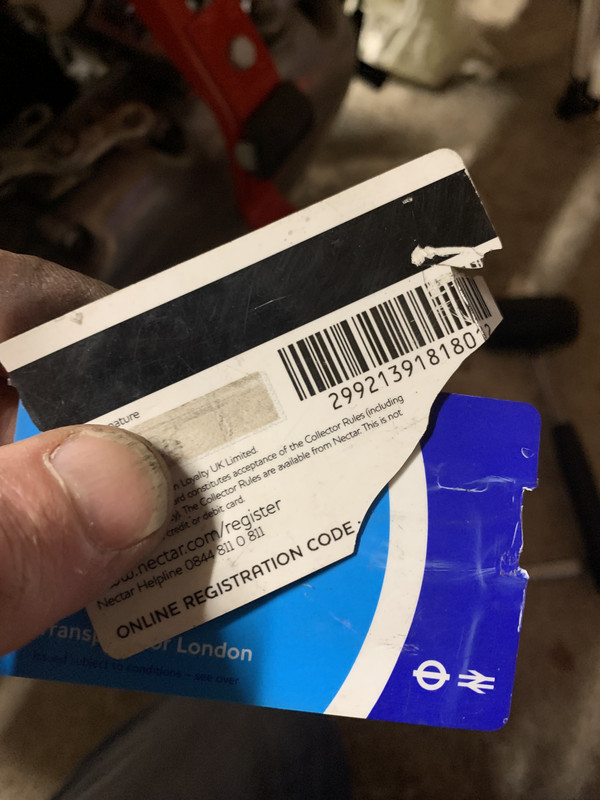
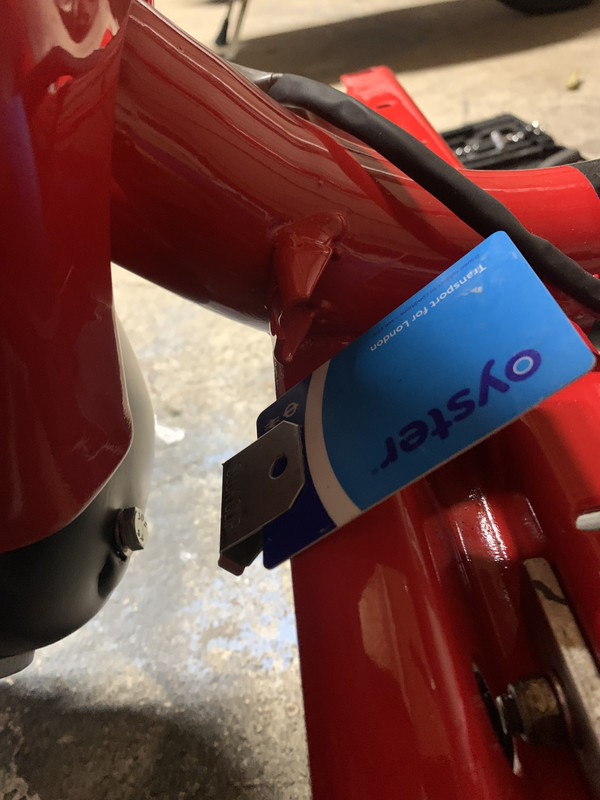
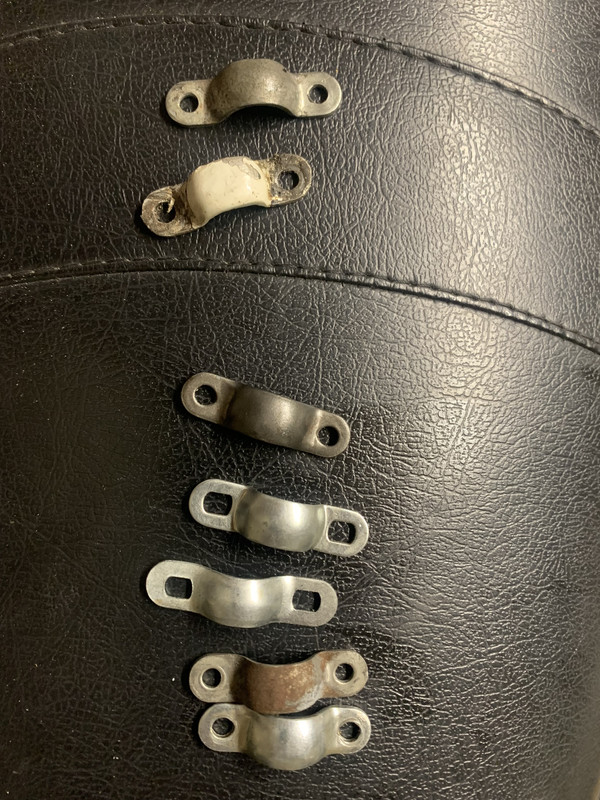
Side panel buffers... to prevent the paint getting scratched I use two old credit cards to slide them on.
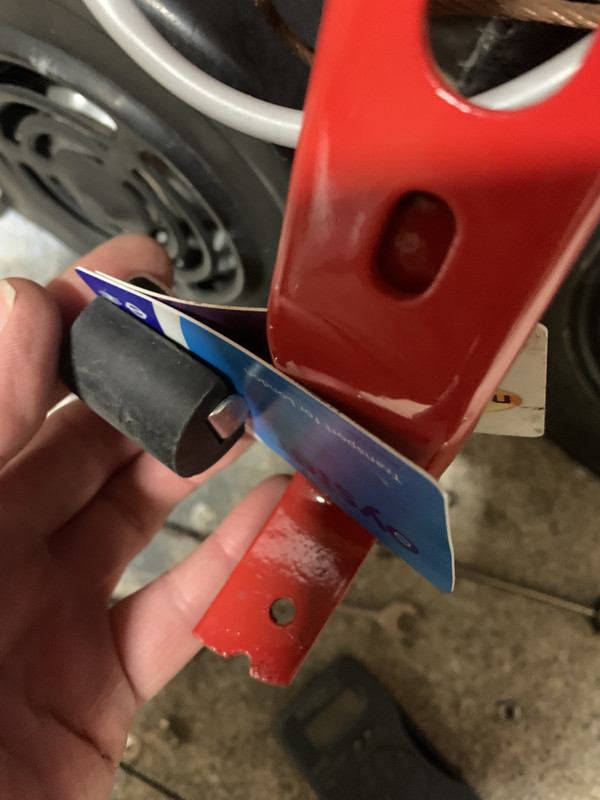
But don't do this with a current bank card, it's hard on them...
Added the leg on the kickstart side as well as the buffer.
Using the same method to install the SLUK bridge piece clips (which I love and recommend)
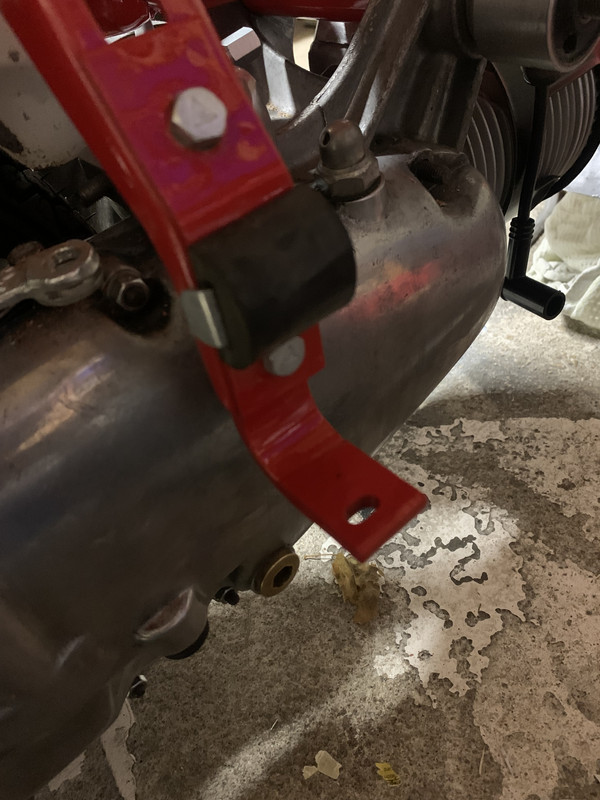
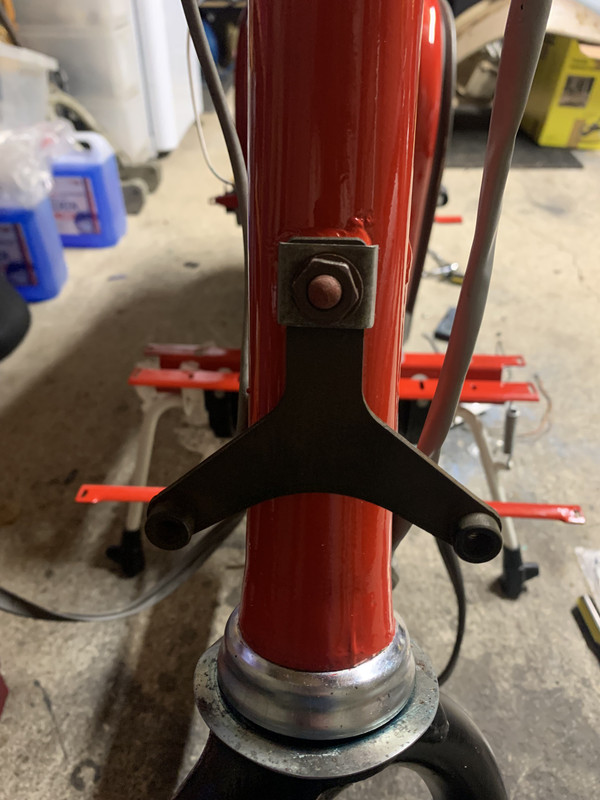
Horn bracket original to the frame complete with nut washer and bracket, cleaned up but not repainted. I want this scooter to reflect the fact that is an old bike which has been well looked after, rather than something new from 2023, hence leaving it this condition.
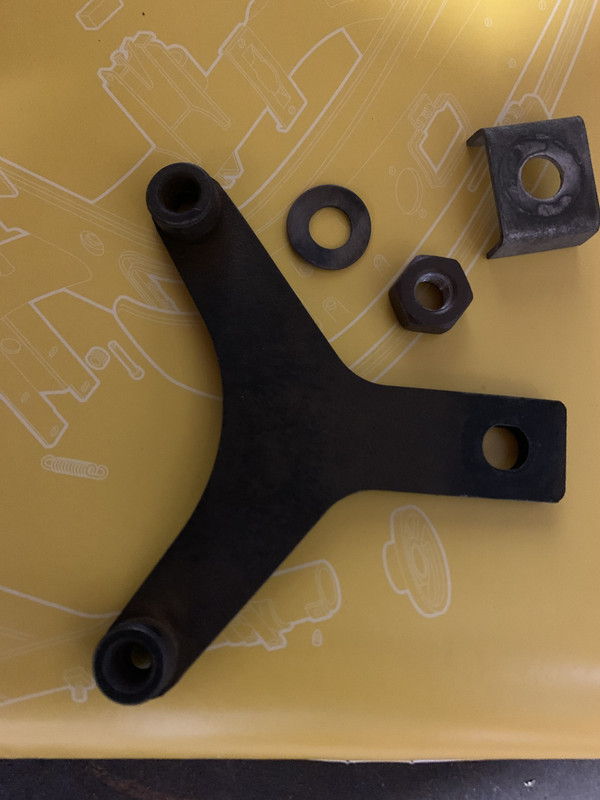
I've fitted it this way with the threaded sections facing forward. Somehow this seems the wrong way round to me but every image shows this as the correct way. If you have a view on the correct orientation please comment.
and horn fitted
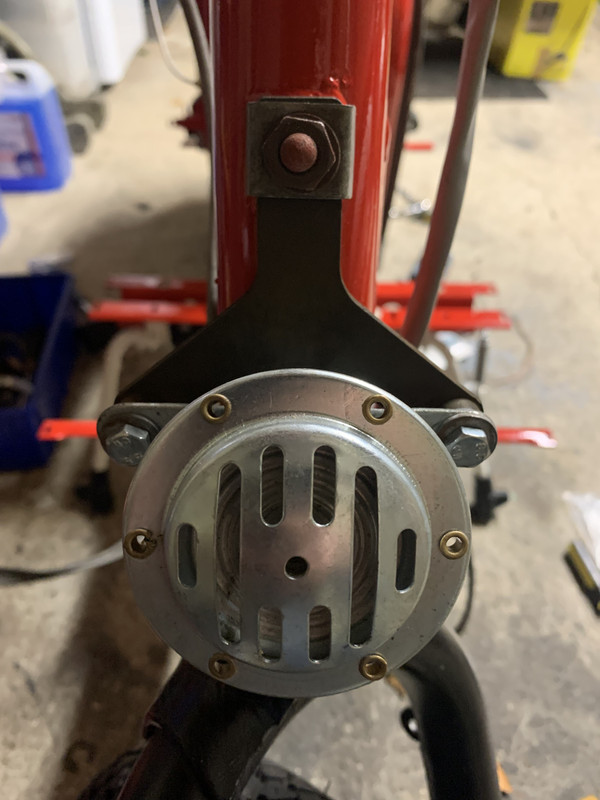
That is it for now, hopefully the parts will arrive tomorrow. My mate who does the paint is dropping round the newly painted tank/airbox/toolbox tomorrow. He is a scooterist who's main job is painting aircraft. He fits me in when he can so parts arrive bit by bit. I'm not quite ready for these parts, my preference is to get the cables connected first, it's all much easier to cable up without the tank and toolbox obscuring the view.
- alex_hughes
- Posts: 93
- Joined: Mon Apr 24, 2017 8:42 am
Re: S3 TV175 build up
![]() by Rich Oswald » Fri Dec 01, 2023 10:25 am
by Rich Oswald » Fri Dec 01, 2023 10:25 am
Rich'
-

Rich Oswald - Posts: 8816
- Joined: Fri May 30, 2014 3:30 pm
- Location: Wiseman From The East (East Of The Pennines That Is)

Re: S3 TV175 build up
![]() by Storkfoot » Fri Dec 01, 2023 6:31 pm
by Storkfoot » Fri Dec 01, 2023 6:31 pm
Storkfoot wrote:A heads up for the correct disc brake cables. They have been out of stock everywhere in UK for quite a while but CamLam have just got some in. I can’t vouch for how good they are but I’ll be ordering a couple in the next few days…..
These cables are Champion, made in India. So, they are a well known manufacturer.
-

Storkfoot - Posts: 2123
- Joined: Fri May 30, 2014 8:59 pm
- Location: Merseyside
Re: S3 TV175 build up
![]() by alex_hughes » Fri Dec 01, 2023 9:11 pm
by alex_hughes » Fri Dec 01, 2023 9:11 pm

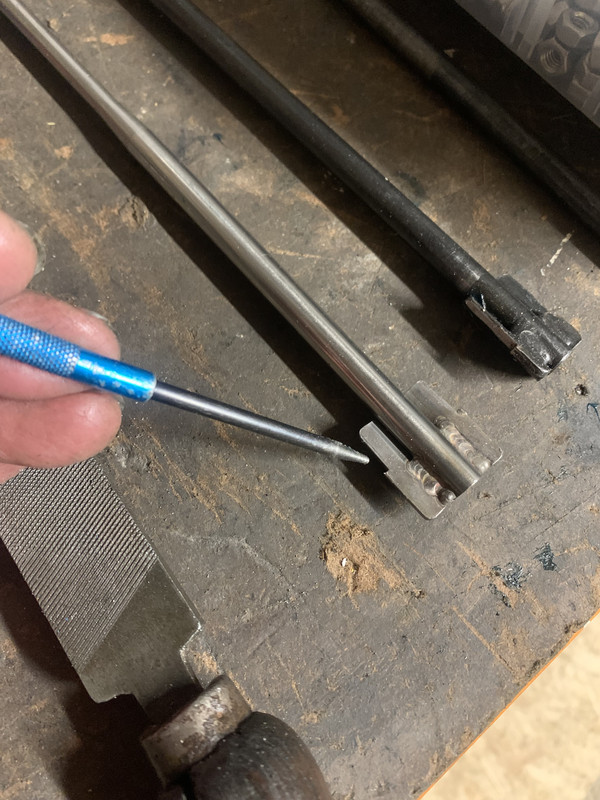
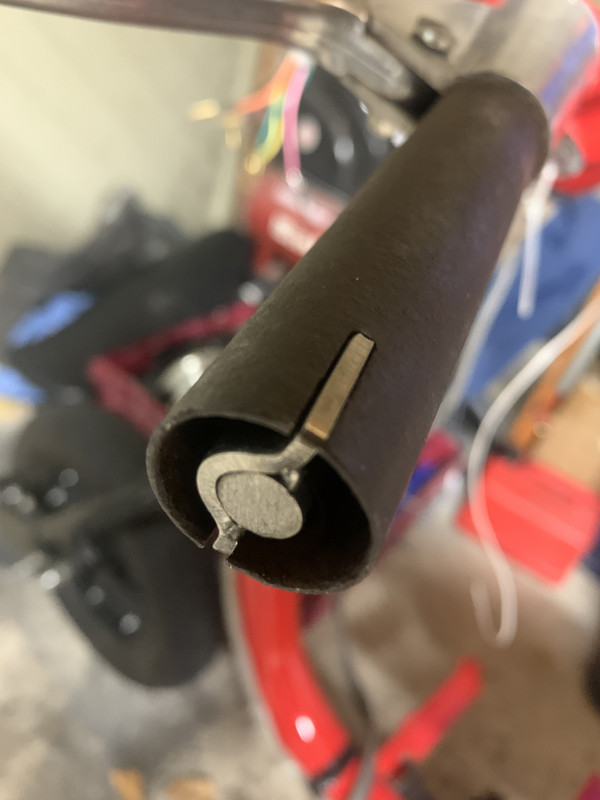
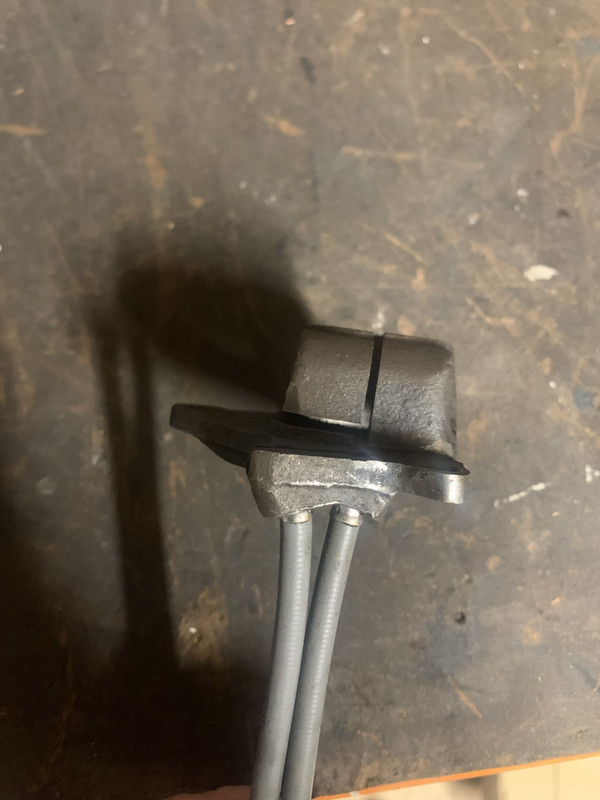
Turns out they need a bit of fettling, the 'shoulders' don't fit into the throttle tube so I will file this bit until it does. Feeling mildly disappointed whilst filing...
Don't forget the shim and wavy washer - lots of grease about to be added.

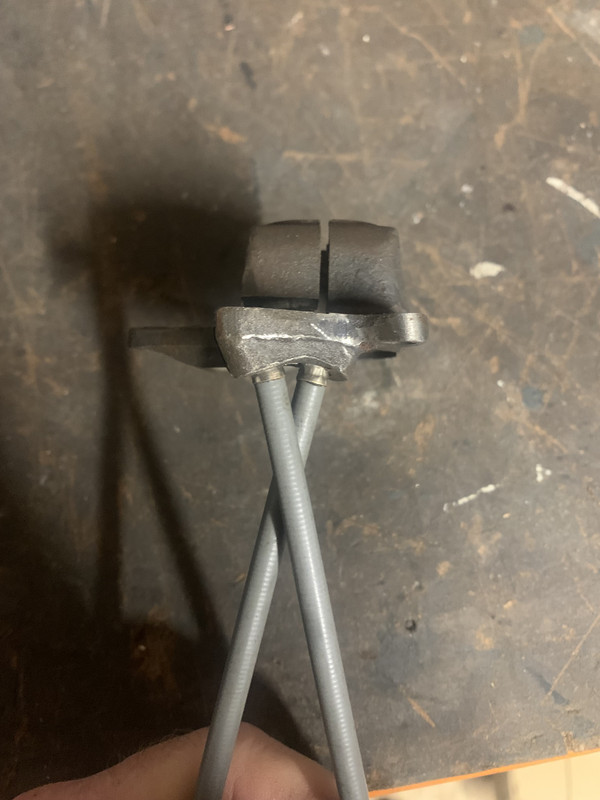
New bush, clamp on. shims on, wheel on. Now this is a Spanish headset with an Italian throttle wheel and the throttle stop doesn't line up, so under the bolt goes a short piece of metal to make it work. My obsession with neat screwheads continues...
I like to check that the cable is as straight as possible. I've seen some installations where the cable is rubbing against the headset clamp because of the relative position of the wheel. The alignment of the wheel can be altered by adding/removing shims at the throttle tube or the throttle wheel. In this case it lines up as it should, so at last a good result for Mr B.
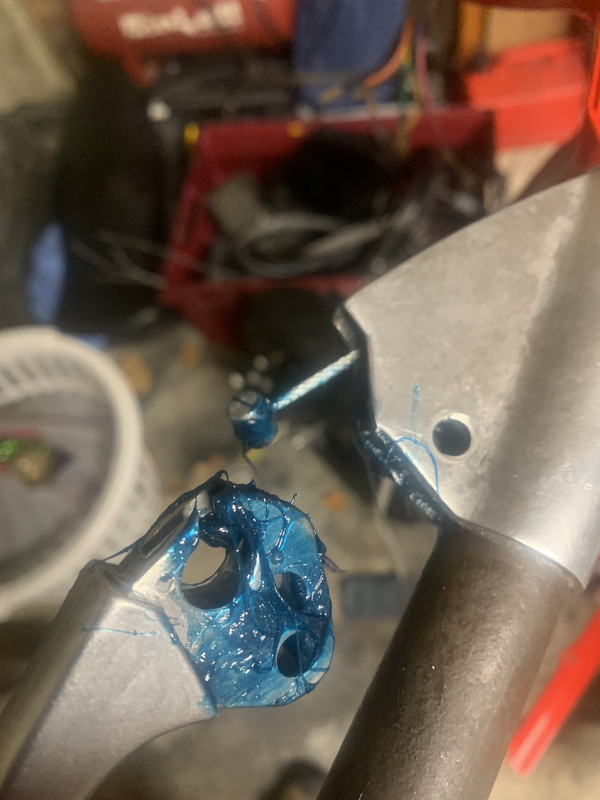
New wiring clamp added. Everybody says that bolt is a bugger to get done up. I find using lots of grease to hold the washer onto the top of the socket is the easiest way. I've decided not to earth the headset here, we will come back to that in due course.
That's it for today, back on it tomorrow.
- alex_hughes
- Posts: 93
- Joined: Mon Apr 24, 2017 8:42 am
Re: S3 TV175 build up
![]() by gizmo » Fri Dec 01, 2023 10:04 pm
by gizmo » Fri Dec 01, 2023 10:04 pm
- gizmo
- Posts: 634
- Joined: Sat May 31, 2014 6:43 pm
Re: S3 TV175 build up
![]() by Fast n Furious » Fri Dec 01, 2023 10:18 pm
by Fast n Furious » Fri Dec 01, 2023 10:18 pm
-

Fast n Furious - Posts: 1512
- Joined: Sat Nov 19, 2016 3:56 am
- Location: York
Re: S3 TV175 build up
![]() by alex_hughes » Sat Dec 02, 2023 6:59 pm
by alex_hughes » Sat Dec 02, 2023 6:59 pm
For the best fit on this headset, one from Andy Francis and the other is NOS Innocenti - which remarkably Scooter Restorations still have in stock, including screws washers and bushes. It amazes me that our stuff can be sitting on a shelf somewhere gathering dust for decades!
Regarding the fit of the paddle into the gear change, I know some people get these welded if there is any play, but I've had success in the past with filling this tube with silicone, the regular stuff you use for bathrooms. It holds the two parts well and it can be undone if you need to. I once had a headset which had an annoying tingle on the gearchange side which was cured with the silicone. In this case no need to, despite how it looks in the picture, the fit is tight.
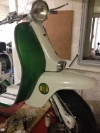
Some nice stuff delivered by the painter. as you can see a red/white colour scheme for this scooter.

- alex_hughes
- Posts: 93
- Joined: Mon Apr 24, 2017 8:42 am
Re: S3 TV175 build up
![]() by alex_hughes » Sun Dec 03, 2023 6:06 pm
by alex_hughes » Sun Dec 03, 2023 6:06 pm
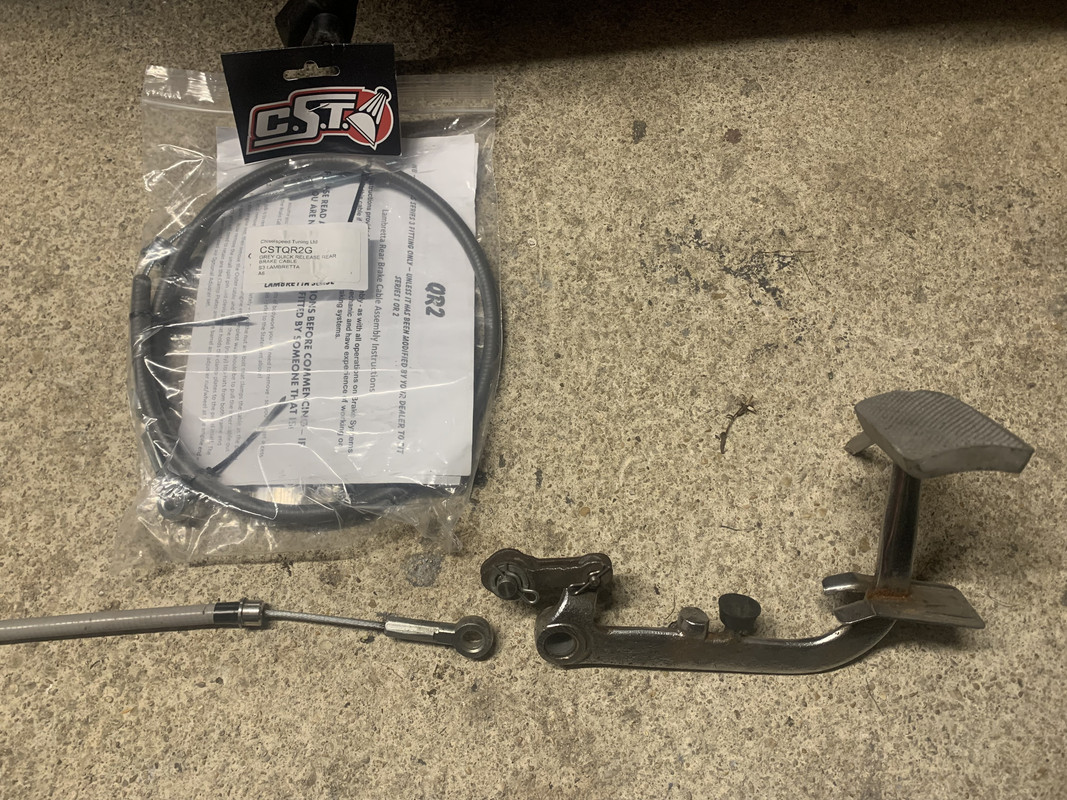

It's a QR2 rear brake cable.
I will point out immediately that these won't make your rear brake any better than standard, and they are expensive... but what a great design!
It's where I think Innocenti would have gone if they had continued to develop the Lambretta. Quick and easy to fit. No fiddling or fettling needed here. So easy to remove if you are dropping the engine (designed originally by Lambretta Sense for their racing team, and sold to support the racing project).
Mark, who developed this, told me they have sold over 1500 of these and he has never had a return.
PS This has sounded like an advert, I should mention that I'm not in any way connected with this product, I just love the elegance and simplicity of the design.
More cabling tomorrow.
- alex_hughes
- Posts: 93
- Joined: Mon Apr 24, 2017 8:42 am
Re: S3 TV175 build up
![]() by alex_hughes » Mon Dec 04, 2023 11:14 pm
by alex_hughes » Mon Dec 04, 2023 11:14 pm
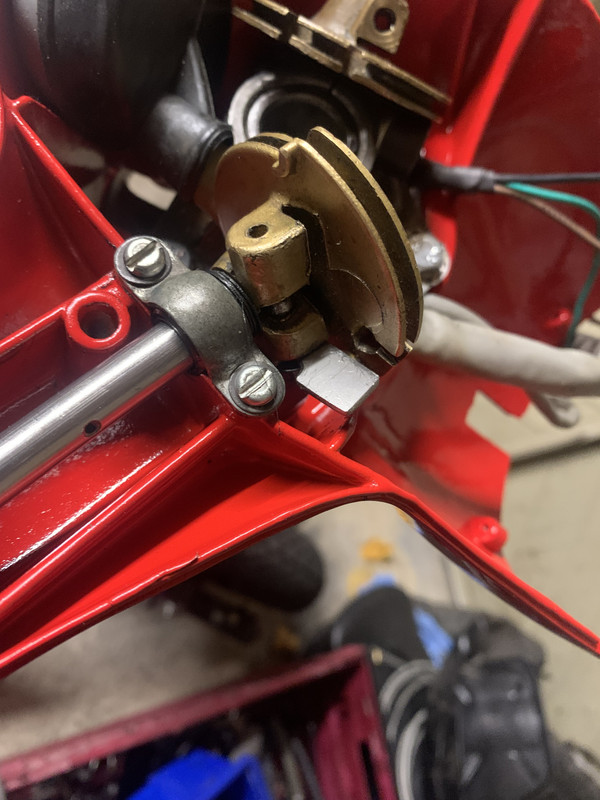
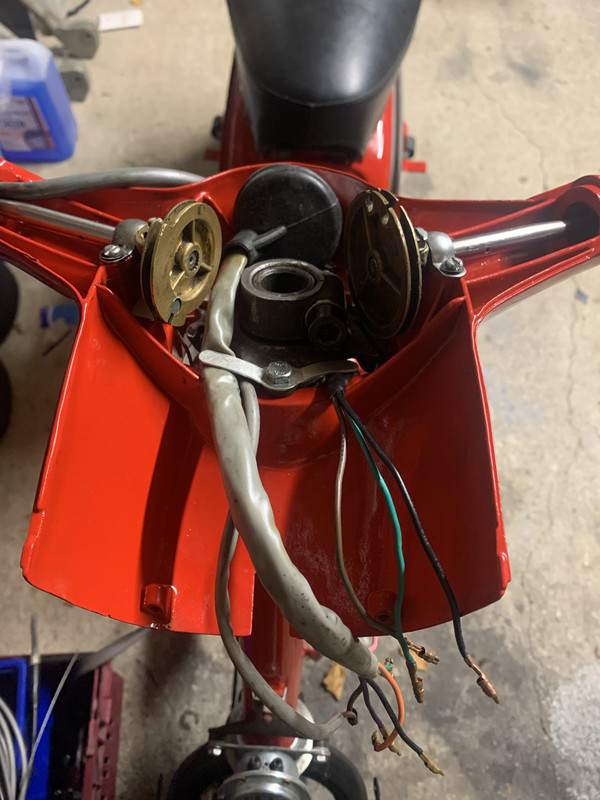
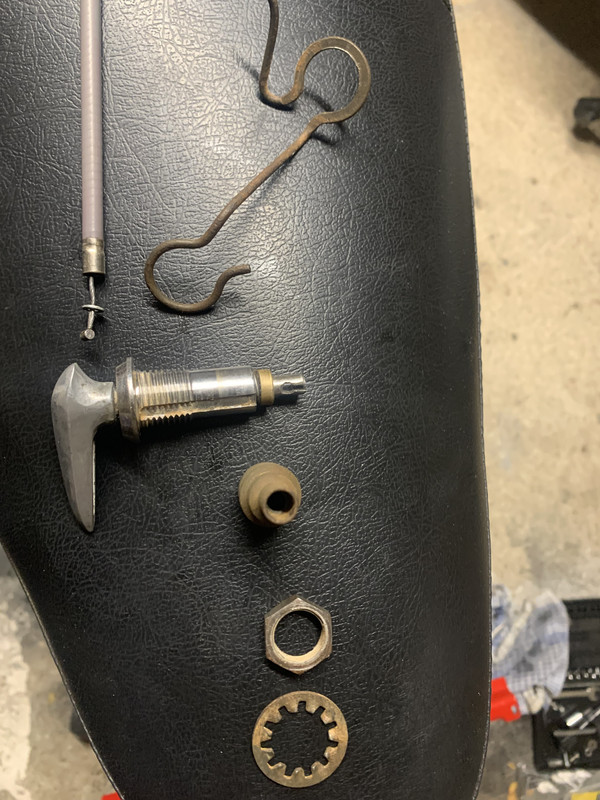
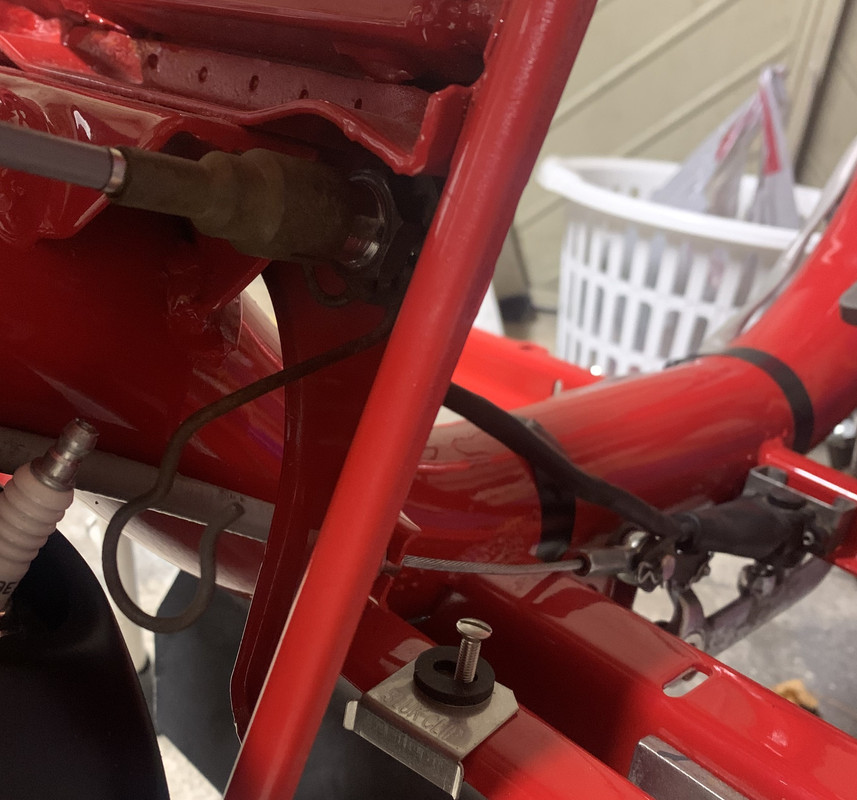
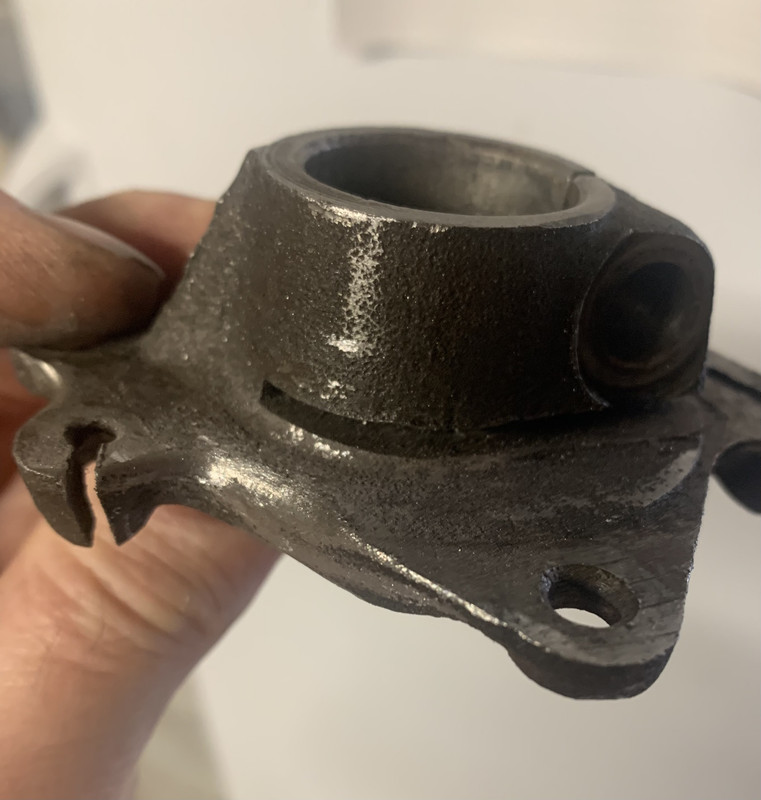
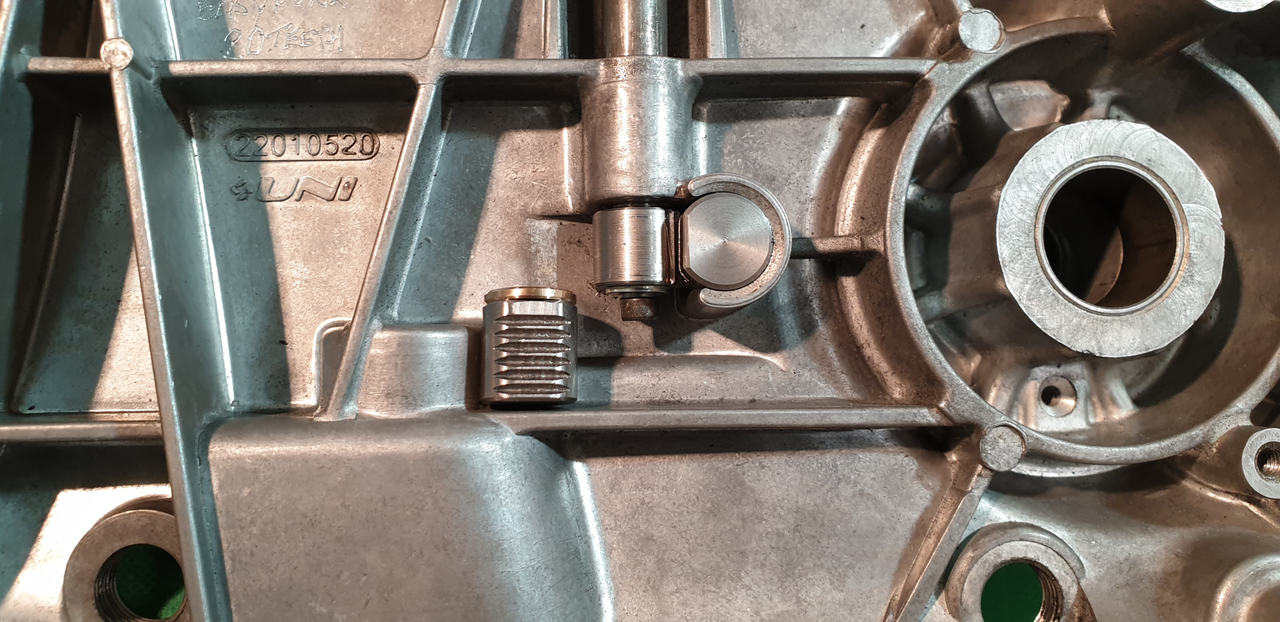
The correct mechanism for this bike would be metal body with nylon insert. As luck would have it I have one in a box of bits. Not correct is the wire retainer, this was discontinued a couple of months before this bike ran down the production line. However, I am planning to use it even if it is an anachronism- full reasoning for using this will follow when I cable up the clutch and gearchange. As it was attached to the mechanism I think that I must have removed them together from a scooter in the distant past, so they can continue living together. That's not the reason for using it but it's good karma, innit? I'm just going to give them a clean with a wire brush and then fit using deep 19mm socket.
Fitted in the picture below (you can also see the brake cable fitted - pedal will need to be removed before leggies go on, but it is there for when we get to testing the electrics).
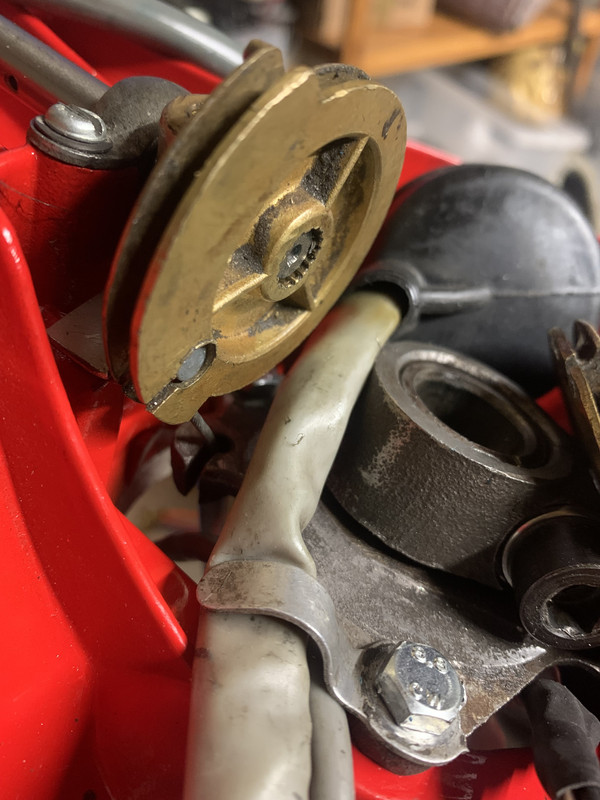
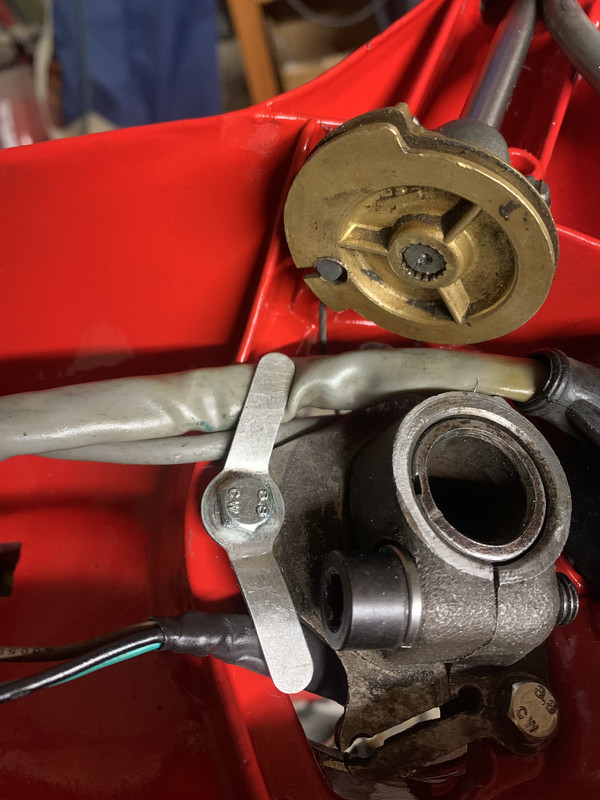
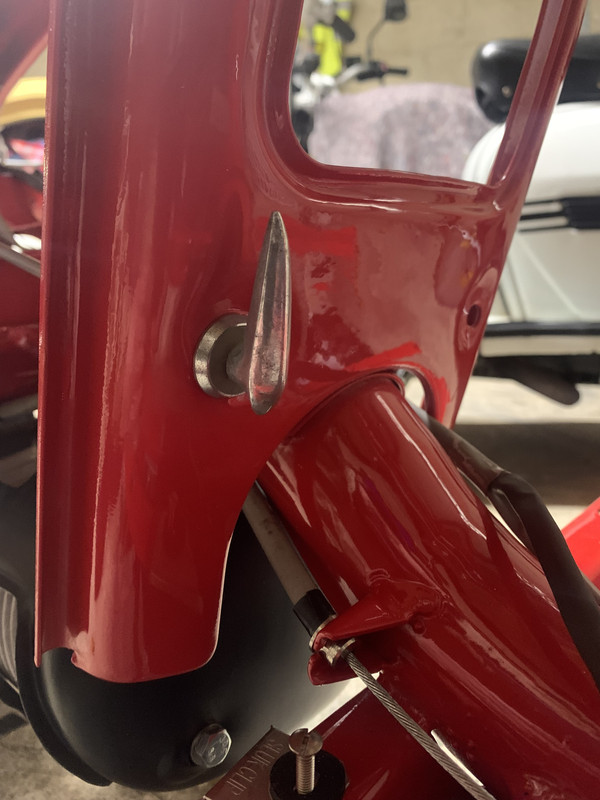
Front view... you can see the choke mechanism has metal body with white nylon insert. Also, this frame has the narrow arch at the front. Many small changes to the frame took place at the factory at the start of S3 TV175 production. Three different battery trays in 18 months! There's a whole other level of anorakness going on to document the changes. I'm obsessed enough with this Lambretta Archaeology to buy into it. Anyway I don't have the correct slightly narrower bridge piece for this arch. Swiss Tony does - but over £100 for a bridge piece? Standard bridge piece will fit. Except the holes for the fuel tap and choke are 3mm closer together on this age of frame, so when the levers are pointing downwards they may contact the bridge piece. I've read that you can use a S2 item, but I can tell you it doesn't fit. I guess we are all somewhere on the anorak spectrum when it comes to Lambretta?
I've put the choke cable on but since I have not yet fitted the non-standard carb, I'll need to check this cable is the right length for what I'm using. Another day.
Next up will be the gear change and clutch cables. I'm going to start by measuring the cables and comparing them to manufacturer specification. It won't matter if they are too long, but quite often I find them to be too short, and this can make them impossible to fit correctly. That's the first job tomorrow.
- alex_hughes
- Posts: 93
- Joined: Mon Apr 24, 2017 8:42 am
Re: S3 TV175 build up
![]() by alex_hughes » Wed Dec 06, 2023 8:13 pm
by alex_hughes » Wed Dec 06, 2023 8:13 pm
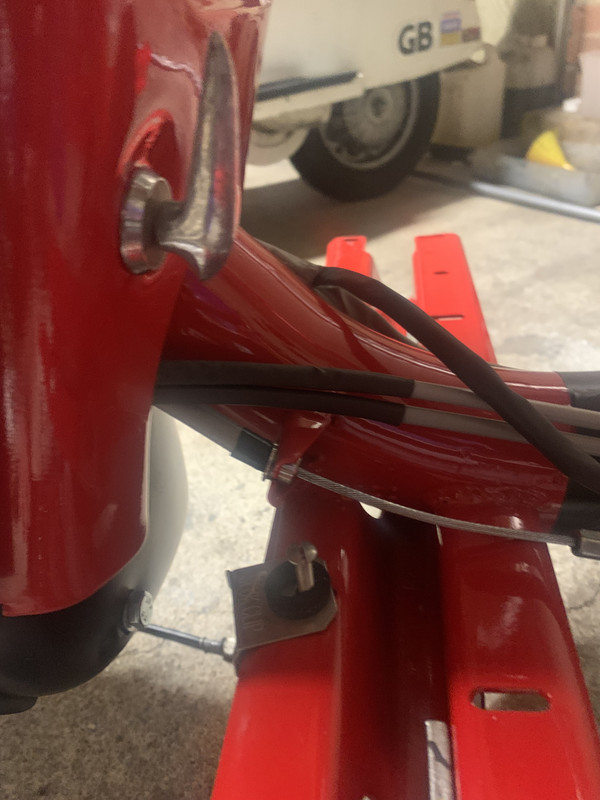
I've seen cables exiting the headset clamp like this...
and it does look tidy as they run down the fork tube, but really they want to be like this...
as this gives the inner a straight shot at the pulley wheel, so they cross as they leave the headset...
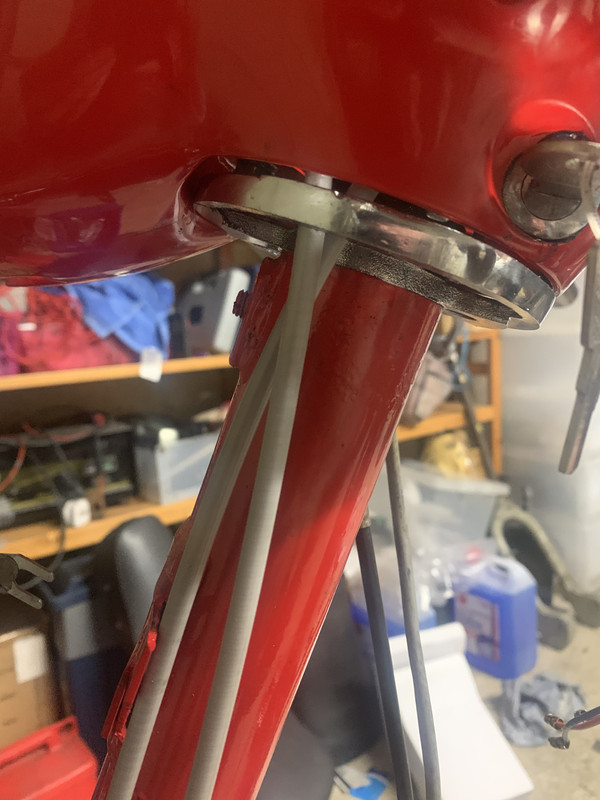
I've put some electrical tape around them where the fork tube joins the main frame, it will be enough for now.
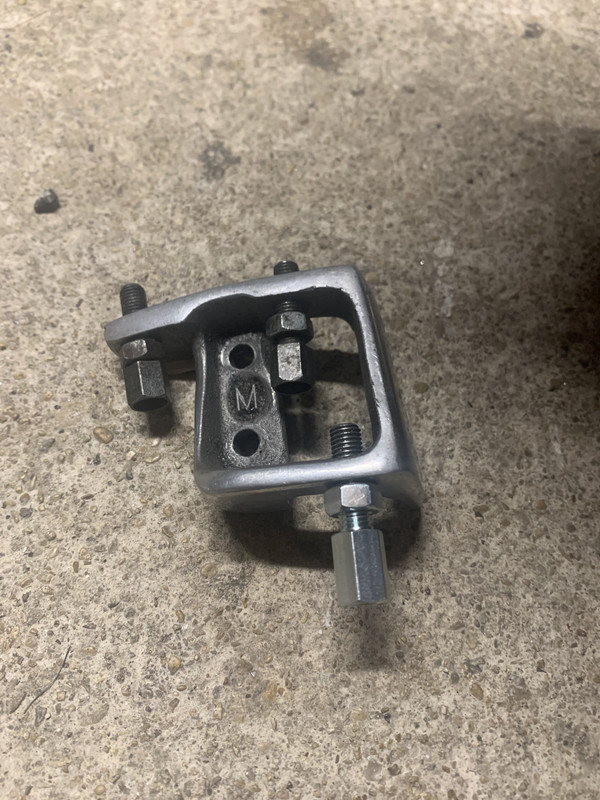
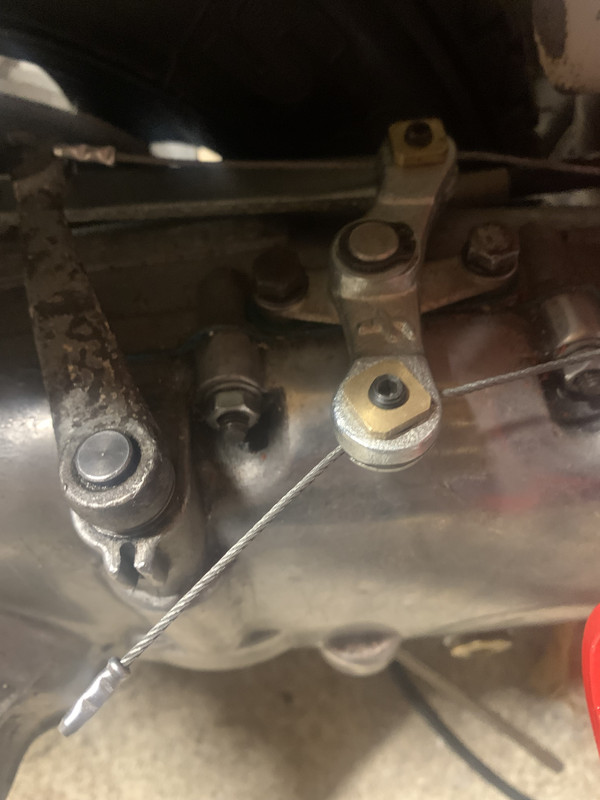
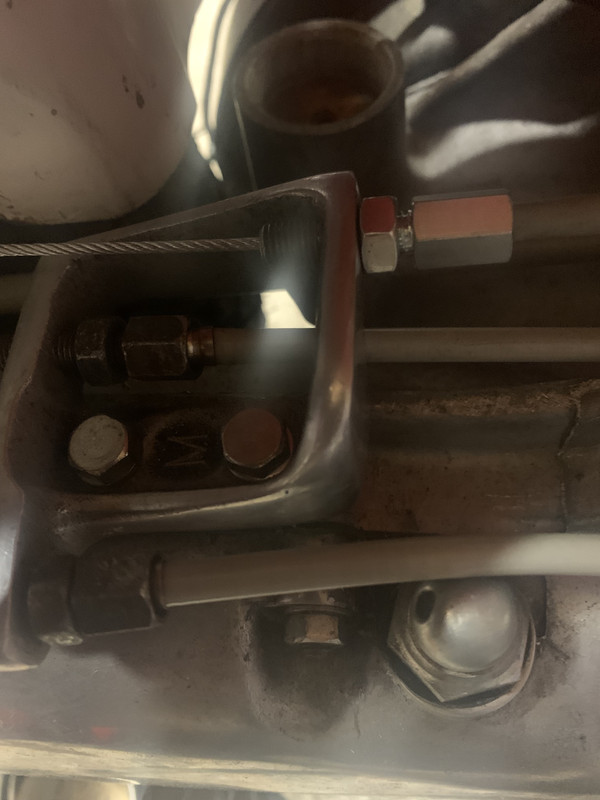
This is the cable adjuster block I'm using. It's a bit of an experiment. The adjusters are in different locations to standard, the idea being to give a straighter run to the cable and therefore less friction in the cable. It has an M on it, it may stand for Mark, but I can't be sure as it was on an engine I bought some time ago. I'm going to give it a try, if it doesn't seem to work I'll change it, but I'm sure the cable runs will be different.
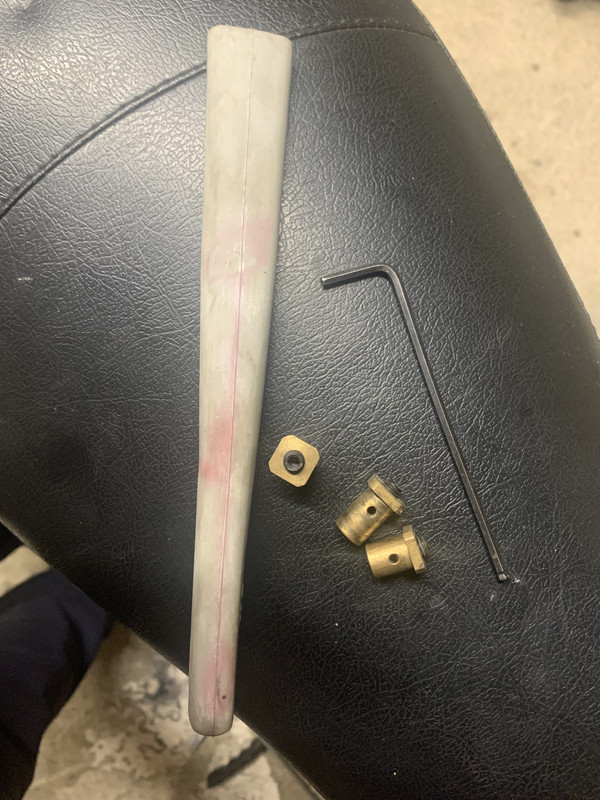
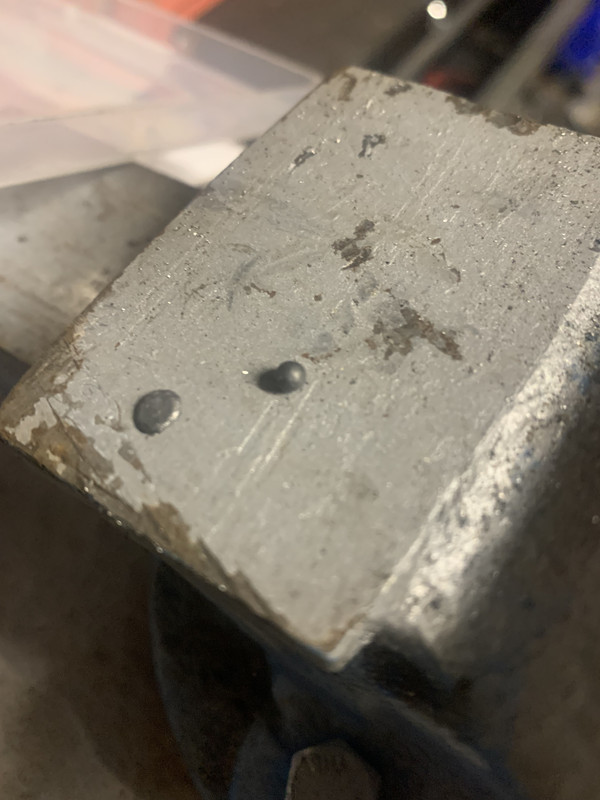
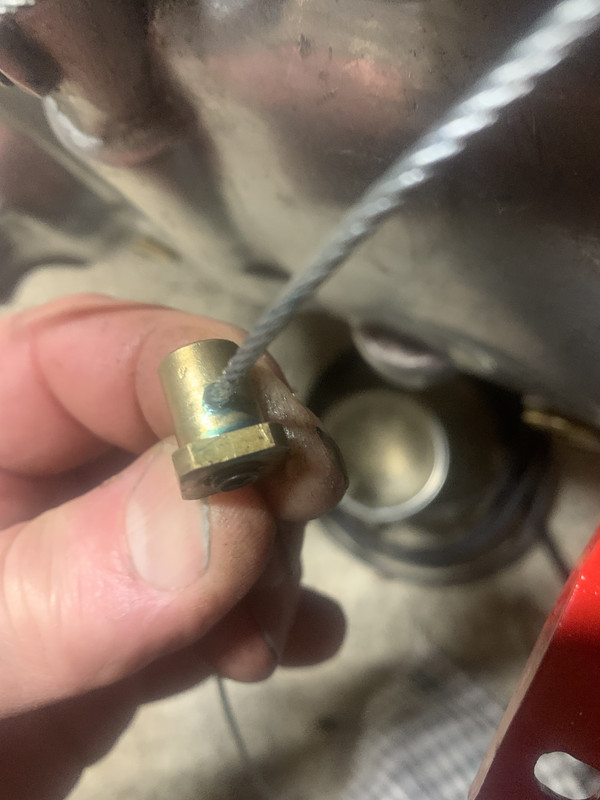
These trunnions are from SuperEibar. I like that they are easy to grip when doing the adjustment. When they came I was puzzled to find what appeared to be small ball bearings in the bag. I contacted Jaime (manufacturer) and he said that they were to make the clamping discs - you have to flatten them with a hammer. Not sure I would have ever worked that out - can I really be the only person who had to ask? Also in the picture is the plastic tube which goes in the middle of the run, but I've decided to omit it.
so fitted and cabled up it looks like this. I cut the cables short and use mountain bike ends to keep it tidy
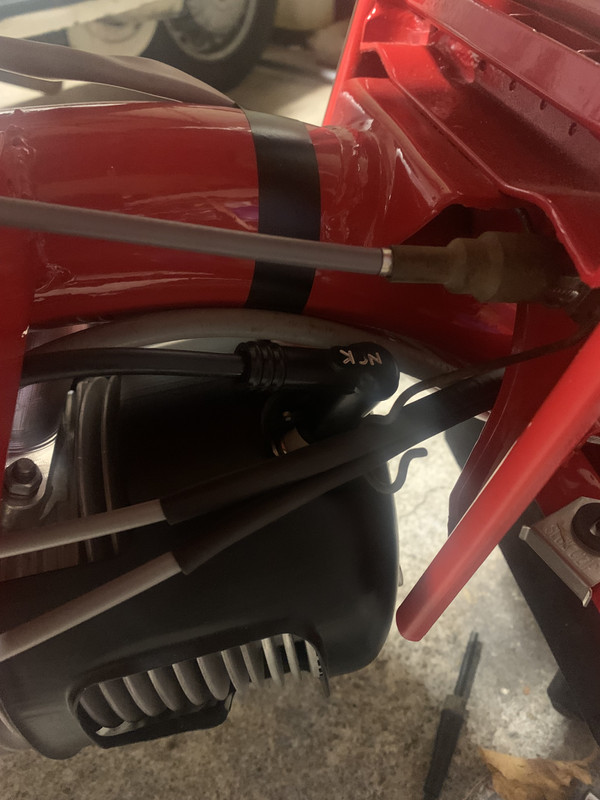
Here's the pictures of the cable run. Standard down to the loop. Not using the plastic tube but I've added a bit of protection to the individual cables with shrinkfit tubing. I'm going to monitor this to see how it wears.
Through the wire clip. I'll be interested to see how easy it is to get the sparkplug in and out when the toolbox is on - but this is giving the straightest run
and either side of the engine mount
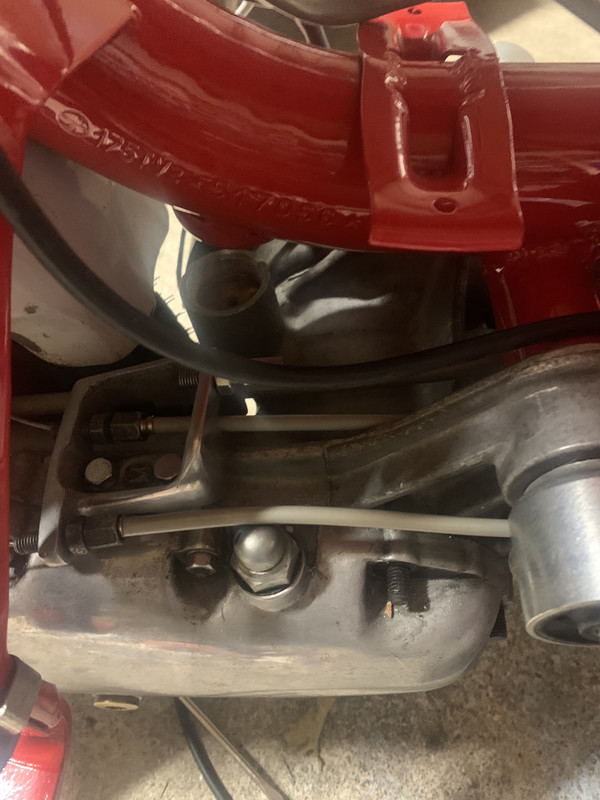
A bit of adjustment and its changing gear nicely. Clutch cable tomorrow, I want to spend some time getting it as right as it can be - there are a lot of variables and my intention is to optimise every one of them to give a light feel to the lever.
- alex_hughes
- Posts: 93
- Joined: Mon Apr 24, 2017 8:42 am
Re: S3 TV175 build up
![]() by nsaints » Wed Dec 06, 2023 10:39 pm
by nsaints » Wed Dec 06, 2023 10:39 pm
Wondering if I need another project
Don’t tell Sue!
Personal preference to finish cable ends is to solder at the point where I’ll cut the cable
Then to use my Park Tool CN10 cable cutters for a clean cut
The best and last bowden cable cutters I’ll have to buy
20+ years old and as sharp as the day I bought them
-

nsaints - Posts: 162
- Joined: Fri May 30, 2014 8:08 pm
- Location: Oxford
Re: S3 TV175 build up
![]() by Fast n Furious » Thu Dec 07, 2023 1:27 am
by Fast n Furious » Thu Dec 07, 2023 1:27 am
Unfortunately, if you are using stainless inner cables then the solder and cut method doesn't work very well. Best to use crimp on ferrules to stop these from fraying as shown above. ( I use electrical wire bootlace ferrules for this job)
For those who don't possess a decent pair of bowden cable cutters, then I would recommend sliding the ferrule on and crimp at the appropriate point, then cut through the ferrule with an angle grinder or Dremmel that's fitted with a slitting disc.
-
Fast n Furious - Posts: 1512
- Joined: Sat Nov 19, 2016 3:56 am
- Location: York
Re: S3 TV175 build up
![]() by shane BBoys » Thu Dec 07, 2023 4:11 pm
by shane BBoys » Thu Dec 07, 2023 4:11 pm
Fast n Furious wrote:Luv the credit card anti scratch method. Always guaranteed to work best when using the wifes cards.....

Beat me to it.
-
shane BBoys - Posts: 480
- Joined: Sat Sep 06, 2014 5:46 pm
- Location: Bradford
Re: S3 TV175 build up
![]() by alex_hughes » Thu Dec 07, 2023 11:08 pm
by alex_hughes » Thu Dec 07, 2023 11:08 pm
I'm going to put this into context by explaining that I have difficulty with my left hand grip following a teenage scooter accident which over the years has developed into arthritis, so I do everything I can to keep the clutch as light as possible. I'm working on making everything as optimal as it can be, believing that even tiny improvements can accumulate to make a noticeable difference.
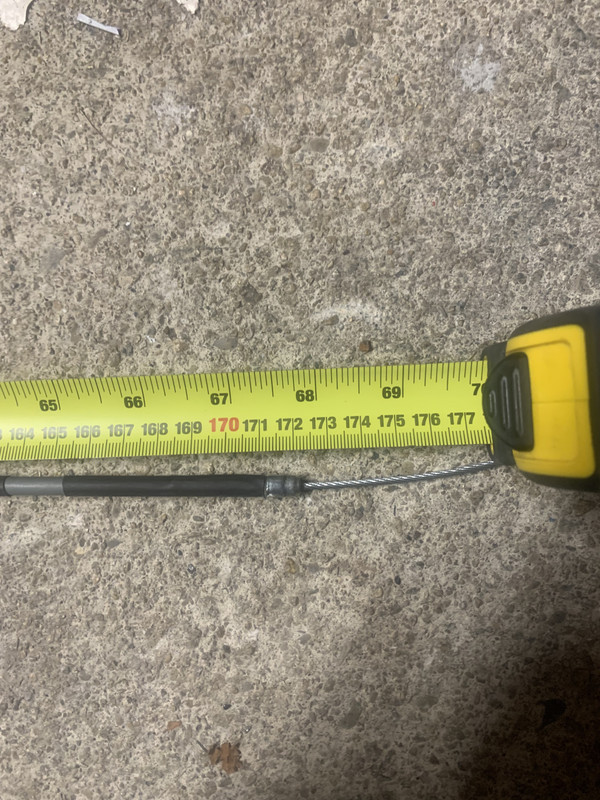
I start with a good quality cable with a free flowing inner, and check it is the right size. Depending where you look you will see that a S3 clutch cable is either 1720mm long or 1700mm long. As long as it's not less than 1700mm it should fit. There was a batch sold by a dealer on the south coast which were 1680mm long and they just didn't fit well enough for the ends of the cables to locate into the sockets. So worth checking.
This one is fine...
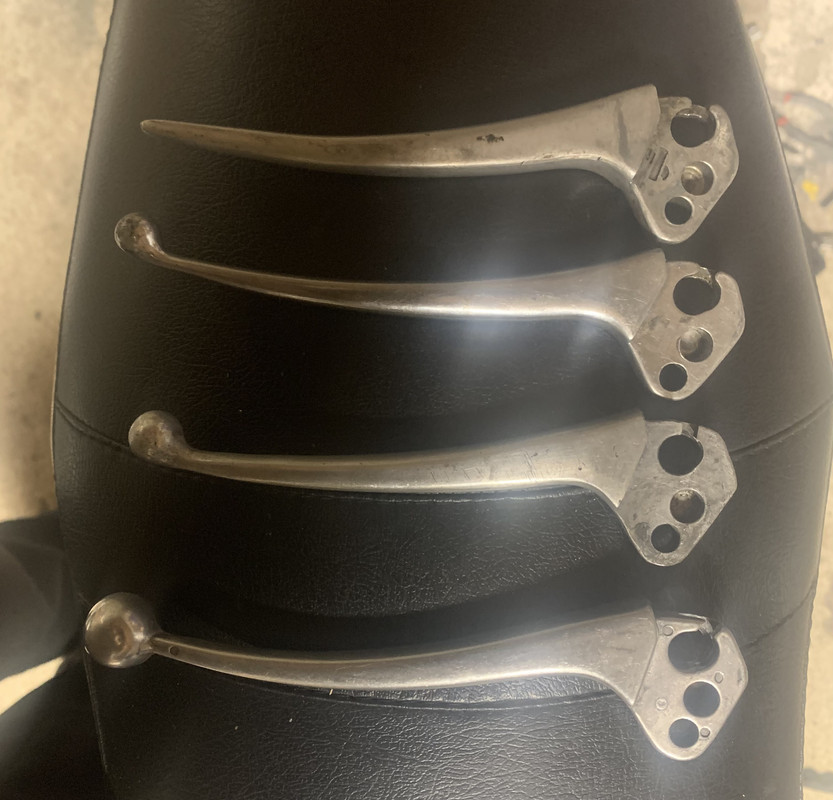
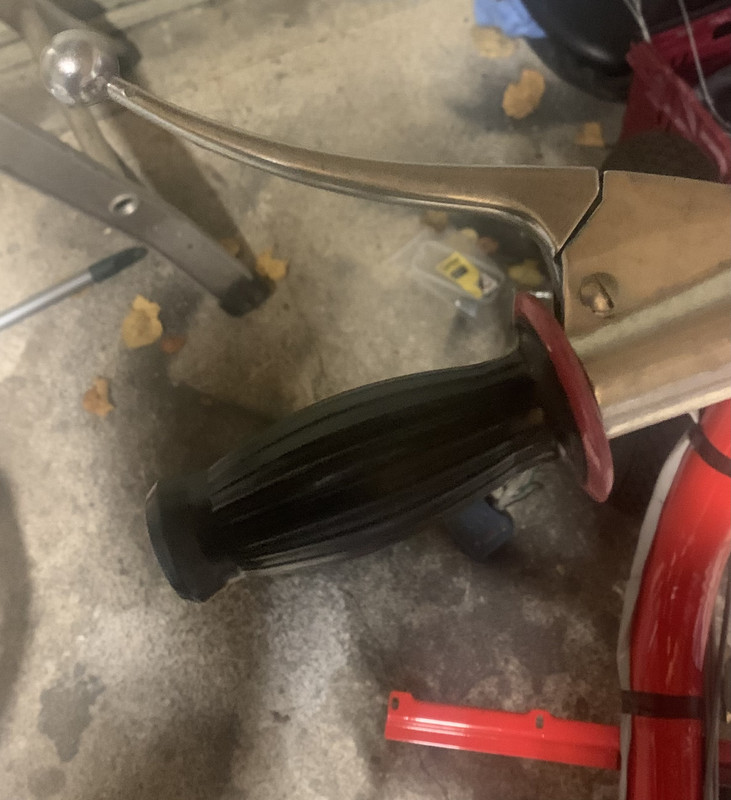
Earlier in the build I selected a lever with minimal wear and a good fit into the support. Below, the Italian ball ends are spherical and Spanish are tear drop shape, the aftermarket Cuppini are the ones I'm going for. They pull the cable a fraction less than a standard lever which makes them a little lighter in action. I would say that they are angled slightly further away from the headset so you need longer fingers to reach...
Lots of grease on all of the moving elements of the lever. I make sure the cable barrel is greased too since it rotates slightly against the lever as it's pulled.
This is the grip I'm using. I find them really comfortable but if you use them and have clutch drag - it may be because the fatness of this grip stops the lever from moving as far as it should. Worth then changing to standard to see if it cures the problem. We will see how it goes with these.
Modern cables are slightly thicker than the originals and in the Sticky book there is a tip about dremeling away part of the headset to create a bit of room for the cable. MBs slightly waisted control rods mean this doesn't need to be done, there is plenty of room on the left hand side. The cable has to follow as smooth a path as possible, and if you think about it the tightest curve it follows is where it drops down out of the headset. It is amazing how much resistance this bend adds to the pull. So I like to give the cable a slightly easier time as it negotiates this bend, so before I installed the headset clamp I rounded off this section.
Loose cable runs down to the adjuster, and as previously mentioned it's a block which hangs the clutch adjuster over to one side for a straight run at the lever. You can see that I'm using a non- standard adjuster. The idea of these is to make sure the cable goes through the very centre of the adjuster, not rubbing on the sides. The straighter cable again should keep everything light. These came from Rimini but you can get them in the UK now
Finally the end trunnion. Worth making sure it is a good fit in the lever, able to rotate slightly, and grease this too.
So its all connected up. Standard clutch with Torbay springs. Scootering Dan reckoned standard Lambretta spring are good for 13hp, this motor should be slightly better than that, but not in need of full on race type springs. Torbay's are somewhere in the middle. So I tried it at the lever and it felt odd. Looking back I realised I hadn't fitted the return spring on the engine. Doh. A few minutes later I found one in a box of bits and now it feels great.
One last thing I would say about keeping my clutch light. I have a couple of engines fitted with the Chiselspeed Easy Clutch and I do really like them. Expensive, but in my case worth every penny.
Next I will position the throttle cable and then check the electrics. I like to check the electrics work before the legshields go on, as if the loom needs work it's best to do it while its easier to access.
- alex_hughes
- Posts: 93
- Joined: Mon Apr 24, 2017 8:42 am
Re: S3 TV175 build up
![]() by nickw » Fri Dec 08, 2023 11:12 am
by nickw » Fri Dec 08, 2023 11:12 am
- nickw
- Posts: 650
- Joined: Sat Jun 07, 2014 10:44 am
- Location: Chesterfield
Re: S3 TV175 build up
![]() by Storkfoot » Fri Dec 08, 2023 1:05 pm
by Storkfoot » Fri Dec 08, 2023 1:05 pm
I definitely agree that the Chiselspeed set up works very well but I fail to be convinced by the non standard cable adjuster blocks I have tried.
-
Storkfoot - Posts: 2123
- Joined: Fri May 30, 2014 8:59 pm
- Location: Merseyside
Re: S3 TV175 build up
![]() by gizmo » Fri Dec 08, 2023 1:21 pm
by gizmo » Fri Dec 08, 2023 1:21 pm
- gizmo
- Posts: 634
- Joined: Sat May 31, 2014 6:43 pm
Who is online
Users browsing this forum: No registered users and 58 guests