LCGB Forums

The ability to post messages is restricted to LCGB members. Any questions contact us at lcgbadmin@googlemail.com

S3 TV175 build up

LAMBRETTA ONLY PLEASE
Show your Lambretta off to us all with pictures of your pride and joy.

S3 TV175 build up

Postby alex_hughes » Fri Nov 17, 2023 11:34 pm

Image


Planning to build this frame up to use as my main rally scooter in 2024.

The intention is to do something each day and post a photo showing some progress, however small. Decided on this to give me a record of the build, and also an incentive to keep at it.

Thanks to Andy (Nsaints on here) who offered help on how to post images.
alex_hughes
 
Posts: 93
Joined: Mon Apr 24, 2017 8:42 am

Re: S3 TV175 build up

Postby alex_hughes » Sat Nov 18, 2023 12:00 am

Image
alex_hughes
 
Posts: 93
Joined: Mon Apr 24, 2017 8:42 am

Re: S3 TV175 build up

Postby Scooterslag » Sat Nov 18, 2023 1:01 am

Sounds like a great project, just in the middle of a build myself (serveta bitza ) and like you- I try and do something everyday not matter how small. Be it fit a washer or prep a piece of panel work for paint. Not doing too bad though I do get the odd lazy day ;) good luck with the build and look forward to following your progress. Cheers Paul
User avatar
Scooterslag
 
Posts: 403
Joined: Sun Jun 01, 2014 4:29 am

Re: S3 TV175 build up

Postby Knowledge » Sat Nov 18, 2023 8:46 am

I am looking forward to following this Alex.

I have a TV175 SIII which is taking far too long to get back on the road so I might try to race you as some competition is useful. :)

I do hope you will be keeping the engine as a 175 with the long conrod.

Good luck.
User avatar
Knowledge
 
Posts: 1957
Joined: Sat May 31, 2014 11:42 am
Location: Ipswich

Re: S3 TV175 build up

Postby alex_hughes » Sat Nov 18, 2023 10:42 pm

Thanks for the encouragement guys.

A bit of background... I have way too many spares after a lifetime of dismantling Lambrettas. A friend commented that I could build several scooters with what I have in my shed and that planted a seed... I just needed some frames.

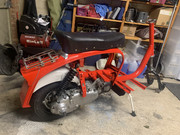
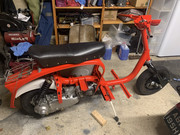
I came across this one in the possession of a dealer down in WSM, famous for his NOS. I had some rare stuff he wanted (no he doesn't have everything) so a trade was done. It is one of the nicest frames I've come across, it has not been messed with, nice and straight and free from corrosion. Dean Stradling checked it on his jig but it needed nothing. Having said that, its not going to be a trailer queen. I'm building it to ride it and so I will be pragmatic when I have to be.

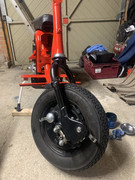
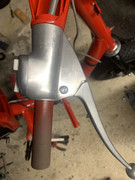
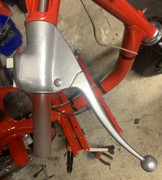
The way I do my scooters is first to build some sub assemblies. The engine, forks, front disc and seat have all been reconditioned and are ready to bolt on. Although I prefer to assemble the headset on the bike... I don't know why but I always do.

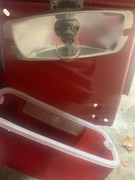
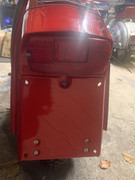
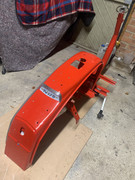
So my fitting order is rear badge holder (why this is first I don't know but it is, and I'm not the only one to do this) stand, rear mudguard, rear light unit, rear seat catch, rack.

Image

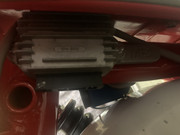
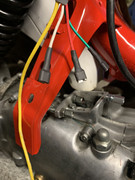
Next to be fitted is the engine. I do this by sitting the engine (back wheel fitted) on the floor, and then dropping the frame over it. The frame is lighter and easier to move around... engine bolt in, rear shock on and stand it up.

Image

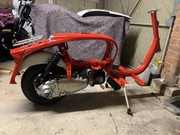
The engine case is an unstamped NOS early S3 case and it is fitted with an RT195 kit. 110mm Yamaha rod on SIL webs. I was tempted to use an original TV175 barrel but I'm at the start of running in an iron barrel on another bike and I couldn't bear running in two iron barrels at the same time.

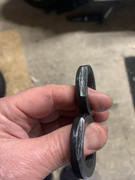
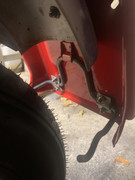
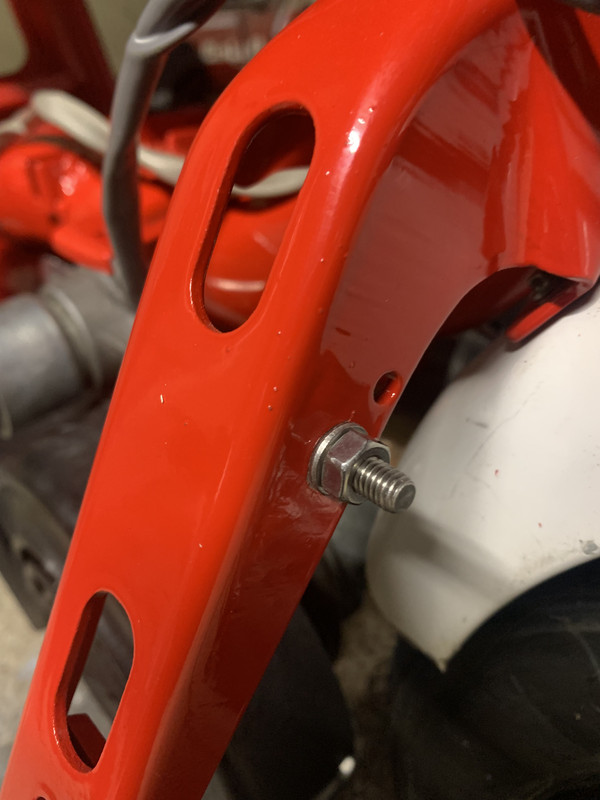
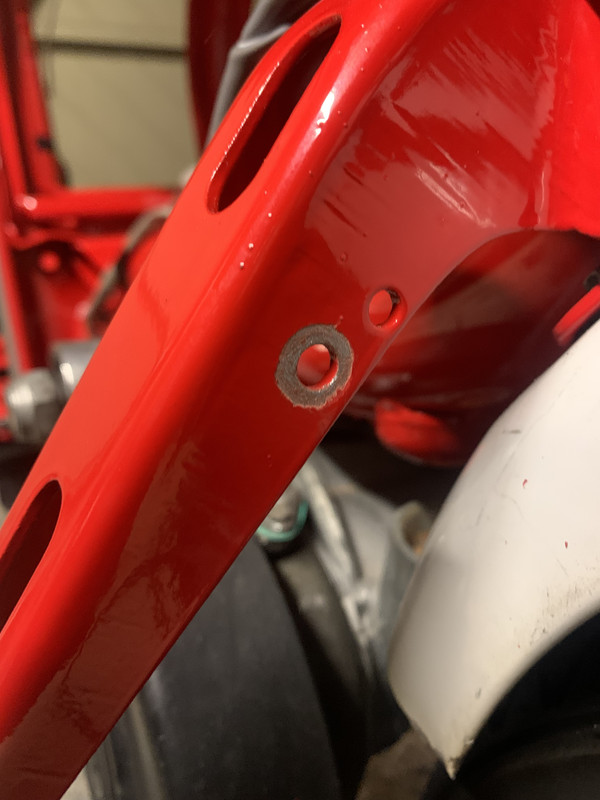
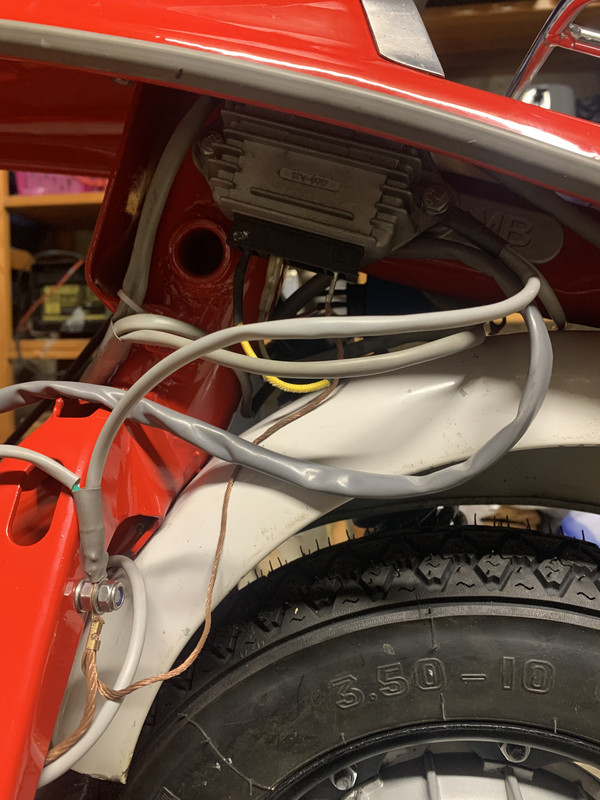
The frame came with a couple of components fitted including the rear mudguard. I'm leaving this as original paint as a sort of reminder, and I'm re-using the original nuts and bolts. I figure they have all been together for 60 years, be a shame to split them up now.
alex_hughes
 
Posts: 93
Joined: Mon Apr 24, 2017 8:42 am

Re: S3 TV175 build up

Postby alex_hughes » Sun Nov 19, 2023 1:36 pm

Seat on... it will give a bit of protection to the loop while I am working around the bike.

Forks (as previously mentioned they were built up before starting the main assembly) ready to go in. You can see that I don't use the caged bearing, preferring instead loose ball bearings. If only I could find them... Not having things to hand is what really adds time to a build. Perhaps I will make the effort to sort out what I need the day before I plan to fit it.

Image
alex_hughes
 
Posts: 93
Joined: Mon Apr 24, 2017 8:42 am

Re: S3 TV175 build up

Postby alex_hughes » Tue Nov 21, 2023 12:22 am

So eventually I found the ball bearings, and what I needed to fit the forks. One of the problems with building a bike from bits is that you don't know if everything will fit. For instance, the top race seemed to fit fine, and the flats were big enough for the spanner to grip. But with the washer and the lock ring fitted there wasn't enough room for the spanner to slide into the gap. So actually the top race didn't fit fine. Fortunately I had a spare to hand, it would have been a bit of a drag to have to wait on the postman.
Image

Front brake already assembled so straight forward to fit it and the front wheel. Nice new tyres both ends.
Image

And then the headset base. At this point its beginning to look like a scooter and I can push it around the garage, so a happy milestone.

Image

I'll start on the electrics tomorrow.
alex_hughes
 
Posts: 93
Joined: Mon Apr 24, 2017 8:42 am

Re: S3 TV175 build up

Postby alex_hughes » Tue Nov 21, 2023 6:25 pm

Rear light brake switch installed. Another component which was on the frame when I got it. Works fine so no need to replace it. As before used original nuts and washers.
The black loom is shrink wrap to cover a bit of broken outer.

Image

Loom laid out on frame and temporarily held in place with electrical tape. That's it for today. Tuesday night is our scooter club night(Oxford Road Runners), we meet on a Tuesday evening to drink beer, eat pies, and talk nonsense. So I'm off out.

Back on with this tomorrow.
alex_hughes
 
Posts: 93
Joined: Mon Apr 24, 2017 8:42 am

Re: S3 TV175 build up

Postby dickie » Tue Nov 21, 2023 9:31 pm

Is the brake actuator an Innocenti or remade one?

Looking good by the way. I've only once built a lambretta completely from parts, it's a true bits, and somehow found it to be the most enjoyable build ever and the longest I've ever kept one.
dickie
 
Posts: 1758
Joined: Thu Oct 02, 2014 12:32 pm
Location: Tyne and Wear

Re: S3 TV175 build up

Postby alex_hughes » Tue Nov 21, 2023 10:40 pm

Hi Dickie, thanks for the encouragement. Yes there is something very satisfying about a total build, where you know every nut and bolt on the bike. Certainly makes me feel it's 'my bike'.

The disc brake came as an complete component in an unrestored state and included the actuator. I would guess that it's the actuator which was fitted in the factory... it looked tatty enough! But it cleaned up ok and it all works fine. I built the brake without the big circlip in the middle, we will see how that goes.
alex_hughes
 
Posts: 93
Joined: Mon Apr 24, 2017 8:42 am

Re: S3 TV175 build up

Postby dickie » Wed Nov 22, 2023 6:12 am

The reason I ask is that I fitted a Vietnamese disc brake on a build a couple of years ago and found it to be awful. The reason is that the dimples are concave rather than conical on the original which means that the applied force per Newton of force at the bar actually reduces as you pull the lever! Another problem is that the circlip groove is machined too deep, meaning that the disc is held too tight on the pins. I fixed that issue by bending the circlip in a vice so that it didn't push as hard on the pins. Just an option if you find the rattle unbearable.
dickie
 
Posts: 1758
Joined: Thu Oct 02, 2014 12:32 pm
Location: Tyne and Wear

Re: S3 TV175 build up

Postby alex_hughes » Wed Nov 22, 2023 7:13 pm

Starting at the rear, back light fitted. I'm using one of these gaskets because it came with the lens... possibly the most discarded part on a Lambretta?

Image

Whilst I was down there I decided to fit the side panel spring. You can see it tucked under the little hook. So many of these have been cut off over the years - I've done it myself - to make it easier to get the back wheel off. The factory stopped using them mid 1963. I should have cut it off... but it's so original... I may yet take the grinder to it...

Image

The view at the rear... looking at the picture I can see I've lined up the screws even though nobody will see them once the number plate is on. Not exactly sure why I've done this but somehow it seems better than them being random.

Image

Fitted the MB bracket for the CDI and regulator. I really like the MB version because it puts the regulator further away from the mudguard and this makes it easier to push the wires on. The only thing I don't like about it is the way it has 'MB' cast into both sides, because it doesn't look like an original fitment.

Image

Wiring up the CDI next. Engine is fitted with a BGM stator, so the wires will be way too long and will need to be shortened.
alex_hughes
 
Posts: 93
Joined: Mon Apr 24, 2017 8:42 am

Re: S3 TV175 build up

Postby alex_hughes » Thu Nov 23, 2023 7:57 pm

Not too much time available for scooters today so just the wiring for the CDI and regulator.

As expected the wires are too long, so I shortened them. Oddly the outer is not plastic - it is woven. Not easy to strip, but manageable.

Image

I like this sort of terminal, though it is a bit tricky compared to crimps. Got the tool from Mr Knowledge at a parts fair if I remember rightly.

The plastic covers which are most commonly used with these terminals can be a bit thick to push into the CDI so I usually use some heatshrink to fashion a slimmer version.

Image

CDI is rubber mounted. These are the rubbers from a bridge piece I think... but it works to reduce the vibration and hopefully extend the life of the unit. As an aside, I recommend a youtube video by a club mate Nobby, on youtube he goes by the name of Team Pacemaker. He attempts to rescue a wreck and ride it to a Belgian rally... there is a moment of jeopardy when his CDi fails. A good watch if you enjoy Lambrettas served with a bit of humour, and it was a good rally.

Image

Also connected the feed to the regulator and that's the finished job for today.

Image

I'm waiting for the earth wire to arrive, so I think tomorrow I'll start fitting out the headset.
alex_hughes
 
Posts: 93
Joined: Mon Apr 24, 2017 8:42 am

Re: S3 TV175 build up

Postby Storkfoot » Thu Nov 23, 2023 9:35 pm

A heads up for the correct disc brake cables. They have been out of stock everywhere in UK for quite a while but CamLam have just got some in. I can’t vouch for how good they are but I’ll be ordering a couple in the next few days.

https://www.lambretta.co.uk/product_inf ... 197ea87200

If you want your photographs to appear as full size from the hosting site you use, click on “hot link for forums” ;)

Keep up the good work :)
User avatar
Storkfoot
 
Posts: 2123
Joined: Fri May 30, 2014 8:59 pm
Location: Merseyside

Re: S3 TV175 build up

Postby alex_hughes » Thu Nov 23, 2023 11:23 pm

Thanks for the photo tip and the encouragement!
alex_hughes
 
Posts: 93
Joined: Mon Apr 24, 2017 8:42 am

Re: S3 TV175 build up

Postby alex_hughes » Fri Nov 24, 2023 9:09 pm

Started on headset.

I want to use the Cuppini big ball levers on this scooter. As well as the safety aspect of not having a pointed potential stabbing thing on the front of the bike they are supposed to give a little bit more clutch pull due to the position of the cable barrel being further away from the fulcrum. Hope that's clear :/

Anyway, despite the reputation of the manufacturer they were not a good fit so fettling ensued. They are better than they were, but perfection will have to wait for another day.

Image
Image

I've also added the steering lock, ignition key and light switch. (Lets go large, thank you Paul)
Image

A couple of hickups... the aluminium cable clamp broke on one side...I don't have a spare. An easy fix, and that bolt will need to be loosened off for the headlight earth. More of a surprise was the throttle rod. When it is inserted into the tube it is clear that the rod is not central so it doesn't slide straight through the bushes, meaning everything clamps up and won't rotate easily. So another order for parts, I hate to think how much of the budget goes on postage.
Image

Mr B has sent his super deluxe earth wire and I'm already having my doubts about it, but that is for tomorrow.
alex_hughes
 
Posts: 93
Joined: Mon Apr 24, 2017 8:42 am

Re: S3 TV175 build up

Postby nickw » Fri Nov 24, 2023 10:19 pm

This is good, I do like to watch a build come together and this has not been happening a great deal nowadays (although Paul has been very good). Thanks for the heads up on the brake cable. Ordered straight away, cheers. Keep the build coming
nickw
 
Posts: 650
Joined: Sat Jun 07, 2014 10:44 am
Location: Chesterfield

Re: S3 TV175 build up

Postby alex_hughes » Sat Nov 25, 2023 7:24 pm

Deluxe earth wire from Mr B... As mentioned I really like his CDi and regulator bracket, I though this would complement it.

Image

From the top it will be engine to regulator to CDi to back light according to his website. In fairness, the website doesn't say there is a direct contact to the frame, I just thought there would be. And the connector to the regulator should be a spade not a ring. You can't really see what is what on the website photo. Also looking at the lengths of the individual runs it seems to me that the loop for the regulator will easily connect to the frame where the junction box used to live. It's a bit of a muddle really.

Belt and braces solution... I'm going to use this plus a standard earth wire. Standard earth wire installed as normal. Fancy earth wire going engine to frame to regulator bolt to back light. This scooter is gonna be so earthed!

So having said I want an earth position on the frame I need to remove some of the fresh paint.

Starting with a nut/washer/bolt here...

Image

Using a stanley knife blade I score around the washer, remove nut/bolt/washer, and then as carefully as possible scrape away all the paint which was covered by the washer. To me this is the neatest way of making the earth connection on the frame.

Image

Reinstall bolt, this will always be bolted up from now on. On to the end of this bolt go the connections to the frame...

Image

So you can see where I've joined the regulator and the earth/frame... it looks like a lot of wires. Once the fuel tank is in I will probably shorten and tidy them.

Superdeluxe engine connection (standard wire goes to mag housing bolt)...

Image

and CDi earth wire under the bolt

Image

I could leave the wire from rear light to CDi bolt in place and cut off the rest of the deluxe... I may yet do this when I'm tidying
alex_hughes
 
Posts: 93
Joined: Mon Apr 24, 2017 8:42 am

Re: S3 TV175 build up

Postby dickie » Sun Nov 26, 2023 10:38 pm

Just a small point. The bare metal where you've scraped off paint will oxidise over time. You can easily stop this by applying a little grease before you fit the bolt and washer etc. Don't worry about using a specific type of grease, the high spots displace it all and it sits in the low spots after you've tightened it up.

Great thread. You're inspiring me to pull my finger out and finish mine.
dickie
 
Posts: 1758
Joined: Thu Oct 02, 2014 12:32 pm
Location: Tyne and Wear

Re: S3 TV175 build up

Postby alex_hughes » Tue Nov 28, 2023 12:00 am

I’m currently waiting on parts.
And it’s cold in my garage.
And I’ve been building a super shed, which my other half describes as ‘the new yoga studio’ and which I describe as ‘the new scooter house’. Ah, married life.

More progress will take place when new headset rods are delivered. Watch this space.
alex_hughes
 
Posts: 93
Joined: Mon Apr 24, 2017 8:42 am

Next

Return to Show Your Ride

Who is online

Users browsing this forum: No registered users and 49 guests