LCGB Forums
The ability to post messages is restricted to LCGB members. Any questions contact us at lcgbadmin@googlemail.com
S3 TV175 build up
Re: S3 TV175 build up
![]() by gaz_powell » Sat Dec 30, 2023 7:15 pm
by gaz_powell » Sat Dec 30, 2023 7:15 pm
- gaz_powell
- Posts: 3094
- Joined: Sat May 31, 2014 7:56 pm
- Location: Hartlepool
Re: S3 TV175 build up
![]() by alex_hughes » Mon Jan 01, 2024 7:06 pm
by alex_hughes » Mon Jan 01, 2024 7:06 pm
This lip here -

Anyway... back to me...
- alex_hughes
- Posts: 93
- Joined: Mon Apr 24, 2017 8:42 am
Re: S3 TV175 build up
![]() by gaz_powell » Mon Jan 01, 2024 7:15 pm
by gaz_powell » Mon Jan 01, 2024 7:15 pm
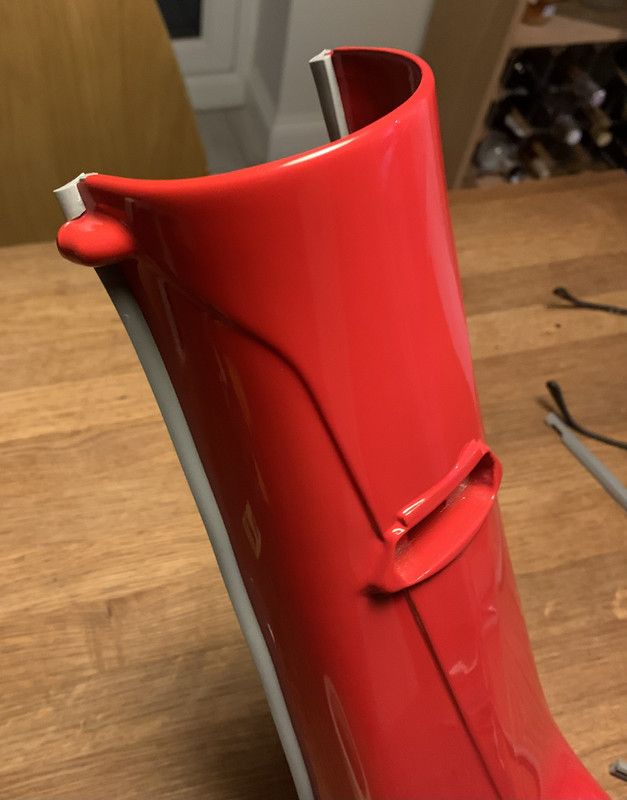
alex_hughes wrote:Ah, working with SIL panels... always a challenge. I built an Indian GP200 up from a frame using SIL NOS and struggled with all of the panels, but a good tip I got from Jon at Urban Scooters in Birmingham helped me fit my side panels. He pointed out that a on a lot of SIL frames (including mine) the lip which holds the side panel on was too high and needed filing down for the panels to sit down far enough. Don't know if this will help on your frame but worth comparing to an Italian or Spanish frame if you can.
This lip here -
Anyway... back to me...
Thats an interesting point, will have a look at the coming weekend, thanks.
- gaz_powell
- Posts: 3094
- Joined: Sat May 31, 2014 7:56 pm
- Location: Hartlepool
Re: S3 TV175 build up
![]() by alex_hughes » Mon Jan 01, 2024 8:09 pm
by alex_hughes » Mon Jan 01, 2024 8:09 pm
MB supply these oversize and without cutouts, but this means you can trim them to fit the horncasting quite precisely.

Fitting the parts to the scooter - Stuart Owen suggests loosely fitting the mudguard to the horncast and offering them up together - but I find this a bit unwieldy, so I start by fit the horncasting on it's own.
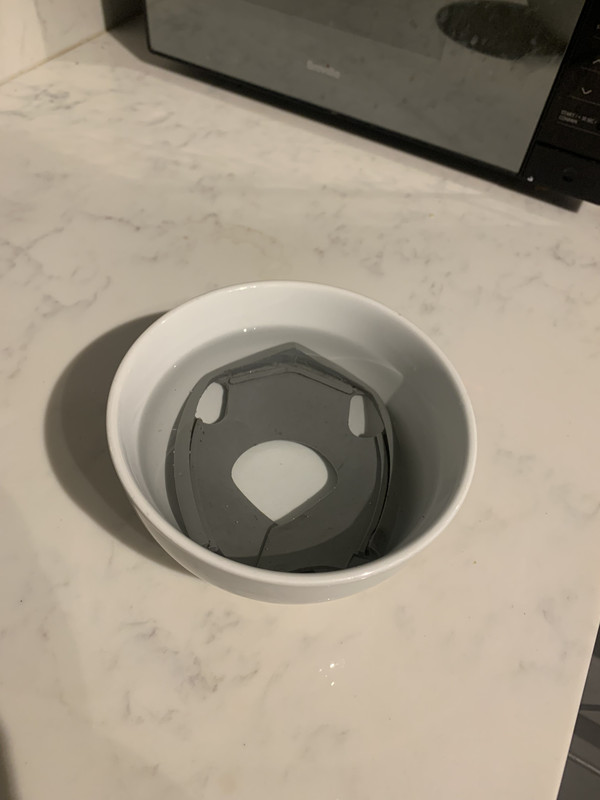
The rubber between the mudguard and horncasting benefits from warm water to make it more pliable. In this case I'm using an original Innocenti rubber... there was a trace of metallic blue paint on it which reminded me of a scooter I had a very long time ago... took me on a bit of a trip down memory lane when I saw it, if you know what I mean.
The two screws which hold the horncasting and mudguard together are too fiddly for words, so I use the 5mm x 20mm grub screws in this location. These will help guide the mudguard into place and also stop the rubber from falling out of line.

and because this is an awkward area to access I'll use the slightly longer nuts which are part of the floorboard set, these are much easier to grip
To hold the rubbers in place while fitting the mudguard I use double sided tape to hold them in place. Once the mudguard is fitted the rubbers are clamped in place but I just find this helps while offering them up. An aside - I got the tape originally from Dean, when the painter noticed this roll of tape in the back of my van he made a slightly off comment about 'panel beaters tape'. I'm wondering if this is an inter trade rivalry, or maybe the sort of comment band members make, which always makes the drummer the butt of the joke? Anyway it helps hold the stuff in place, and thank you Dean if you are reading this.
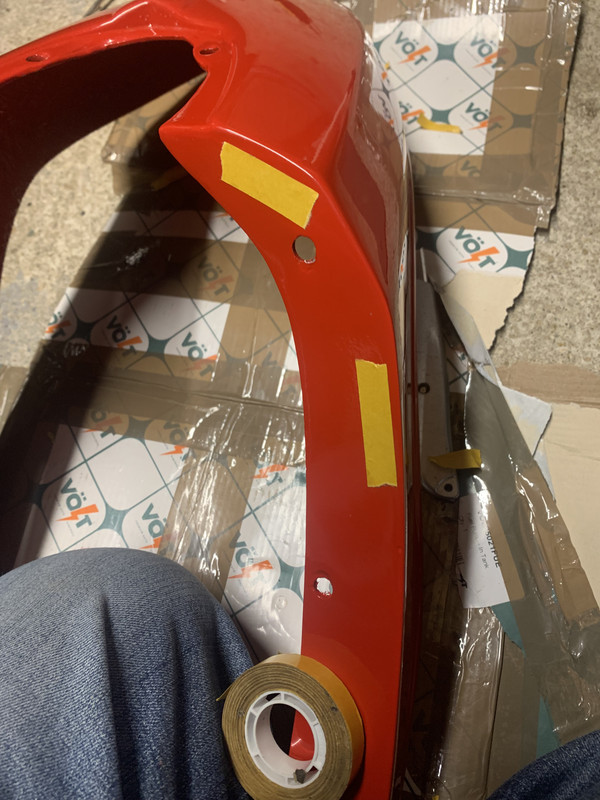
The mudguard is fibreglass, it came with the Sensi Seeds panels. As soon as I had it in my hands I thought it wasn't an original TV part, since you can feel the fibreglass strands. Original TV fibreglass mudguards (in my experience anyway) are very smooth on the underside, and they also have small triangular reinforcements around the middle which this doesn't have. As I type this I realise I'm broadcasting to a super-knowledgeable fanbase so please say if you know otherwise and I will edit these comments!
Anyway it is not a bad fit for probably aftermarket fibreglass. The mudguard gaskets are Casa, I do like their gaskets because they are slightly more pliable than most and this makes them easier to fit. I'd say that the MB gaskets are a shade lighter than the original and the Casa, but maybe I'm being picky. The overall effect is acceptable.
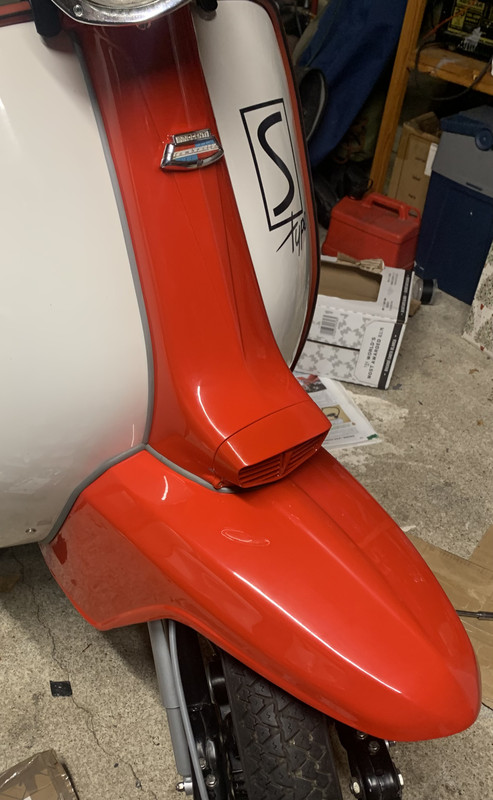
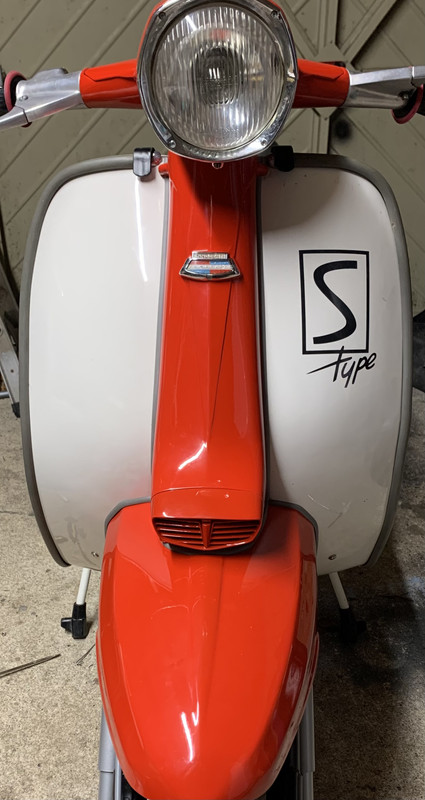
Badge bolted on and it's a wrap for today.

You will remember these leggies were not originally intended for this scooter. There's nothing about it which justifies the S Type badge so I will be removing the decal. The intention is to replace it with 'TV' decals in red with a black lining... don't want to upset anyone in the S Type community! The other thing about using these leggies is that the this is to all intents the dry build. I'll certainly be adjusting the panelwork to get finer tolerances at some point but for now I'm focussed on the dyno session Andy has booked.
- alex_hughes
- Posts: 93
- Joined: Mon Apr 24, 2017 8:42 am
Re: S3 TV175 build up
![]() by gizmo » Mon Jan 01, 2024 9:32 pm
by gizmo » Mon Jan 01, 2024 9:32 pm
- gizmo
- Posts: 634
- Joined: Sat May 31, 2014 6:43 pm
Re: S3 TV175 build up
![]() by alex_hughes » Wed Jan 03, 2024 11:19 pm
by alex_hughes » Wed Jan 03, 2024 11:19 pm
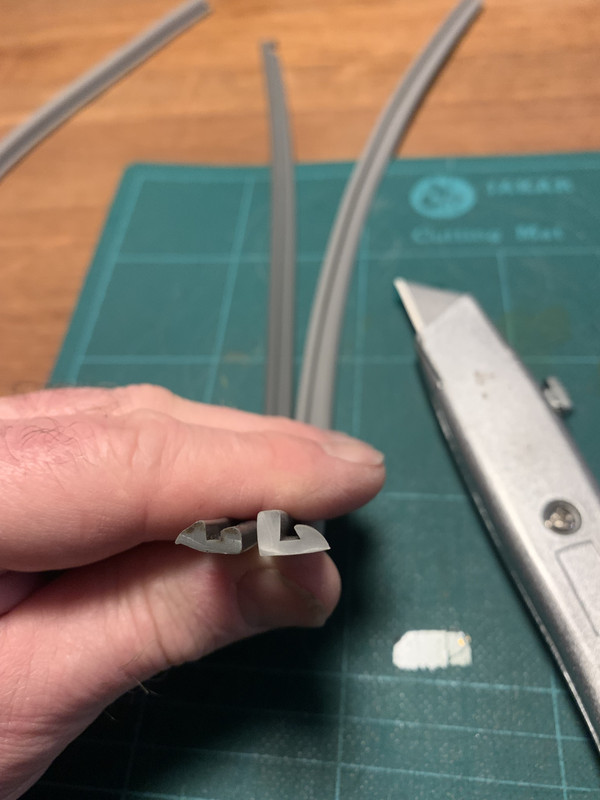
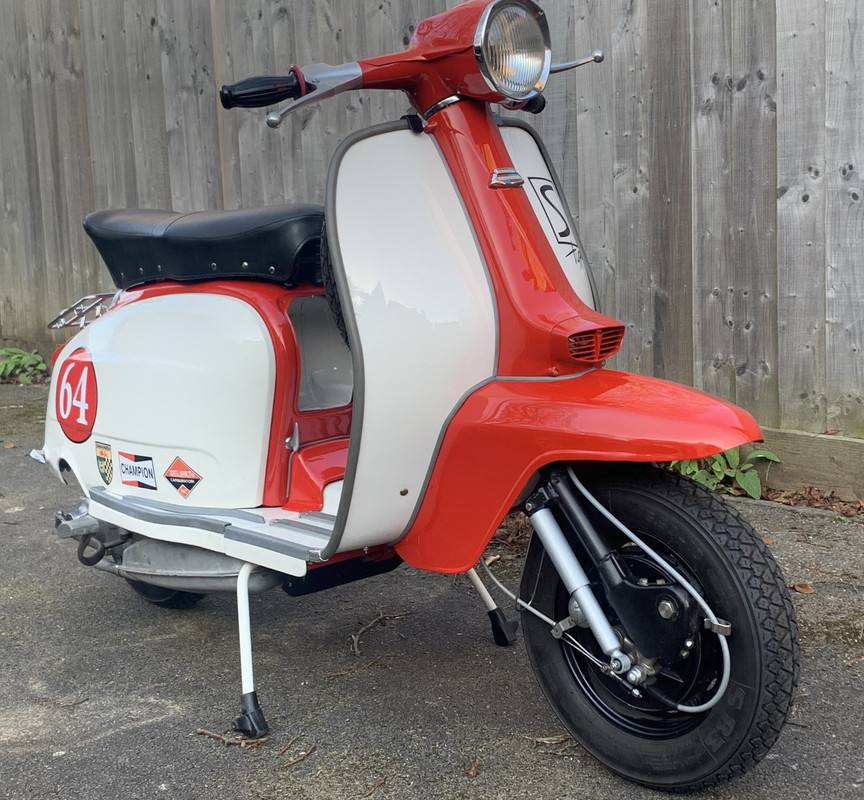
Grey legshield beading. Glad I’ve done this, looks much better. I tried to revitalise some old original beading but it looked awful… sometimes you’ve got to go repro.
Lots of fiddling around with not much to show, but spare wheel carrier is on.
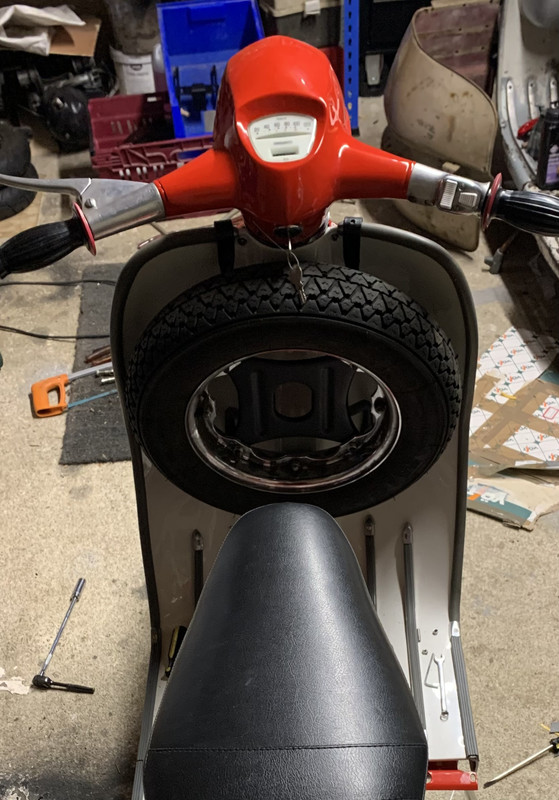
My garage needs a tidy before I do anything else.
- alex_hughes
- Posts: 93
- Joined: Mon Apr 24, 2017 8:42 am
Re: S3 TV175 build up
![]() by Rich Oswald » Thu Jan 04, 2024 12:10 pm
by Rich Oswald » Thu Jan 04, 2024 12:10 pm
Rich'
-
Rich Oswald - Posts: 8816
- Joined: Fri May 30, 2014 3:30 pm
- Location: Wiseman From The East (East Of The Pennines That Is)
Re: S3 TV175 build up
![]() by Solid Air » Thu Jan 04, 2024 12:31 pm
by Solid Air » Thu Jan 04, 2024 12:31 pm
-

Solid Air - Posts: 984
- Joined: Sun Jun 01, 2014 10:58 pm
- Location: Cambridge
Re: S3 TV175 build up
![]() by gaz_powell » Sat Jan 06, 2024 5:42 pm
by gaz_powell » Sat Jan 06, 2024 5:42 pm
gaz_powell wrote:alex_hughes wrote:Ah, working with SIL panels... always a challenge. I built an Indian GP200 up from a frame using SIL NOS and struggled with all of the panels, but a good tip I got from Jon at Urban Scooters in Birmingham helped me fit my side panels. He pointed out that a on a lot of SIL frames (including mine) the lip which holds the side panel on was too high and needed filing down for the panels to sit down far enough. Don't know if this will help on your frame but worth comparing to an Italian or Spanish frame if you can.
This lip here -
Anyway... back to me...
Thats an interesting point, will have a look at the coming weekend, thanks.
Fitting better after some work, panel beater going to shape them Monday and thats dry build finished - its been a challenge!
- gaz_powell
- Posts: 3094
- Joined: Sat May 31, 2014 7:56 pm
- Location: Hartlepool
Re: S3 TV175 build up
![]() by alex_hughes » Sat Jan 06, 2024 7:14 pm
by alex_hughes » Sat Jan 06, 2024 7:14 pm
Time has been against me over the past few days but I'm hoping to put a bit of effort into the build on Monday, I feel I'm not far off the road test.
I'm also making a list of stuff to go back to... I think the front brake cable is still longer than it needs to be, and you might recall the headlight is held at the top by a tie wrap. Now, I've done many thousands of miles on my GP with a tie wrap holding in the headlight but I have to say its not best practice, so an order was sent to Scooter Restorations for some bits and pieces. Their website led to some scooter archaeology...
One of the things I've had in my parts store for longer than I can remember is a headlight unit in cast aluminium (rather than the normal pressed steel) but I had no idea what it would fit - so it would be mad to get rid of it, right? Could turn out to be the Lambretta equivalent of the Holy Grail, for all we know. I like the idea of it because being aluminium you know rust isn't going to push the silvering off, but a standard clip doesn't fit and what is it for anyway? Here it is below, next to the more usual unit, for comparison.
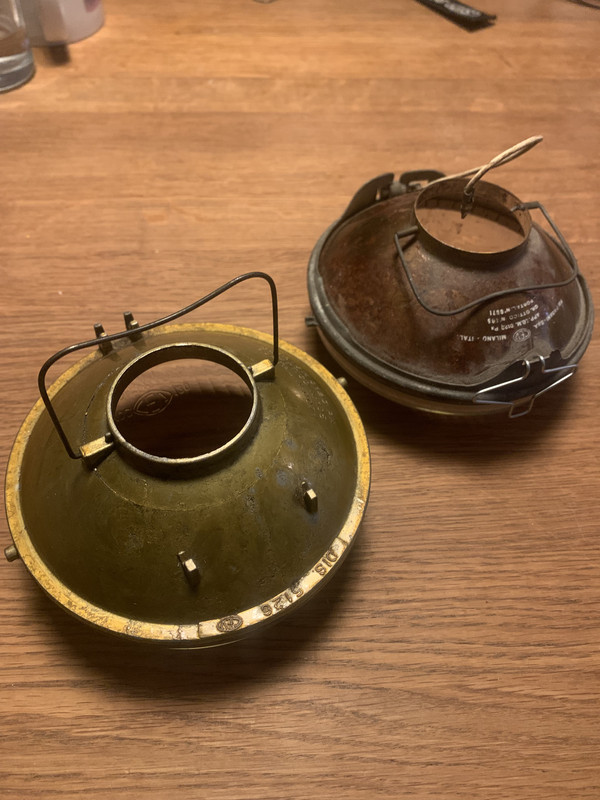
Well it turns out this headlight was used for the first year or so of S3 TV175 production. Big surprise but also a happy coincidence. Unfortunately, as you can see, the lugs for the spring are different and the tie wrap solution won't work. On the off- chance, whilst looking at the SR website, I searched all headlight clips - and lo and behold they have the special clips - NOS and they've been sitting on a dusty shelf for decades!
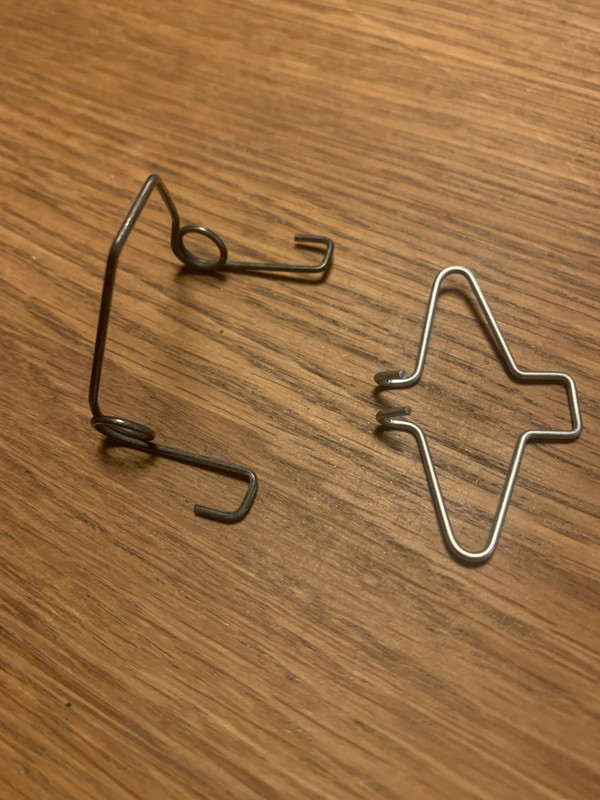
I shouldn't describe SR shelves as dusty. For all I know they might be as clean as an operating theatre. Sorry if you are reading this Mr B. Anyway here is what it looks like fitted...

Its a bit more complex than the later sort, isn't it? An elegant design and it works beautifully, but I guess the bean counters decided they could save a fraction of a Lira with a redesign. Anyway, it will go onto this scooter and the ali headlight will live again.
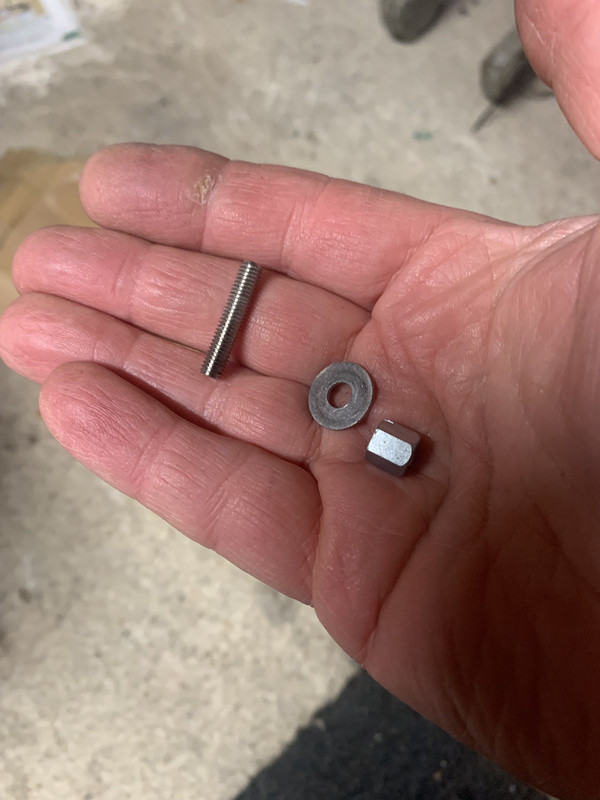
The other bit of archaeology is to do with the front brake cable. In the sixties manual of Performance Tuning and Conversions they describe how to use some quite odd parts to build an adjustable trunnion on the disc brake lever. With thanks to Bruce, here is a picture of one fitted...

it's the trunnion off an LD front brake and the cable adjuster off a J range.
A bit of poking about on the SR site and they have both!
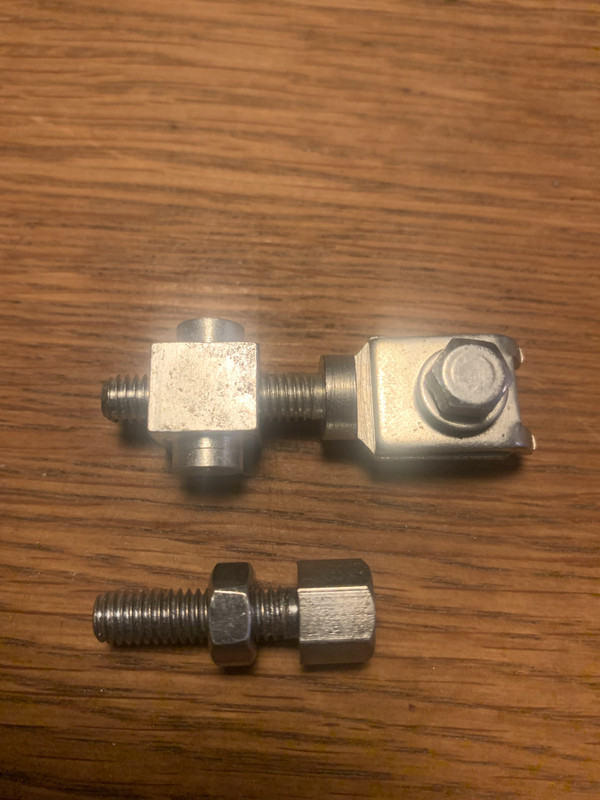
so when I shorten the cable I'll be using them like this.
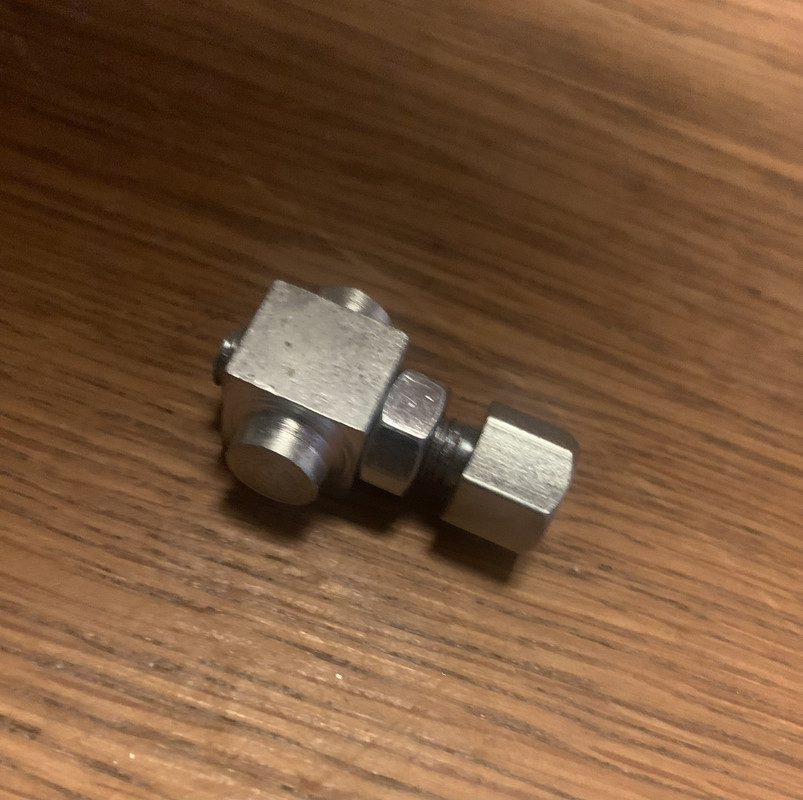
It's a nice touch and it builds in a bit of fine tuning on the cable length.
I'll be back on this on Monday. If it's too cold in the garage I'm going to bring the scooter into the house... Sharon will be at work, and what you don't know doesn't harm you (fingers crossed she never reads this, and anyway it can't be as bad as when she opened the dishwasher and there was an engine casing in there)
- alex_hughes
- Posts: 93
- Joined: Mon Apr 24, 2017 8:42 am
Re: S3 TV175 build up
![]() by gaz_powell » Sun Jan 07, 2024 11:29 am
by gaz_powell » Sun Jan 07, 2024 11:29 am
Build many bikes but everyday is a school day and seen sone great tips and alternative ways on this tread., that i will be using.
Ordered MB horncasting rubbers last night as "standard" always drive me nuts.
- gaz_powell
- Posts: 3094
- Joined: Sat May 31, 2014 7:56 pm
- Location: Hartlepool
Re: S3 TV175 build up
![]() by alex_hughes » Mon Jan 08, 2024 10:47 pm
by alex_hughes » Mon Jan 08, 2024 10:47 pm
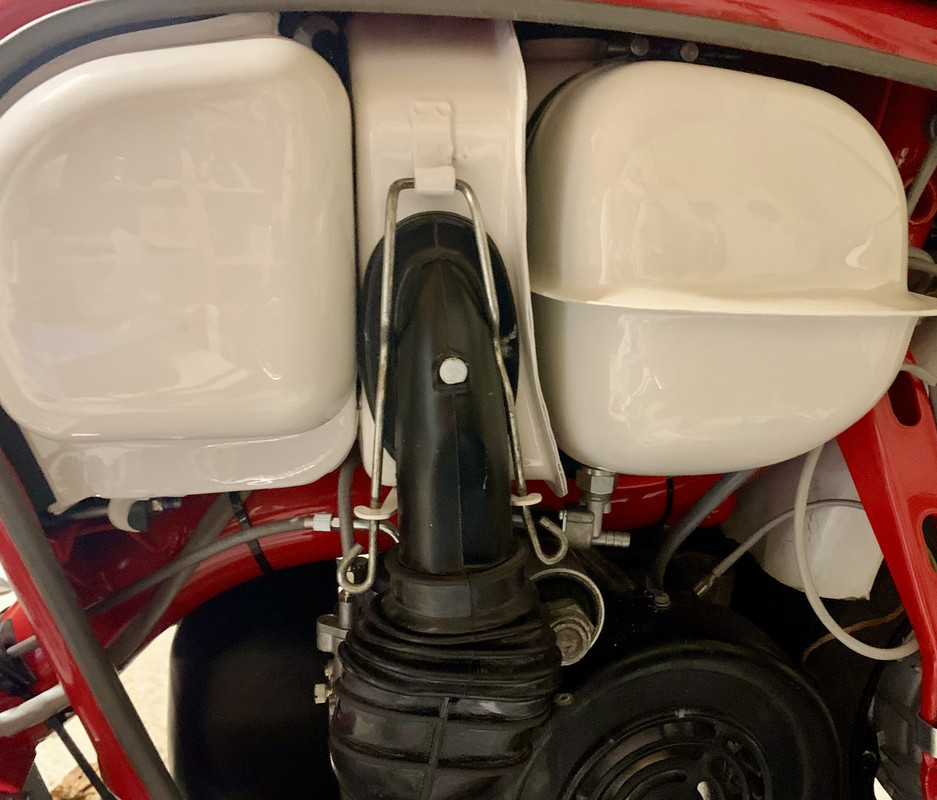
Previously I changed the manifold from MB to BGM because with the MB one the airbox didn’t line up very well with the carb. Even with the BGM version there’s still an element of misalignment - I’ve looked at photos of other installations and it doesn’t seem unusual.
The armadillo air hose is slightly collapsed to fit… will it flow the air? I’m wondering if I should dump the idea of the standard airbox and use a remote filter. Dyno will decide.
- alex_hughes
- Posts: 93
- Joined: Mon Apr 24, 2017 8:42 am
Re: S3 TV175 build up
![]() by dickie » Tue Jan 09, 2024 10:18 am
by dickie » Tue Jan 09, 2024 10:18 am
I love that aluminium reflector by the way.
- dickie
- Posts: 1758
- Joined: Thu Oct 02, 2014 12:32 pm
- Location: Tyne and Wear
Re: S3 TV175 build up
![]() by alex_hughes » Tue Jan 09, 2024 5:15 pm
by alex_hughes » Tue Jan 09, 2024 5:15 pm
- alex_hughes
- Posts: 93
- Joined: Mon Apr 24, 2017 8:42 am
Re: S3 TV175 build up
![]() by alex_hughes » Tue Jan 09, 2024 5:18 pm
by alex_hughes » Tue Jan 09, 2024 5:18 pm
- alex_hughes
- Posts: 93
- Joined: Mon Apr 24, 2017 8:42 am
Re: S3 TV175 build up
![]() by Knowledge » Tue Jan 09, 2024 9:34 pm
by Knowledge » Tue Jan 09, 2024 9:34 pm
dickie wrote:I've always believed it was the elbow from the airbox that becomes the limiting factor once you've gutted the airbox, scoop etc. It's a toughy isn't it? Somehow the airbox seems part of the character of a lambretta but is so limiting at the same time. Someone must have the skills to come up with a complete, scoop, airbox, filter, elbow and bellows solution. The market seems to want it.
I think BGM have come closest to your wish Dickie. They manufacture their own air boxes and supply a selection of rubbers for the elbow.
Did you read my recent Oily Rag article about putting one extra air hole in a (stripped-out) Innocenti air box? We found an extra 1.6bhp on the dyno.
-

Knowledge - Posts: 1957
- Joined: Sat May 31, 2014 11:42 am
- Location: Ipswich
Re: S3 TV175 build up
![]() by SlackerThePinstriper » Fri Jan 12, 2024 9:21 am
by SlackerThePinstriper » Fri Jan 12, 2024 9:21 am
I can make stuff look pretty though!!
My only negative is the black painted forks/rims etc
I also liked the red beading
-

SlackerThePinstriper - Posts: 839
- Joined: Thu Jan 05, 2017 4:32 pm
Re: S3 TV175 build up
![]() by alex_hughes » Sun Jan 14, 2024 5:23 pm
by alex_hughes » Sun Jan 14, 2024 5:23 pm
A few small jobs are outstanding but not things which prevent a road test... here's a photo snatched during the maiden voyage this afternoon .
It looks like the skyline is on fire but it's actually the sun setting behind The Ridgeway.
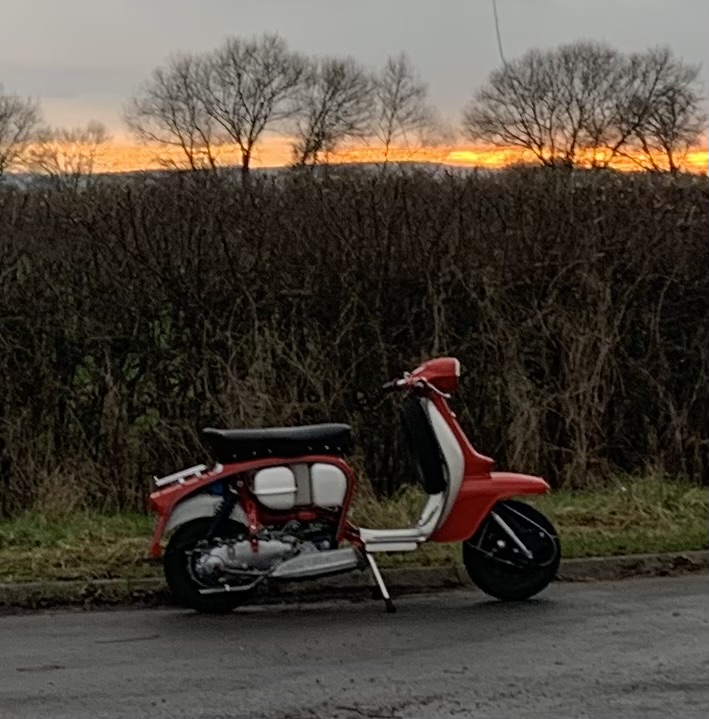
I probably won't be posting much on this thread now until after it's visit to the Diablo dyno in April. See you then.
- alex_hughes
- Posts: 93
- Joined: Mon Apr 24, 2017 8:42 am
Re: S3 TV175 build up
![]() by gaz_powell » Sat Feb 17, 2024 9:15 pm
by gaz_powell » Sat Feb 17, 2024 9:15 pm
alex_hughes wrote:^
The other bit of archaeology is to do with the front brake cable. In the sixties manual of Performance Tuning and Conversions they describe how to use some quite odd parts to build an adjustable trunnion on the disc brake lever. With thanks to Bruce, here is a picture of one fitted...
it's the trunnion off an LD front brake and the cable adjuster off a J range.
A bit of poking about on the SR site and they have both!
so when I shorten the cable I'll be using them like this.
It's a nice touch and it builds in a bit of fine tuning on the cable length.
My frame went to powder coaters today and other parts heading to painters next week, so i started looking at my boxes of purchased parts. I had already bought a reverse pull kit, looking at the parts, it comes with a 7mm adjuster to sit in the barrel, however the barrel is not threaded. The supplier has stated that the tension of the cable is sufficient. I wasnt happy so have threaded the barrel.
- gaz_powell
- Posts: 3094
- Joined: Sat May 31, 2014 7:56 pm
- Location: Hartlepool
Who is online
Users browsing this forum: No registered users and 57 guests