LCGB Forums

The ability to post messages is restricted to LCGB members. Any questions contact us at lcgbadmin@googlemail.com

Series 2 survivor

LAMBRETTA ONLY PLEASE
Show your Lambretta off to us all with pictures of your pride and joy.

Re: Series 2 survivor

Postby dickie » Sat Jul 06, 2024 1:11 pm

Just thinking about storkfoot's recent rusty tank problems. I just wiped my finger in the top of the tank. Not good.
Image
Not sure what to do about this, but I'm not just leaving it. Maybe try white vinegar like nobby did in his very entertaining video?
dickie
 
Posts: 1865
Joined: Thu Oct 02, 2014 12:32 pm
Location: Tyne and Wear

Re: Series 2 survivor

Postby dickie » Sat Jul 06, 2024 1:28 pm

This is a brand new fuel tap that I just installed. You'll notice I swapped the insert for a metal one and used the original nut.

But the main thing is the rust!
Image

Also, look at this!
Image

No, this isn't my y fronts after a night of lager and curry. It's a white tee shirt that I filtered the fuel out of the tank through.
dickie
 
Posts: 1865
Joined: Thu Oct 02, 2014 12:32 pm
Location: Tyne and Wear

Re: Series 2 survivor

Postby Storkfoot » Sat Jul 06, 2024 2:35 pm

From my experience, definitely don’t leave that. I cleaned the whole tank again but upside down to make sure the area at the top of the tank was cleaned. First caustic soda for a couple of days, then spirit of salts and finished off with a rinsing of rust remover.
User avatar
Storkfoot
 
Posts: 2395
Joined: Fri May 30, 2014 8:59 pm
Location: Merseyside

Re: Series 2 survivor

Postby dickie » Thu Jul 11, 2024 11:51 am

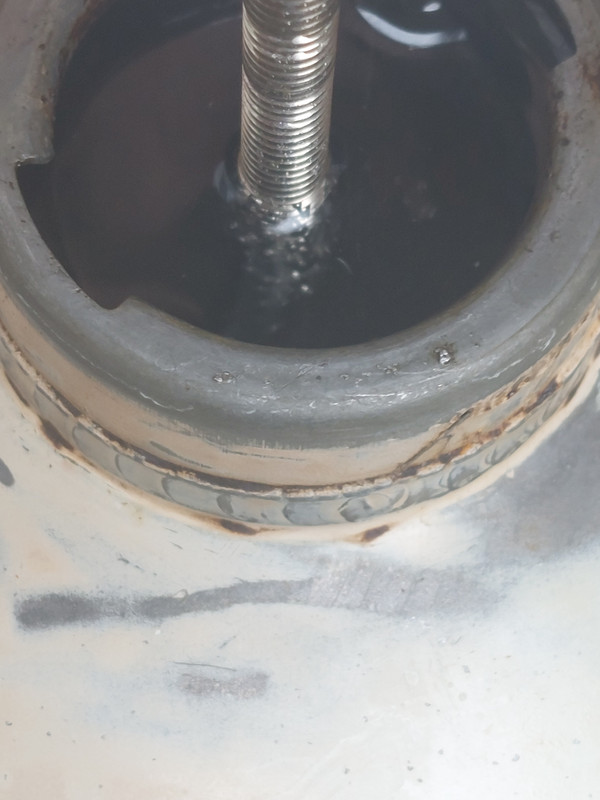
while I'm sure that Nobby's white vinegar or Storkfoot's chemical process are perfectly good techniques for tank rust removal, I have chosen to try electrolysis, partly because I suspect it will be more thorough, but mostly just because I think it's an interesting thing to try.

First I cleaned out the tank with hot soapy water, as oil is a good insulator, so may affect the process.

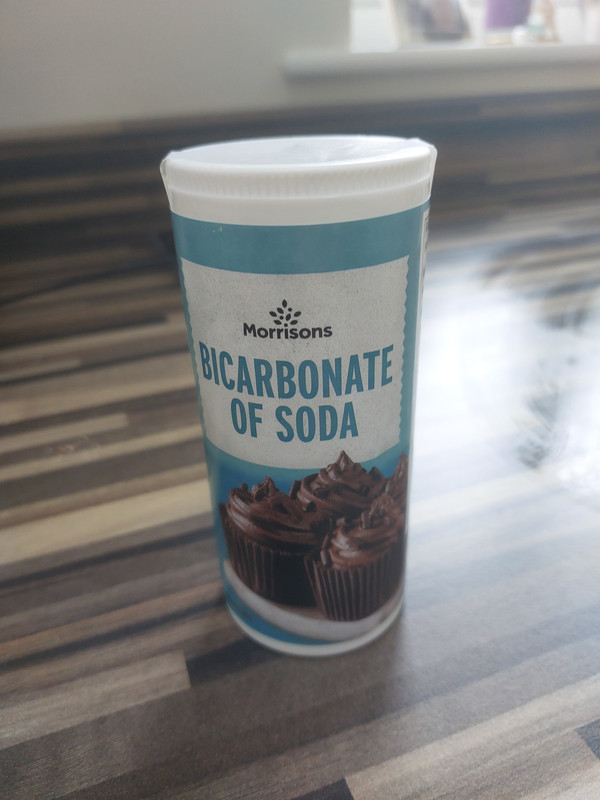
Then Mixed a solution with about 100g of bicarbonate of soda and hot water, making sure that all crystals were dissolved before pouring into the tank.
Image

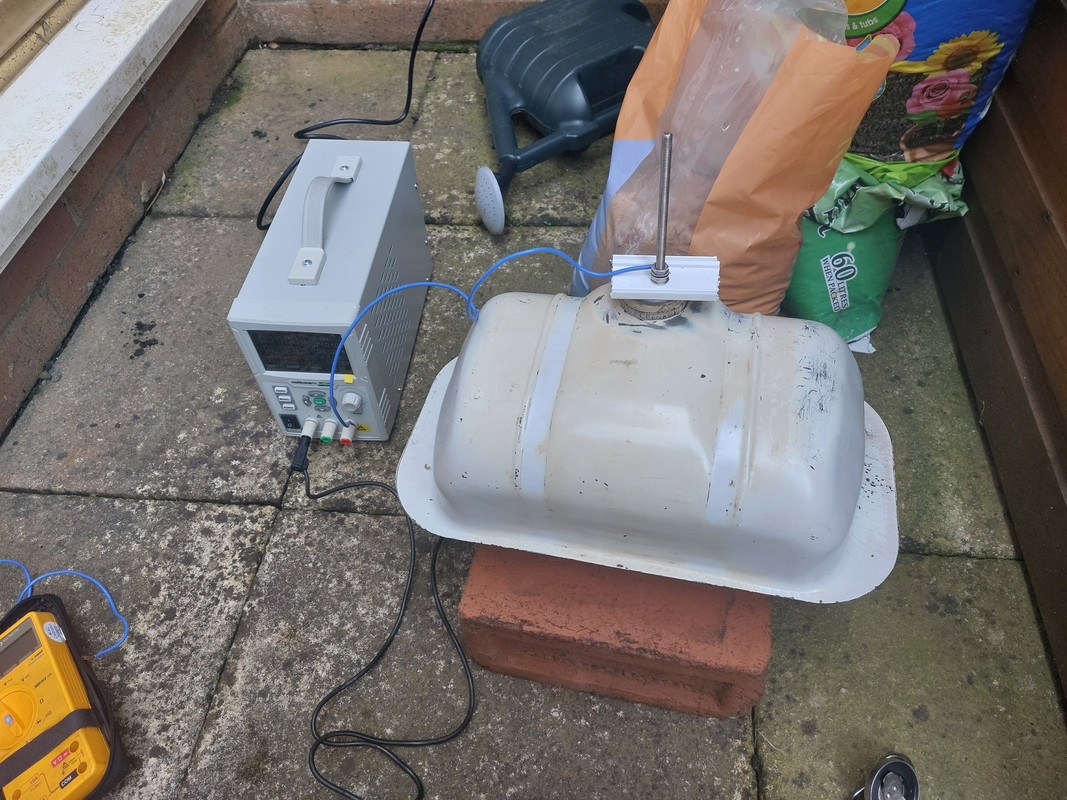
I made an anode by drilling a piece of plastic and fixing some stainless m6 studding into it, as long as possible WITHOUT touching the bottom of the tank.
Image
The tank was full to the brim to make sure I cleaned the top surface.
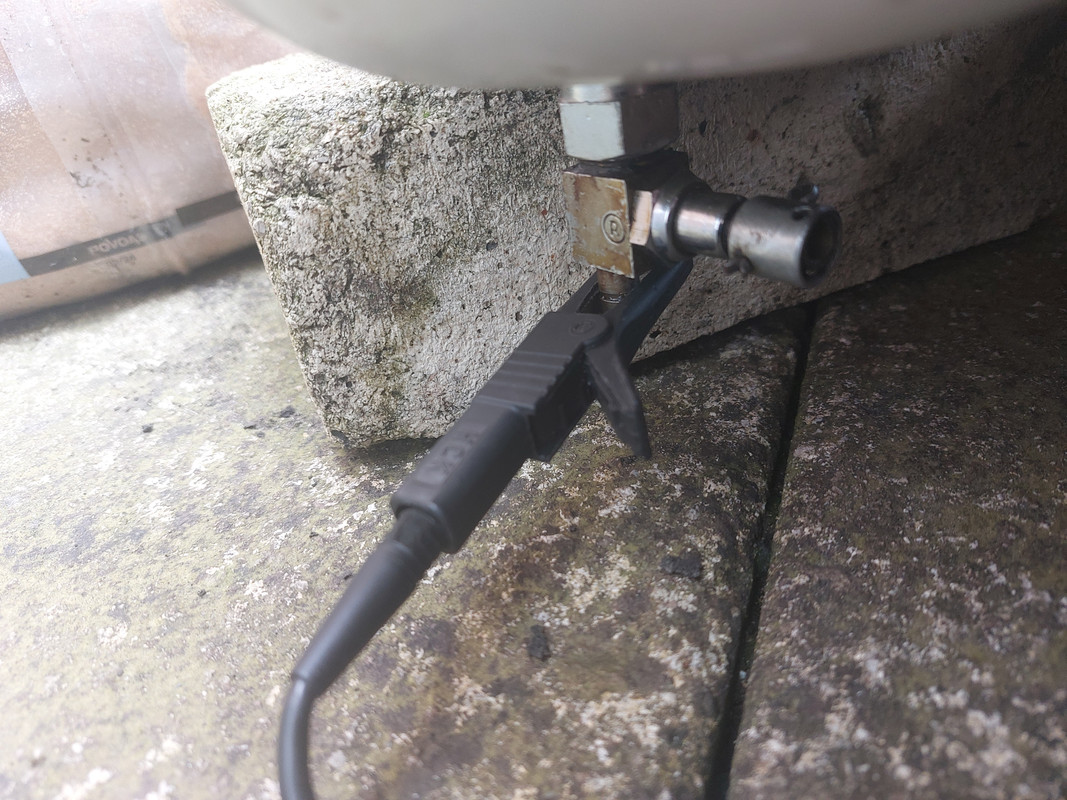
The tank is the cathode.
So I connected the red, positive lead of my power supply to the anode, and the black negative to the cathode.
Image

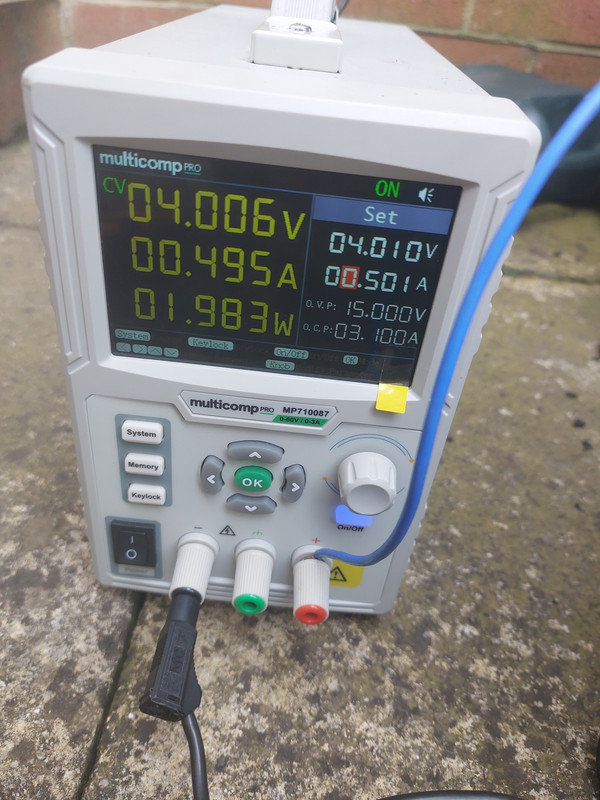
I set the power supply up to only deliver 500mA, just out of a slightly cautious nature, but i think I'll wind it up to 2A, just to hurry the process along.
Image

Here you can just make out the bubbles. these are hydrogen so you need to do this is in a well ventilated area to avoid blowing shit up.
Image

Let's see how it works out?
dickie
 
Posts: 1865
Joined: Thu Oct 02, 2014 12:32 pm
Location: Tyne and Wear

Re: Series 2 survivor

Postby dickie » Thu Jul 11, 2024 12:02 pm

I just whacked it up to about 3A and it's bubbling away much faster now.
Image
dickie
 
Posts: 1865
Joined: Thu Oct 02, 2014 12:32 pm
Location: Tyne and Wear

Re: Series 2 survivor

Postby Warkton Tornado No.1 » Thu Jul 11, 2024 11:06 pm

Hey Dickie.

Thank you for outlining how any of us could go about using the process of electrolysis to remove rust. I suppose the main issue for most of us would be the provision of a stable electrical supply....

However, the anode material choice surprised me. I don't know why I anticipated it would be copper. That said, there are several types of stainless: austenitic etc. Is the grade important?
Warkton Tornado No.1
 
Posts: 2247
Joined: Sun Jan 11, 2015 1:27 pm

Re: Series 2 survivor

Postby dickie » Fri Jul 12, 2024 3:05 am

Mark, to be honest, I'm not an expert in this, I just followed someone else's advice. As normal, I checked a few other sources before I believed it (too much BS on Google).

This seemed to be the best set out advice, so I just went along with it. I particularly like that there is a "tool preservation society "

https://htpaa.org.au/resources/rust-removal#:~:text=The%20electrolytic%20method%20involves%20immersing,electrode%20dipping%20into%20the%20solution.

The stainless I used was A4, approximately the same as 316 so austenitic. I used because I had it, no other reason.

I'm also half-considering trying to zinc plate the inside of the tank, but there is wildly conflicting advice about the wisdom or otherwise of doing this.

Yes, I realise not many people have access to a power supply like that, but they're relatively cheap; £30ish quid I think. But an old type battery charger would work just as well, as long as it''s able to deliver 1 or 2 amps, it'll work fine. The stability of the current isn't that important actually, it just means when the current is higher, it's working faster.
dickie
 
Posts: 1865
Joined: Thu Oct 02, 2014 12:32 pm
Location: Tyne and Wear

Re: Series 2 survivor

Postby dickie » Tue Jul 16, 2024 8:05 pm

So I left the tank under electrolysis for about 24 hours. I emptied the bicarbonate solution out and it was orange. Not a deep orange, but orange. I had bought some 40% white vinegar, which I emptied into the tank and had to add about 3litres of water for a full tank coverage, making it about 25%. Again, I left overnight then emptied and flushed with water. I was still not convinced so I sloshed premix around and filtered through an old white tee shirt about a dozen times before I was convinced that it was clean. Some job, but I'm happy now. I wish I'd done the sloshing and filtering outside as I ended up with a thumping headache. :lol:
dickie
 
Posts: 1865
Joined: Thu Oct 02, 2014 12:32 pm
Location: Tyne and Wear

Re: Series 2 survivor

Postby dickie » Tue Jul 16, 2024 8:39 pm

Next on the list of jobs was to check my junction box which is actually an old rectifier housing with the rectifier removed and a capacitor added to stabilise the DC voltage.

A mate had a tv200 built by someone who coincidentally used the same rectifier housing but purely as a junction box. The first time my mate rode it, he smelt burning after just a minute or two of pottering about his estate; the burning was at the junction box. I investigated for him and found it was high resistance between 2 terminals.

Anyway as a precaution, I checked mine.
This should be about 0.5ohms, which is just my meter leads resistance.
Image

So I drilled the rivets out
Image
And added a blob of solder after cleaning up the brass pads
Image

Jobs a good un.
Image
I need some m3x25 screws to put the box back together, but that's nowt.
dickie
 
Posts: 1865
Joined: Thu Oct 02, 2014 12:32 pm
Location: Tyne and Wear

Re: Series 2 survivor

Postby dickie » Tue Jun 03, 2025 5:52 am

Got back into this after a little inspiration from attending Carlisle and Kelso; that's 2 years' worth of rallies in 2 weeks for me!

When I went to finish off the wiring, one of the female connectors in the junction box I'd just fettled snapped as soon as I put a connector in.

The following photos show how you can easily repair one and keep original looks.

Also, as I've said earlier, my mate's TV200 nearly went up in flames through a high resistance in one of these.

Image

Image
Bullet crimp flattened out.

Image
Edges trimmed

Image
Old one cut away and bent up

Image
Trimmed new one soldered in place

Image
Bob's yer uncle.
dickie
 
Posts: 1865
Joined: Thu Oct 02, 2014 12:32 pm
Location: Tyne and Wear

Re: Series 2 survivor

Postby Storkfoot » Tue Jun 03, 2025 8:32 am

Very resourceful :)

Are you using the original loom?
User avatar
Storkfoot
 
Posts: 2395
Joined: Fri May 30, 2014 8:59 pm
Location: Merseyside

Re: Series 2 survivor

Postby dickie » Tue Jun 03, 2025 10:01 am

Storkfoot wrote:Very resourceful :)

Are you using the original loom?

Yes, I'm keeping as much as I can original. There's no reason why a loom will fail other than at the connections. I've flowed solder into some of the original bullet crimps and i always apply grease when I connect them. Due to going full DC, there are a few mods, but I've done my best to hide them.

The cable outers are original too. I tried to use the original inners by taking them out and cleaning them, but they weren't good enough. Once i replaced the inners, all actions were unsurprisingly much nicer. The throttle cable was a little tricky, but a barrel adjuster for a classic bike plus about 100mm of offcut new outer means it works with a 25phbl.
dickie
 
Posts: 1865
Joined: Thu Oct 02, 2014 12:32 pm
Location: Tyne and Wear

Re: Series 2 survivor

Postby Storkfoot » Wed Jun 04, 2025 4:07 pm

dickie wrote:
Storkfoot wrote:Very resourceful :)

Are you using the original loom?

Yes, I'm keeping as much as I can original. There's no reason why a loom will fail other than at the connections. I've flowed solder into some of the original bullet crimps and i always apply grease when I connect them. Due to going full DC, there are a few mods, but I've done my best to hide them.

The cable outers are original too. I tried to use the original inners by taking them out and cleaning them, but they weren't good enough. Once i replaced the inners, all actions were unsurprisingly much nicer. The throttle cable was a little tricky, but a barrel adjuster for a classic bike plus about 100mm of offcut new outer means it works with a 25phbl.


I re used the loom on a ‘62 TV175 as both the sheathing and connectors were as good as new. That TV was an Italian import which looked like it had endured a hard life. Using that loom was the exception though. In most cases, I have replaced the loom and ignition switch as I have always feared they may let me down at some point.

I do like to reuse old parts if possible. Came inners though :o
User avatar
Storkfoot
 
Posts: 2395
Joined: Fri May 30, 2014 8:59 pm
Location: Merseyside

Re: Series 2 survivor

Postby gaz_powell » Thu Jun 05, 2025 9:44 pm

Tank cleaner... To add my pennys worth... I use sorbic acid then white vinegar, flush, dry as best as can with towels and a hair drier then a 2 stroke lining
gaz_powell
 
Posts: 3378
Joined: Sat May 31, 2014 7:56 pm
Location: Hartlepool

Re: Series 2 survivor

Postby dickie » Mon Jul 14, 2025 10:17 am

Rich Oswald wrote:
dickie wrote:
Rich Oswald wrote:No teaching you to suck eggs Dickie, but did you look under the fuel cap handle, in the centre, for the breather hole? Sorry if that is obvious.

Rich'


I take no advice as insulting; nobody knows everything even if they think they do. But yes, I did check and was surprised to see it didn't have one. As I type this, I'm wondering what even made me look in the first place!


What prompted me to ask this was, I restored S1 quite a few years ago now and it would only run for a few minutes before cutting out. Found out that it was the original fuel cap with no breather hole. A new cap cured it.

Rich'


I started this last week as I'm determined to take it to Ripon. Satrted after 4 or 5 kicks, so I was dead happy in the way you always are when a new build starts. I strobed the timing and each time I did, it was harder to start until it wouldn't start at all. A lot of head scratching, swearing etc followed by a few pints and bed. Always best to walk away when you're getting nowhere.

Then I remembered this fuel cap discussion. Went into the garage in the morning, undid the fuel cap and heard a whoosh as it sucked air into the tank. The rubber is being squashed onto the breather hole that I drilled; try agian.

Had a quick ride up and down the street which revealed a couple of minor things, so I'm confident that it will eventually be on the road for Ripon.
dickie
 
Posts: 1865
Joined: Thu Oct 02, 2014 12:32 pm
Location: Tyne and Wear

Re: Series 2 survivor

Postby coaster » Mon Jul 14, 2025 1:31 pm

I had a severely corroded Diablo tank (bought 2nd hand off here I think) which I filled with caustic soda and left over night to get rid of 2 stroke oil residue. Then I flushed it and filled with brick cleaner and left overnight. When completely dry I treated it to an application of POR15 and its been fine ever since 8-)
User avatar
coaster
 
Posts: 2694
Joined: Fri May 30, 2014 1:00 pm
Location: Norfolk, Flying 8 Balls

Previous

Return to Show Your Ride

Who is online

Users browsing this forum: No registered users and 2 guests